
User's Manual

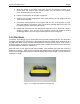

Table Of Contents
- 1 General Overview
- 2 Noggin Components
- 3 Noggin 100 Assembly
- 4 SmartCart Assembly
- 5 SmartTow Assembly
- 6 SmartHandle Assembly (Noggin 500 & 1000 only)
- 7 Rock Noggin Assembly (Noggin 500 & 1000 only)
- 8 Connecting GPS
- 9 Digital Video Logger (DVL)
- 10 Powering Up the System
- 11 Locate & Mark Mode
- 12 Survey & Map Mode
- 12.1 Survey & Map Menu
- 12.2 Data Acquisition
- 12.2.1 Replaying or Overwriting Data
- 12.2.2 Screen Overview
- 12.2.3 Position Information
- 12.2.4 Data Display
- 12.2.5 Section C - Menu
- 12.2.6 Gain
- 12.2.7 Collecting Data using the Odometer
- 12.2.8 Collecting Data in Free Run Mode
- 12.2.9 Collecting Data using the Trigger (or B) Button
- 12.2.10 Noggin Data Screens
- 12.2.11 Calib. (Calibration) Menu
- 12.2.12 Error Messages
- 12.3 Noggin Setup
- 12.4 Noggin File Management
- 12.5 Noggin Utilities
- 13 Troubleshooting
- 14 Care and Maintenance
- Appendix A Noggin Data file Format
- Appendix B Health & Safety Certification
- Appendix C GPR Emissions, Interference and Regulations
- Appendix D Instrument Interference
- Appendix E Safety Around Explosive Devices
- Appendix F Using the PXFER Cable and WinPXFER Software
- F1 Transferring Data to a PC using the PXFER Cable
- F1.1 Connecting the Digital Video Logger to a PC
- F1.2 PXFER Cable Types
- F1.3 Installing and Running the WinPXFER Program
- F1.4 Setting the DVL to the PXFER Cable Type
- F1.5 Transferring Noggin Data Buffer Files
- F1.6 Exporting Nogginplus Data
- F2 Transferring One or More Noggin PCX Files to an External PC using WinPXFER
- Appendix G GPR Glossaries

Noggin 12-Survey & Map Mode
111
Odometer calibration values for the SmartHandle odometer should be around 1530.
Odometer calibration values for the Vehicle odometer vary but may be around 50.
12.5.3 Upgrade
Upgrade requires the use of the optional PXFER cable so this menu is not required for users
who upgrade their DVL firmware using a removable compact flash drive.
The menu allows the user to enter Upgrade mode to update the firmware on the DVL. Selecting
Upgrade puts the DVL into listen mode to allow a software upgrade to be transferred from an
external PC to the DVL using the PXFER and WinPXFER cable. Avoid pressing this button until
the instructions in a software upgrade tell you to. Once pressed, the DVL must have the power
disconnected to exit from this menu item.
12.5.4 System Information
This option can be used to list system information that may be useful to troubleshoot a problem
with the Noggin. The information is intended for the use of Sensors & Software staff to assist in
solving a problem with the Noggin system.
System information can be listed to the screen, printed directly to an attached printer or
transferred to a PC.
To print the information to a printer, attach the printer to the parallel port of the DVL and then
press the B button.
To transfer the information file to a PC, attach the parallel XFER cable from the parallel port of the
PC to the parallel port of the DVL. Then run the WinPXFER program on the PC (see Section
12.4.1: p.108) and press the 1 button.
Sensors & Software technical staff may request that this information be sent to them. A printed
copy of the information can be faxed to Sensors & Software Inc. If the data is transferred to a
PC, the data file can be e-mailed to Sensors & Software Inc.
12.5.5 DVL Recording Space
This option shows, based on the current data collection settings, the total number of traces that
can be collected before the DVL memory is full. It also lists, based on the current Station Interval,
the total distance of data that can be collected before the DVL memory is full.
12.5.6 Transfer Mode
Transfer Mode requires the use of the optional PXFER cable so this menu is not required for
users transferring Noggin data using the removable compact flash drive. This menu allows the
user to set the transfer mode to Normal or Turbo depending on what type of PXFER cable they
have (see Appendix F).