
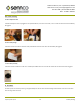
User's Manual

Prepared by KM 11/2015 12 Patent pending
14407 Coil Plus Dr, Unit A | Plaineld, IL 60544
www.sennco.com | techsupport@sennco.com
815.577.3400 | Toll free 866.736.6261
Mon - Fri 9AM - 5PM CST
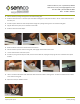
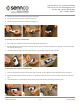
1. Plug the barrel plug end of the AC power cable into the AC power port on the main alarm.
2. Plug the other end of the cable into an outlet that has AC power available.
3. Place the main alarm in a secure locaon within 50 feet of the bubble makers with the antenna posioned vercally 90°. It should be at least
2 feet away from the nearest sensor head.
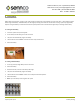
B. Main alarm
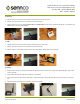
C. Snier
1. Plug the barrel plug end of the AC power cable into the AC power port on the snier.
2. Plug the other end of the cable into an outlet that has AC power available.
3. Place the snier in a secure locaon within 50 feet of the system with the antenna posioned vercally 90°.
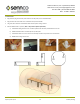
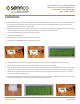
D. Gateway
1. Screw the taller antenna into the le posion labeled WLAN and the shorter antenna into the right posion labeled 3G/GPRS. Posion both
antennas vercally.
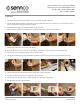
2. Plug the USBA cable from the snier into the USB port on the gateway.
3. Connect the two parts of the AC power cable together. Plug the barrel plug end of the AC power cable into the AC power port on the gate-
way.
4. Plug the other end of the cable into an outlet that has AC power available.