
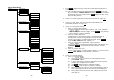
User's Manual

~
51
~
b. Press “2” to Group Select: see Handset Group Subscription on page
35 .
c. Press “3” to set Call Barring: see Call Barring operation on Page 40.
d. Press “4” to set Feature Call: see Feature Call operation on Page 41.
6. Press “5” to set Phone Settings:
a. Press “1” to set PA On/Off
Use CHANGE (Left) soft key to select and confirm on or off.
Re: When set “off”, the handset will not receive
broadcast from other handsets or base. The
LCD will display a PA off icon to prompt.
b. Press “2” to set Any Key TALK:
Use CHANGE (Left) soft key to select and confirm on or off.
Re: a. When set “on”, press any key (except ) to answer the
incoming call.
b. When set “on”, the handset will automatically answer the call
while lift the handset from cradle.
c. Press “3” to set LCD Contrast:
(1)
Use or to scroll through option 1~8. Default is 4.
(2)
Press SAVE (Left) soft key to confirm selection.
d. Press “4” to set LCD Backlight:
(1)
Use or to scroll through option 1~3 (1.8 seconds
2.On 3.Off ). Default is “8 seconds”.
(2)
Press SAVE (Left) soft key to confirm selection.
e. Press “5” to set Name Tag:
(1)
Use or to scroll through option on or off. Default is
“Off”.
(2)
Press SAVE (Left) soft key to confirm selection.
Re: When Set “on”, if matching the caller ID with the phone book
entries; once matched, the LCD screen will display the name or
nickname instead of pure caller ID info (needs Call Waiting with
Caller ID service from local telephone company)
f. Press “6” to set Language:
(1)
Use or to scroll through option 1~3 (1.English
2.Spanish 3.French ). Default is “English”.
(2)
Press SAVE (Left) soft key to confirm selection.
g. Press “7” to set Custom Name:
(1)
Enter characters using the Character Table and method
discussed in the Phonebook section.
(2)
Use or to move the cursor backward or forward to
insert (to the left of the cursor) or delete (the character above the
~
52
~
cursor, or left of the cursor if cursor is on the right of the last
character).
(3)
Press SAVE (Left) soft key to confirm setting.
Re:
Once entering the custom name, the greeting of LCD in standby
mode will be changed as the entering.
h. Press “8” to Change Password:
(1)
Enter original password (4 digits) when enter this menu.
(2)
Enter new password then press SAVE (Left) soft key to confirm
new password.
7. Press “6” to set Base Settings:
When enter this menu, you must enter PIN code first (4 digits).
Re: The PIN code is for Base Settings.
a. Press “1” to set DTMF Duration.
(1)
Enter the DTMF duration (90~200ms), press OK (Left) soft key to
confirm the setting. Default is 100ms.
Re: Please check with your dealer before you change it. If the duration
not match with PSTN or PBX setting, it may operate faultily.
b. Press “2” select flash key timing. Default is 600ms.
(1)
Use or to scroll through option 1~9 (100~900ms).
(2)
Press SELECT (Left) soft key to confirm selection.
Re: The default value (600 ms) works in most areas. Changing this
setting may cause Flash key not working. Change only when you
are certain of the new value would work.
c.
Press “3” to set Assign Next HS
(1)
Enter 2-digit handset ID followed by pressing OK (Left) soft key.
(2)
When register a new handset, the base will assign the specific
handset ID which assigned in advance to the new handset.
d.
Press “4” to set Clear HS
(1)
Enter 2-digit handset ID followed by pressing OK (Left) soft key.
(2)
The base will erase the handset ID from system.
e.
Press “5” to Change PIN:
(1)
Enter the new PIN followed by OK (Left) soft key.
Re: Default PIN is “0000”.
f.
Press “6” to set Auto Hang Up:
(1)
Use CHANGE (Left) soft key to select and confirm on or off. The
Default PIN is “0000”.
Re: When setting “on”, the FreeStyl 1 will automatically hang up if the
far end caller hung up already. However, this function depends on
if there is “Line Reversal” signal sent out by PBX or PSTN, after
the call hung up.
g.
Press “7” to Set Time to support DTMF Caller ID:
(1)
Use CHANGE (Left) soft key to select and confirm on or off. The