
User Manual


Multi-Function Gigabit Wireless-N Client Bridge
Version 1.0
9
2 Understanding the Hardware
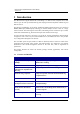
2.1 Hardware Installation
1. Place the unit in an appropriate location and screw device with mounting kit.
2. Plug one end of the Ethernet cable into the LAN port of the device and another end into your
PC/Notebook.
3. Plug one end of another Ethernet cable to WAN port of the device and the other end into you
cable/DSL modem (Internet)
4. Insert the DC-inlet of the power adapter into the port labeled “DC-IN” and the other end into
the power socket on the wall.
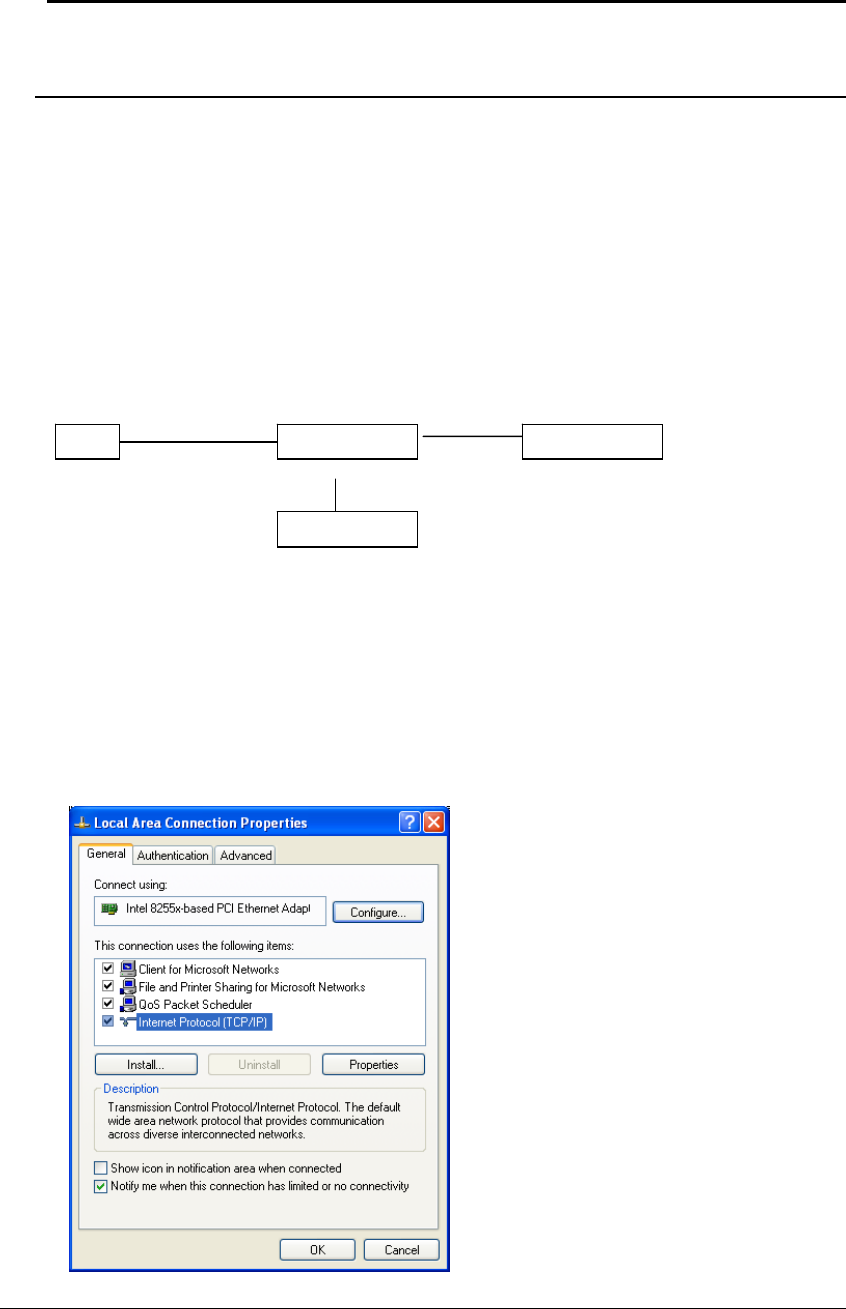
This diagram depicts the hardware configuration
2.2 IP Address Configuration
This device can be configured as a Bridge/Router or Access Point. The default IP address of the
device is 192.168.1.2 (In Client Bridge Mode as default)In order to log into this device, you must
first configure the TCP/IP settings of your PC/Notebook.
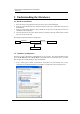
1. In the control panel, double click Network Connections and then double click on the
connection of your Network Interface Card (NIC). You will then see the following screen.
UnitPoE In
j
ectorPC
Power Outlet
Ethernet Ethernet
AC/DC cable