
User's Manual
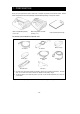
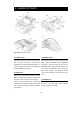

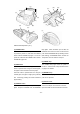
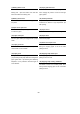


Table Of Contents
- COVER
- COPYRIGHT
- INTRODUCTION
- SAFETY PRECAUTIONS
- OPERATING PRECAUTIONS
- 1. PREPARATION
- 2. NAMES OF PARTS
- 3. POWER CONNECTING
- 4. PAPER SETUP
- 5. ATTACHING AND DETACHING THE BELT CLIP AND STRAP
- 6. TEST PRINTING
- 7. FUNCTION SETTINGS
- 8. CONNECTING TO THE HOST COMPUTER
- 9. CHARGING THE BATTERY PACK
- 10. THERMAL HEAD/PLATEN ROLLER MAINTENANCE
- 11. TROUBLESHOOTING
- 12. SPECIFICATIONS
- 13. OPTIONAL UNITS AND CONSUMABLES
- REAR COVER

-
21
-
[POWER Lamp Indication]
The POWER lamp comes in three colors - - -green, red, and orange.
Indication POWER lamp
Power OFF Off
Power ON (print ready) Green On
Standby Dark Green On
Charging Orange On
Power voltage failure Red On
No paper, paper cover open Green blinks
Battery voltage low (needs charge) Orange blinks
Error Red blinks
[REPRINT Lamp Indication]
The REPRINT lamp comes in one color, green.
Indication REPRINT
lamp
Reprint disabled, Button print invalid OFF
Reprint enabled Green ON
Button print valid, Non-suspension Green 1-time blinking
(slow blinking)
Button print valid, Suspension Green 3-time blinking
(fast blinking)
The printer provides the “button print” function that suspends the next print temporarily each time
when the printer prints one sheet. If the button print function is set to “valid”, the printer goes in
“reserve” state each time when one sheet is printed. In this case, the print can be restarted by
canceling the reserve state with the REPRINT button.