
Installation guide
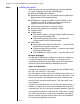
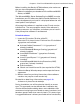
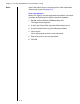
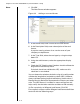

Table Of Contents
- 1 Introduction
- 2 Architectural Overview
- 3 First-Time NT500 Offline System Installation & Setup
- System requirements
- Navigating the software
- Installing the system
- Defining the system
- Setting up organization options
- Creating time and mode profiles
- Setting up hardware
- Creating cardholders and operators
- Configuring a lock using a laptop
- Configuring an office admin kit as an enrollment station
- Viewing events, diagnostic information, and reports
- Database backup and restoration
- Glossary of Terms
Chapter 3: First-Time NT500 Offline System Installation & Setup
3 – 8
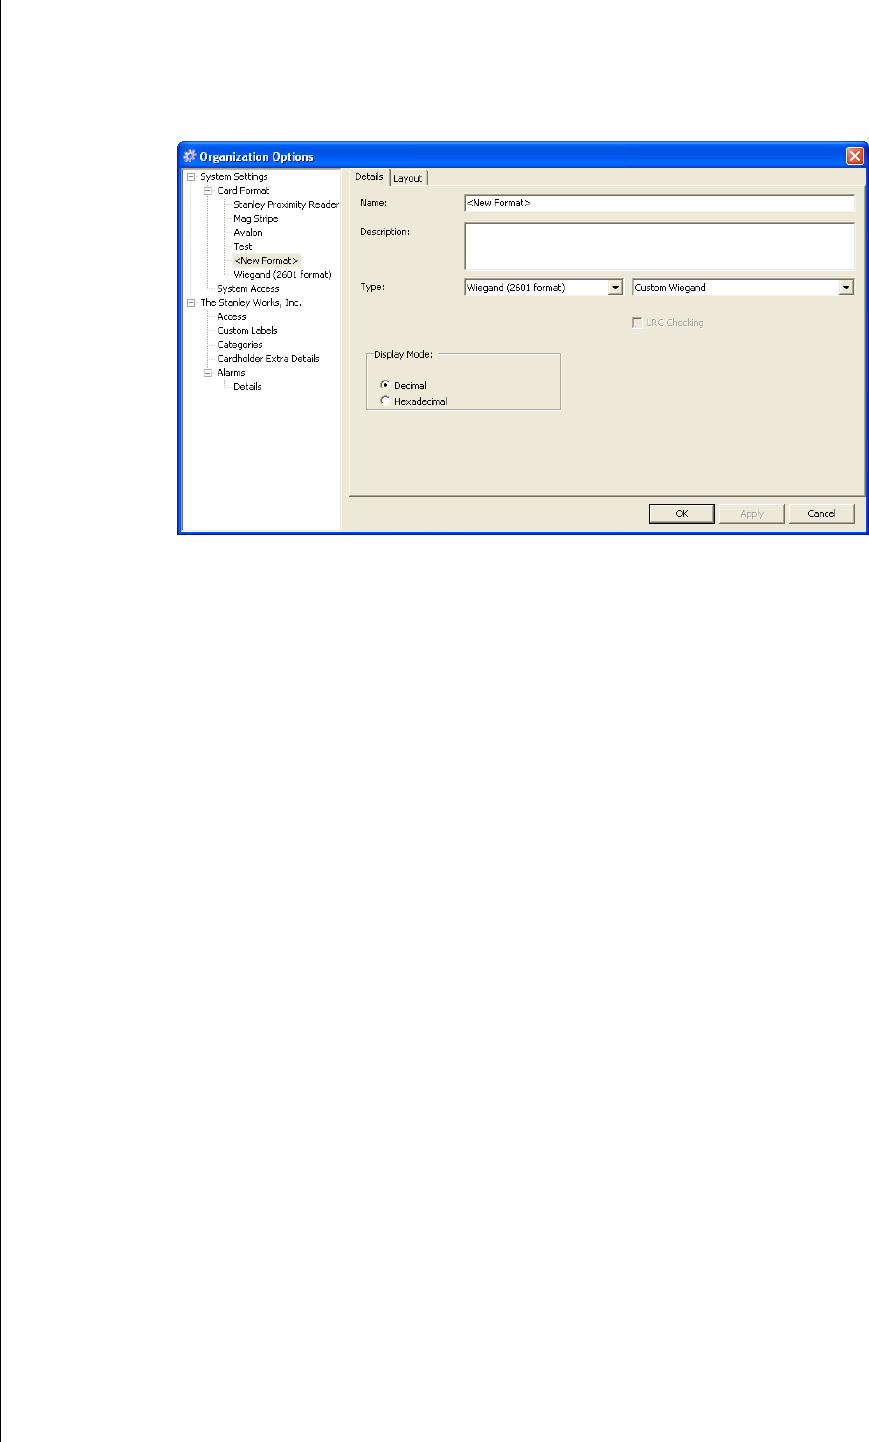
Notes 4 Click OK.
The New Format window appears.
5 In the Name field, enter a name for the card format.
6 In the Description field, enter a description of the card
format.
A popular naming scheme is to use the name of your
company or department.
7 In the Type field, select the card type by using the drop-
down list.
8 Using the radio buttons, select the appropriate display
mode.
9 Check the LRC Checking box if readers should validate the
longitudinal redundancy check.
If the lock should not validate the LRC, make sure this
check box is not checked.
You can determine whether the locks using this configuration
validate the longitudinal redundancy check (LRC). However,
always validate the longitudinal redundancy check unless a
Stanley Security Solutions Representative informs you other-
wise. The LRC feature is included in most card formats and
helps verify that the locks read the card data or PIN correctly.
10 For a proximity or Wiegand card format, Click OK.
For magnetic stripe or custom Wiegand card format definition
continue with the following steps.
Figure 3.3 Adding a new card format