DigiAir-SD User’s Manual Digital Outdoor Wireless Camera System Kit with PIR motion, 2-way Audio, Night Vision and SD Digital Video Recorder
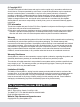
© Copyright 2011 This manual is furnished under license and may be used or copied only in accordance with the terms of such license. Except as permitted by such license, no part of this publication may be reproduced, stored in a retrieval system, or transmitted, in any form or any means, electronic, mechanical, recording, or otherwise, including translation to another language or format, without the prior written permission of SecurityMan.
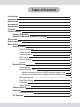
Table of Content Introduction Important Restrictions Accessories Specification Features Product Basics Camera (SM-60DT) Receiver (SM-60DR) & Buttons Function Quick Start User’s Interface Menu Setup System Setting Date/Time Setting Video System Camera Rotation SD Format Default Setting Version Record Setting Video Setting Motion Record Time Motion recording active in QUAD channel display view Motion recording active in Single channel display view Schedule Record Date/Time Stamp Overwrite Video Record Camera
Introduction Thank you for choosing the DigiAir-SD Digital Outdoor Wireless Camera System Kit. DigiAir-SD records and digitizes streaming video on to a standard SD card (up to 32GB capacity). It implements MPEG4 video compression format for smooth recording or JPEG picture recording. DigiAir-SD features 2-way audio communication between camera and receiver, scheduled, manual and motion detect recording with time/date stamp, which makes the DigiAir-SD an ideal choice for your recording needs.
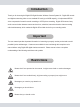
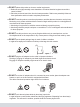
● DO NOT places this product too close to medical equipments. 1. Radio waves might potentially cause breakdown of medical electrical equipments and thus cause incidents. 2. Place the product at least 22cm from the heart pacemaker. Radio wave potentially influences heart pacemaker and thus leads to respiratory disturbance. ● DO NOT uses this product to monitor equipments or activities that are relevant to one's privacy.
● DO NOT put the camera in wet places where water might splash or where rainwater and mist might erode (Except weather-proof series). It might cause fire, shock, short circuit, etc. ● DO NOT disassemble or repair the camera, receiver or other relevant peripheral equipment s by yourselves. Improper disassembly might cause damages to the product or the peripheral equipment. ● DO NOT put the camera in quaky paces. The camera may be unstable or out of operation if installed improperly.
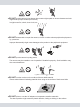
● DO NOT touch, shake or hold the antenna. ouching, shaking or holing the antenna might influence the receiving of electromagnetic wave, and thereby influence the receiving effect. ● DO NOT use the camera in complex environment, The obstruction of stumbling block will affect the electromagnetic wave and influence the receiving range. Wall, tree and other stumbling block might absorb, reflect the electromagnetic wave, and influence the receiving range.
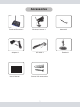
Accessories Receiver/Recorder*1 Adapter*2 User’s Manual Wireless Camera*1 AV cable*1 Screws*3 & accessories 5 Antenna*2 Bracket*1
CAMERA (SM-60DT) RECEIVER SM-60DR) GENERAL Specification Frequency Modulation Antenna Transmission Distance Operating Temperature Operating Humidity Video System Video Resolution A/V Output A/V Input Video Record Format Photo Format Recording Frame Rate Video File Size SD Slot (storage) Rx Sensitivity Record Overwrite Record time Display Playback Detection Sensitivity Power Supply Power Consume Dimensions Net Weight Sensor Resolution View Angle Audio Speaker Ingress Protection Night Vision Range PIR Moti
Features • Do-it-yourself (DIY, easy to setup and use security system • Weatherproof camera with PIR motion sensor • 2-way audio communication between camera and receiver • Wireless transmission up to 130ft with walls in between • No Wi-Fi interference and interference from crowded analog 900mHz/2.4Ghz/5.8Ghz/6.
Product Basics Camera (SM-60DT) Sun Visor Power Socket Receiver (SM-60DR) & Buttons Function Audio/Video Output Power Socket 8
Quick Start 1. Attached the included antenna to the back of the receiver and then find a suitable location for the DigiAir-SD wireless receiver/recorder. 2. Mount the camera in the desired position. Be sure to plug in the power to the camera and attach the supplied antenna to the back of the camera. 3. Connect the AV (audio/video) cable from the AV output of the receiver to a monitor or other recorder for backup purposes. (ie. CCTV monitor, LCD monitor, TV, DVR, recorder, & etc).
6. A window boot up screen will display as shown below, and then to the main user’s interface. 7. Enable the intercom feature by pressing the Talk button. Sound is transferred from the receiver to the camera by pressing and holding the Talk button and speaking into the Mic (located on the front of the receiver); Release the Talk button to listen to the sound from the camera as illustrated below. Use the UP and DOWN buttons to control the volume of the receiver and camera.
a) In Video Mode, AVI video recording will start to record and the RECORD indicator located in front of the receiver will light up to indicate the receiver is in record mode and the • REC will appear in red at the top center of the screen. The RECORD indicator light will turn off after motion finished recording and resume motion video stand-by mode and the NEW indicator of the receiver will light up.
Signal Intensity The Signal Intensity shows the signal strength between the transmitter and the receiver. The more bars, the better the transmission signal image. Resolution Select between VGA and QVGA resolution quality to display and record videos and take snapshots. Higher resolution VGA will display and record up to 11 frames per second and the lower resolution QVGA will display and record up to 30 frames per second.
SD Card icon Once the SD card (storage media) is inserted into the SD slot, the SD icon and Free Space (in MB) will appear on the screen as shown in the above illustration. Both the SD icon and Record symbol will flash on the screen to indicate that the storage media is full. The screen will not display the SD icon or Free Space, if the SD card is not inserted correctly or cannot be identified by the recorder (support up to 32GB of memory).
System Setting From the Menu Setup window, select System Setting as illustrated below. The System Setting consists of Date/Time, Video System, Camera Rotation, SD Format, Default Setting, and Version. Camera Rotation SD Format Default Setting Date/Time Setting In the System Setting highlight and press the OK button on Date/Time to setup the current date and time as shown below. Press the UP or DOWN button to increase or decrease the value and use the RIGHT/LEFT buttons to toggle thru the other values.
Camera Rotation In the System Setting highlight and press the OK button on the Camera Rotation as shown below. Sequential Setting Auto Sequence The Auto Sequence is use to setup the camera sequential rotation period between cameras. The default Auto Sequence is set to OFF. To change the value, press the UP or DOWN buttons to toggle between OFF, 5 sec, 10 sec, 15 sec, 25 sec, or 30 sec. Press OK to save and exit out of Auto Sequence or press the MENU button to exit without changes.
Default Setting A message “Restore default, are you sure?” will appear in red color, press the UP or DOWN buttons to select YES or NO (default) to proceed with system restore. If YES is selected the recorder will default all the setting back to the original factory default setting, otherwise press the MENU at any time to exit out of Default without restoring factory default setting. Note: Please double check and jot down current system setting before running the system Default Setting.
Video Setting In the Record Setting highlight and press the OK button on Video Setting as shown below. Video Setting Press the UP and DOWN button to make a selection between VGA (640x480 display resolution, default), QVGA (display with 320×240 display resolution) and ZOOM (camera(s) image will be zoomed in). Press OK to save the setting and exit Video Setting or press the MENU button to exit without saving. Note: VGA resolution recording and live view frame rat is fixed at 11 frame per second.
Note: In QUAD screen live display view; Manual recording and Schedule recording is not operable, please change the live screen display to single full screen for manual recording and Schedule recording. Under QUAD display view; only the OK, QUAD, and MENU buttons operates. Motion recording active in Single channel display view: Motion recording only records the channel that is being displayed.
When the Date/Time Stamp is enabled, the system will display the date and time to real-time monitoring and the recorded video/photo files. Press the UP and DOWN button to make a selection between ON (default) or OFF, then press OK to save the setting and exit Date/Time Stamp or press the MENU button to exit without saving. Overwrite In the Record Setting highlight and press the OK button on Overwrite as shown below.
Camera Pairing From the Menu Setup window, select Camera Pairing as illustrated below. Camera Pairing In Camera Pairing window, press the UP and DOWN button to select the desired camera to pair, and then press the OK button to enable pairing. When pairing is enabled, the screen will go black and the indicator message “Please press Pair Key on Camera side” will appear in teal color with a 30 seconds countdown.
In the playback directory files (VIDEO or PICTURE), press the UP and DOWN button to browse through the dated files and then press the OK button to start playback. Select the folder icon and press OK button at any time to step back to the previous directory. During playback, press the LEFT button to REW (rewind) at 1X, 2X, 4X and 8X the normal playback speed and press the RIGHT button to FF (fast forward) at 2X, 4X, 8X, 16X, 32X and 64X the normal playback speed.
PC Playback Since the DigiAir-SD recorder stored recorded data into an SD (Secure Digital) memory card, the card can be ejected from the recorder and plug into a media card reader on a PC to read, playback, delete file(s), and file backup (copy/paste) as shown below. Some computers come with built-in card reader and others may not but third party card reader can always be purchase for integration.