
Use and Care Manual


7
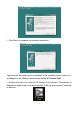
9. Click on Network Configuration
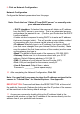
Network Configuration
Configure the Network parameters from this page.
Note: Check the box “Obtain IP from DHCP server” or manually enter
your address information.
• DHCP checkbox: If checked, the camera will obtain an IP address
from the DHCP server in your router. This is an automated process
and perhaps the easiest to use. (Confirm your Router has the DHCP
function enabled).
A better solution compared to using DHCP is to enter an IP address
that never changes (static). This will provide a more reliable method
of connecting with your camera via the internet in the future.
•IP address: Manually type in an IP address if you have a Static IP
(one that never changes from your Internet Service Provider). Make
sure the subnet (the first three sections of the number) are the same
as the gateway you type in.
•Mask: The default subnet mask of the camera is: 255.255.255.0
•Gateway: Make sure it is in the same subnet with your PC IP
address. Default Gateway address is 192.168.1.1
•DNS: IP address of your Internet Service Provider (ISP).
•Port: LAN port assigned for the camera, usually 81.
•User & Password: Default User = admin
Password = _________(leave space empty).
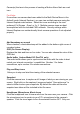
10. After completing the Network Configuration, Click OK
Note: You may find it necessary to place the IP address assigned to the
camera in “Trusted Sites” for Internet Explorer. See Appendix.
RESET BUTTON: Press and hold down the RESET BUTTON at the end of
the cable for 5 seconds. Release the button and the IP portion of the camera
will be reset back to the factory default settings.
11. Access your camera by double clicking the IP address listed in the
camera finder window, or type the IP address of the camera directly into the
address line of your preferred web browser.