
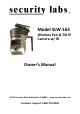
Use and Care Manual

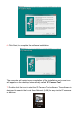
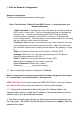

7. Confirm the Network Type and Encryption used are correct.
8. Enter your network password or share key.
9. Click <Submit>, and return to <Live Video>.
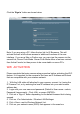
You may remove the LAN cable at this time, and place the camera at its
intended location. Please confirm WiFi transmission from the location of the
camera before installing the accessory mounting bracket.
Note: If you are having difficulty properly connecting to the camera, flush the
ARP buffer (IP Camera Tool / right click camera on list / Flush ARP Buffer)
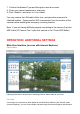
OPERATION / ADDITIONAL SETTINGS
Main User Interface (as seen with Internet Explorer)
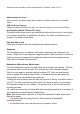
Device Status
Camera(s) that are in the process of sending a Motion Alarm flash as a red icon.
For Visitor
If more than one camera has been added to the Multi-Device Menu in the ActiveX mode
(Internet Explorer), you can view multiple cameras using the Internet Explorer web browser.