
User`s guide


18 XR200-485 User Menu
Using the Zone Monitor Function
1. Access the User Menu.
2. Press COMMAND until ZONE MONITOR? displays.
3. Press any Select key. The keypad displays ALL NBR.
4. Select ALL to place all disarmed zones into Zone Monitor.
4a. The keypad displays ALL? ADD RMV.
4b. Select ADD to add all disarmed zones to Zone Monitor.
4c. Select RMV to remove all disarmed zones.
5. Select NBR to enter a specific zone number for zone monitor.
6. If NBR is selected, the keypad displays ZONE: - ADD RMV.
6a. Enter any zone number and select ADD to add this zone.
6b. Enter any zone number and select RMV to remove this
zone.
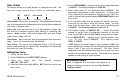
7. The zone number automatically disappears and a new zone
number can then be entered in step 6a or 6b.
☞ ☞
☞ ☞
☞ Browser Feature
If you are unsure of the zone number or description, refer
to Appendix B at the back of this guide for a diagram
showing you how to use the built-in Zone Monitor browser.
System Status
Displays the current condition of internal system hardware.
System Status displays the condition of the panel's AC power, battery
power, and optional panel tamper. When System Status is selected,
each monitor is displayed followed by OKAY or TRBL (Trouble) to
indicate the current condition.
Using the System Status Function
1. Access the User Menu.
2. Press COMMAND until SYSTEM STATUS? displays.
3. Press any Select key. The display starts listing each system
monitor and status.
For example: AC POWER - OKAY
Below are the System Monitor displays:
Keypad Display What it monitors
AC POWER = AC power
BATTERY = Battery power
TAMPER = Panel box tamper
These are followed by either OKAY or TRBL (trouble).
If TRBL is displayed, call the service department for assistance.
4. The system then displays its firmware version (for example,
VER_201_9/15/99), the panel model (MODEL XR200-485),
and then exits the User Menu.