XR200-485 User’s Guide
Silencing an Alarm 1. While the alarm bell or siren is sounding, press the COMMAND key until MENU? NO YES appears and press the select key under YES. Enter your user code and press the COMMAND key until ALARM SILENCE appears. Press any top row select key. The system silences the alarm bell or siren. 2. If your system is programmed to send an Abort (alarm cancel) report to the central station, the keypad displays ALARM CANCELLED. Copyright © 1997 - 2003 Digital Monitoring Products, Inc.
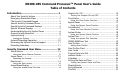
XR200-485 Command ProcessorTM Panel User's Guide Table of Contents Introduction ..................................................... 1 About Your Security System ............................... Emergency Evacuation Plans .............................. The Security Command Keypad ........................... Special Security Command Tones ......................... Special Security Command Displays ...................... Special Wireless Displays ..................................
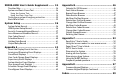
XR200-485B User’s Guide Supplement ........ 34 Appendix B .................................................... 46 Two Man Rule ............................................... 34 System and Panic Zones Test ............................. 34 Outputs On/Off Browser .................................. 46 Zone Status Browser ....................................... 46 Bypass Zones Browser ..................................... 47 Zone Monitor Browser .....................................
About Your Security System Introduction The Security Command system has been designed with your safety and comfort in mind. It uses the latest in computer based technology to create the most advanced, user friendly security, fire, and access control system available. The Security Command system combines ease of use with a simple to understand Security Command keypad to offer the full range of features requested by today’s security system owners.
Emergency Evacuation Plans The National Fire Protection Association recommends that you establish an emergency evacuation plan to safeguard lives in the event of a fire or other emergency. Use the following steps as a guide. Draw a floor plan of your home or business On a clean sheet of paper, draw the walls, windows, doors, and stairs. Also draw any obstacles that a person may encounter while exiting the building such as large furniture or appliances.
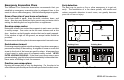
The Security Command Keypad The Back Arrow key Your system may have one or more easy to use Security Command keypads (16- or 32-character) that allow you to properly operate the system. The illustration and descriptions below highlight some of the keypad features: The Back Arrow key is used to go back through the keypad displays while operating your system. You can press the Back Arrow key to back up through the list of functions in the User Menu or to erase the last character you entered.
32-Character Keypad User Options Menu Press and hold the Back Arrow and COMMAND keys for about two seconds. The keypad display shows SET BRIGHTNESS. Use the first Select key to lower the display brightness or the fourth Select key to increase the brightness. Press COMMAND. At SET TONE, use the first Select key to lower the keypad tone or the fourth Select key to raise the tone. Press COMMAND.
TRY AGAIN or INVALID CODE SYSTEM TROUBLE or SERVICE REQUIRED The user code you have entered is not recognized by the system. Check the user code and try again. There is a problem with one or more of the components in your system. Contact our service department as soon as possible. INVALID PROFILE SYSTEM BUSY All user codes have a profile that allow the user to only access certain functions. When users attempt functions outside their authority, the INVALID PROFILE message displays.
Understanding Security System Terms Throughout this guide, and in some displays on your keypad, you will see certain words or phrases that might be unfamiliar. Below are some terms you will see here and on your keypad display: Areas An area is made up of burglary zones that can be armed or disarmed together. One area might consist of the office doors and windows. When you arm the office, these zones arm together and sound an alarm if opened.
Status View Zone Status Status is a feature that automatically displays the armed or disarmed status of your system on the Security Command keypads. Alarm or trouble conditions on a zone or a system monitor such as AC or battery trouble can also be displayed. There are two types of status information available: Armed Status and Status List. To view the disarmed zones that are in fault, press any Select key when the status list is displayed.
General Arming Operation Your burglary protection is divided into areas. Each area has a custom name. Areas can be turned on or off independent of other areas and can have different schedules and authorized users. After making your arming selection, the keypad displays any zones that are currently bypassed. These zones remain bypassed until the system is armed and then disarmed. Any 24-hour zones in a faulted condition are also displayed.
System Arming Area Assignment: Your security system has been set up into separate areas. The number of areas and their names are listed in the back of this guide. Arming or Disarming: You can arm and disarm all areas at one time or each area individually. You can only arm or disarm areas authorized for your user code. Arm all or Selective Arming: After entering your user code, the system allows you to arm either all of the areas to which you have access or one or more selected areas.
General Disarming Operation While the system is armed, you can only enter the premises through an entry/exit delay door without causing an alarm. After opening the door, the Security Command keypad sounds a prewarn tone to remind you to disarm the system. (See Door Access Disarming below.) You must disarm the system before the entry delay time expires or an alarm on the door zone will occur. During the entry delay time, the keypad displays ENTER CODE:. Enter your code to disarm the system.
Disarming the System from the keypad 1. Press the COMMAND key until ARM DISARM is displayed. During entry delay this process starts at step 3. 2. Select DISARM to disarm areas. 3. The keypad displays ENTER CODE: . Enter your user code and press COMMAND. The keypad displays ALL? NO YES. 4. Select YES to disarm all areas authorized for your user code. Select NO to disarm only certain areas individually.
User Menu Security Command User Menu Many of the features of your system have been put into a User Menu that you can access from any Security Command keypad. The menu requires you to enter your user code and then it only shows those functions to which you have access. ZONE STATUS Allows you to see if a zone is either armed, bypassed, in alarm, open, or shorted. BYPASS ZONES Allows you to Bypass a zone or reset an already bypassed zone.
Alarm Silence Sensor Reset Silences the alarm bells or sirens during an alarm. Resets smoke or glassbreak detectors. Also clears Fire/Supervisory alarm and trouble displays. Alarm Silence allows you to turn off the alarm bells and sirens connected to your system during an alarm. Using Alarm Silence does NOT stop an alarm report from being sent to the central station and does not reset any alarmed devices. Use the Sensor Reset function to reset devices such as smoke detectors that have latched in alarm.
Door Access Armed Areas Display Operates an electric door strike from the keypad. Displays all armed area names in the system. Door Access is used to operate a door strike relay that is built into some Security Command keypads. Power for the door strike is connected to the keypad relay and can be interrupted by using the Door Access function. The Armed Areas display lists all of the names of the armed areas in your system at the Security Command keypads.
Outputs On Off Allows you to manually turn the system or door access relay outputs ON and OFF. This function is used to individually turn your system’s relay and access door outputs ON and OFF. Your system may use these outputs to control door access, interior and exterior lighting, heating, air conditioning, or other appliances. The names and numbers of the relays connected to your system are located in the System Setup section of this guide.
Zone Status Displays a list of armed, bypassed, or alarmed zones. Also allows you to check the status of individual zones. Zone Status can be used to give you a list of zones by category or display the current status of an individual zone number. The four categories are: • Armed Zones - zones that are currently armed. • Bypassed Zones - zones that are currently bypassed. • Alarmed Zones - zones that have gone into alarm during the current or previous armed period.
Bypass Zones Zone Monitor Allows you to bypass a zone prior to arming. Allows the system to monitor selected disarmed zones (doors, windows, or motion detectors) and display their name at the keypad as they are faulted. This feature could be used to monitor an access door. Bypassing is usually done when a zone cannot be restored to normal. A significant benefit of bypassing a zone is to allow a zone in a faulted or bad condition to be bypassed so that arming can occur.
Using the Zone Monitor Function 1. Access the User Menu. 2. Press COMMAND until ZONE MONITOR? displays. 3. Press any Select key. The keypad displays ALL NBR. 4. Select ALL to place all disarmed zones into Zone Monitor. 4a. The keypad displays ALL? ADD RMV. System Status Displays the current condition of internal system hardware. System Status displays the condition of the panel's AC power, battery power, and optional panel tamper.
System Test XR200-485B Panic Test System Test is used to test the battery, alarm bell or siren, and communication to a central station. The System Test function begins automatically as soon as you select it. Your system may be a Model XR200-485B which includes a panic button zone test. See the XR200-485B User’s Guide Supplement section in the back of this guide. Using the System Test Function 1. Access the User Menu. 2. Press COMMAND until SYSTEM TEST? displays. 3. Press any Select key.
User Profiles This option allows you to add, delete, or change User Profiles. A profile defines the authority of each user code in the system. There are several characteristics associated with each User Profile that define its authority within the system. Profile Number - Each profile may be assigned a unique number from 1 to 99. The Profile Number is the default Profile Name. Profile Name - Each profile may be assigned a 16 character name. The Profile Number is used as the Default name.
User Profiles Chart Profiles Number Menu ARM/DIS ALM SLNC SNSR RST DOOR ACS ARM AREA OUTPUTS ZN STATS BYPAS ZN ZONE MON SYS STAT SYS TEST PROFILES USR CODE SCHEDULS TIME DIS EVNT SERV REQ FIRE DRIL EXTEND TEMP CODE ANTI PASS ALOW: 1234 XR200-485 User Menu NO NO NO NO NO NO NO NO NO NO NO NO NO NO NO NO NO NO NO NO NO __ YES YES YES YES YES YES YES YES YES YES YES YES YES YES YES YES YES YES YES YES YES ANY Privilege 1 2 Arm and Disarm Alarm Silence Sensor Reset Door Access Armed Areas Outputs ON/OFF
Deleting User Profiles 1. 2. 3. 4. Access the User Menu. Press COMMAND until USER PROFILES? displays. Press any Select key. The keypad displays ADD DEL CHG. Press the second Select key, under DEL, to delete a user profile. 5. At the PROFILE NO: - prompt, enter a profile number and press COMMAND. The display changes to DELTD. Note: User codes assigned to deleted profiles will not function. Changing User Profiles 1. 2. 3. 4. 4. 5. 6. 7. 8. 22 Access the User Menu.
User Codes This option allows you to add, delete, or change a user code. You may also assign specific User Profiles to individual users. 125 User Number 34812 John Smith User Code User Name 7 User Profile User Number - Every user is numbered. This number identifies the user to the system and is transmitted to the central station when the user arms or disarms areas. User Code - Each user also has a 3 to 5 digit number to enter into the Security Command keypad when arming or disarming the system.
Deleting User Codes Changing User Codes 1. Access the User Menu. 2. Press COMMAND until USER CODES? displays. 3. Press any Select key. The keypad displays ADD DEL CHG BAT. 4. Press the second Select key, under DEL, to delete a user code from the system. To delete a user code, you must have a user code with a profile that has user code authority. Note: Your system must have at least one user with user code authority in order to be able to add or delete user codes.
Forgive Failure to Exit Ambush Codes Failure to Exit is an Anti-pass back violation in which a user assigned with anti-pass back has attempted to re-enter an area that the user did not exit through. Your system may be programmed to allow user number 1 to be an Ambush code. This Ambush code functions identically to a standard code with the exception that it sends a silent alarm to the central station.
Schedules Schedules are ideal for auto arming and disarming of individual areas and for creating Opening/Closing windows during which users can access the building or disarm the system. Having separate schedules allows you to create Opening/Closing windows for each day. One could be for normal business activity and another could be for cleaning crews or a second shift. Once programmed, these schedules operate continually until changed.
Setting Shift (S1 S2 S3 S4) Schedules 1. Access the User Menu and press COMMAND until SCHEDULES? displays. Press any Select key. 2. The keypad displays S1 S2 S3 S4. Press the Select key under the shift you want to program. This will allow you to enter a schedule that remains in place until you change or delete it. 3. Your system may be programmed to allow four shift schedules per area, if so, AREA NO:- is displayed. Enter the area number that you are assigning to a schedule.
Setting Output (OUT) and Door (DOOR) Schedules The Schedules function allows you to set up to 100 different scheduled times for relay outputs and door access relays connected to your system to turn ON and OFF automatically. The maximum number of schedules that can be assigned per door access relay or relay output is 8. 1. Access the User Menu. 2. Press COMMAND until SCHEDULES? displays. 3.
Setting Holiday ABC Schedules for S1, S2, S3, S4, OUT, and DOOR Schedules Three Holiday schedules are available for each shift (S1, S2, S3, S4), each output relay (OUT), each door access relay (DOOR), and are available through their respective menu options. This allows a shift, output, or door to have three different schedules for holidays. For example, Holiday Schedule A for those holidays when the building stays closed, Holiday Schedule B for a day that only opens for a morning, etc.
Setting Holiday Dates (HOL) Extending Schedules (EXT) Setting Holiday Dates provides the system with dates in the year that the normal opening and closing schedules are not used and are superceded by one of the Holiday Schedules A or B or C. When the panel determines that it is a holiday, the Holiday Schedule supercede the current schedule for that day. Up to twenty different holiday dates can be entered.
Setting the Date and Time Display Events Allows you to change the current date and time displayed on the Security Command keypad and used by the system. Allows you to review up to 1000 past door accesses and 200 past system events. There are six event types: Setting the System’s Date and Time Zone Activity - Zone alarms, troubles, and restorals. Opening and Closing - Arming and disarming of the system. User Code - Adding, deleting, and changing user codes.
Using the Display Events 1. Access the User Menu. 2. Press the COMMAND key until DISPLAY EVENTS? displays. Press any Select key. 3. The keypad displays FRST LST PRT SRT. Select FRST (first) to view the oldest to newest events. Select LST (last) to view the newest to oldest events. If you select FIRST, use the COMMAND key to scroll up through the events. If you select LAST, use the Back Arrow key to scroll down through the events.
Service Request Fire Drill Your user code profile may be programmed for Service Request. This feature of the User Menu allows you to just press any top row Select key while SERVICE REQUEST? is displayed and have the system automatically send a "Request for Service" message to the central station. The display changes to REQUEST MADE momentarily to confirm your request was sent. Fire Drill is used to test the fire bells or fire horns in your system.
XR200-485B User’s Guide Supplement This supplement is intended for use with the XR200-485B Access Control Interface Card and includes information about the additional features specific to the 485B. Two Man Rule During an entry delay time, the keypad displays ENTER CODE:. If areas of your system are programmed for Two Man Rule, anytime a user enters a code to disarm a Two Man area or perform a door access, the keypad displays 2ND CODE: - for 10 seconds.
Using the Panic Zone Test 1. 2. 3. 4. 5. Access the User Menu. Press COMMAND until SYSTEM TEST? displays. Press any Select key. The keypad displays SYSTEM PANICS. Press the Select key below PANICS. The Panic Zone Test begins automatically and the keypad displays TRIPS: END. During the Panic Zone Test, trip each panic zone (or button) on the system by pressing and holding the panic for 1 to 2 seconds. Note: You do NOT have to hold the panic for 2 seconds in normal mode.
System Setup System Setup Record 485B System Setup Record We have provided this System Setup section to allow you to track the current and future status of the programmable options on your Security Command system. If you make changes to the system, you should update the information contained on these pages. This section allows you to track the status of the XR200-485B programmable options on your Security Command system. Your system is monitored by a central station.
Security Command Keypad Record Device # Name Which keypads display Armed Status? Area ❏1&9 ❏ 2 & 10 ❏ 3 & 11 ❏ 4 & 12 ❏ 6 & 14 ❏ 7 & 15 ❏ 8 & 16 ❏ N/A ❏ 5 & 13 1 ____________________________ 12345678 2 ____________________________ 12345678 3 ____________________________ 12345678 4 ____________________________ 12345678 5 ____________________________ 12345678 6 ____________________________ 12345678 7 ____________________________ 12345678 8 ____________________________ 123456
Profile Name Arm/Disarm Area Access Area Output Group Shift/Time Access Profile # Arm/Disarm Alarm Silence Sensor Reset Door Access Armed Areas Outputs On/Off Zone Status Bypass Zones Zone Monitor System Status System Test User Profiles User Codes Schedules Time Display Events Service Request Fire Drill Extend Schedules Temp User Code Anti-pass Back Suggestion: Photocopy this page before using.
User Codes Record Suggestion: Photocopy this page before using. Depending on how your system is programmed, you may have 200 to 999 user codes available. As you add new users or change current users' codes, you can keep track of their profile number in the system. Use the following table to track custom user codes in your system.
Schedules Record Sche dule A re a Name Status S1 S2 S3 S4 Area # S1 S2 S3 S4 Area # S1 S2 S3 S4 Area # S1 S2 S3 S4 Area # S1 S2 S3 S4 Area # S1 S2 S3 S4 Area # S1 S2 S3 S4 Area # S1 S2 S3 S4 Area # S1 S2 S3 S4 Area # S1 S2 S3 S4 Area # Door # Output # Door # Output # Door # Output # Door # Output # Door # Output # Door # Output # ______________ ______________ ______________ ______________ ______________ ______________ ______________ ______________ ______________ ______________ ______________ ___________
Holiday Date Record Output Relay Record Your system has up to 20 holiday dates available that supercede all regular scheduled times for that day. Your system has ____ output relays that are used to control various functions within the building or access around its perimeter. Below is a list of the devices they control. # 1. Date (mm/dd) _____/_____ HOL (circle one) A or B or C 2. _____/_____ A or B or C 3. _____/_____ A or B or C 4. _____/_____ A or B or C 5. _____/_____ A or B or C 6.
About the Display Events Section Appendix A This section of the user’s guide shows the User's Guide Display Events items for both 16-character (single line) and 32-character keypad displays. While in the Display Events function, use the COMMAND and Back Arrow keys to go forward or backward through the list of events. To view more information about each display, press the Select key as directed in the explanations below.
User Code Change Event Displays Supervisory Event Displays This displays any addition, deletion, or change to a user code. This displays the date and time of an automatic test report. 16-Character Display Description 16-Character Display Description 12 User 12 added user 19 on Oct. 17. Press the right Select key for the time this occurred. AUTO RECALL 1017 The test report was sent on Oct. 17.
System Monitor Event Displays Door Access Event Displays This displays any problems with the system's AC power, battery, or phone line(s) or any opening of a tampered panel box. This displays the keypad address where a Door Access occurred and the user number of the person granted access. 16-Character Display Description 16-Character Display Description POWER T BL 1017 An AC failure occurred on Oct. 17. Press the fourth Select key for the time.
Schedule Change Event Displays Zone Bypass Event Displays This displays Changes made to the system’s schedules. This displays the bypassing of system zones. 16-Character Display Description 16-Character Display Description S1 MON 024 1017 S1 schedule for Monday was changed by user 24 on Oct. 17. Press the fourth Select key for the time of occurrence or the third Select key for the user name. 26 BYPS 1 2 1017 Zone 26 bypassed by user 12.
Appendix B Outputs On/Off Browser OUTPUTS ON /OFF? OUTPUTS DOOR OUTPUT: - ON OFF DOOR: ON OFF Access the User Menu. Press the COMMAND key until OUTPUTS ON/OFF? displays. Press the SELECT key under OUTPUTS or DOOR. Zone Status Browser Access the User Menu. Press COMMAND until ZONE STATUS appears. ZONE STATUS? Press any SELECT key then press the SELECT key under NBR. ARM BYPS ALR NBR Press one of the left two SELECT keys to browse through the names of zones. ZONE NO: - SELECT AREA . . .
Bypass Zones Browser Zone Monitor Browser ZONE MONITOR? Access the User Menu. Press COMMAND until BYPASS ZONES appears. Press any SELECT key. BYPASS ZONES? Press either of the two left SELECT keys. ZONE: - This prompt allows you to search for a zone by area. Press the COMMAND key to scroll through the list of areas. Press either of the two left SELECT keys. SELECT AREA . . . EAST DOOR RST BYP FRONT OFFICE When the area where the zone is located is displayed, press any SELECT key. SELECT ZONE .
Add User Profiles Browser Delete User Profiles Browser Access the User Menu. Press COMMAND until USER PROFILES? displays. Press any SELECT key. USER PROFILES? Press the SELECT key ADD DEL CHG under ADD. USER PROFILES? At this prompt, you can enter a new profile number or scroll through the available (unused) profile numbers. PROFILE NO: - ADD DEL CHG View available profile numbers. Press any SELECT key. Enter a new profile number. PROFILE NO: 12 PROFILE NO: 012 Access the User Menu.
Change User Profiles Browser USER PROFILES? ADD DEL CHG PROFILE NO: - Enter a profile number. Add User Codes Browser Access the User Menu. Press COMMAND until PROFILES? displays. Press any SELECT key. Press the SELECT key under CHG. At this prompt, you can enter a profile number or scroll through the list of profile names Press the SELECT key ADD DEL CHG under ADD. Press any SELECT key. PROFILE NO: 12 Access the User Menu. Press COMMAND until USER CODES? displays. Press any SELECT key.
Delete User Codes Browser USER CODES? Change User Codes Browser Access the User Menu. Press the COMMAND key until USER CODES? displays. Press any SELECT key. USER CODES? Press the SELECT key ADD DEL CHG under DEL. USER NUMBER: - At this prompt, you can enter a user number or scroll through the list of user names. Press the SELECT key under CHG. ADD DEL CHG View current user names. Enter a user number. Press any SELECT key.
Output Groups Browser OUTPUT GROUP: - SELECT GROUP . . . Access OUTPUT GROUP:- in the USER PROFILES? menu. Press any SELECT key. At this prompt you can scroll through the list of output group names. Entering User Names Once you've cleared the default name, the display shows just a dash on the left side. – 1 To enter a custom name into the keypad, you'll be using the 3 rows of number keys. { 1 2 3 4 5 6 7 8 9 0 COMMAND 1 COMMAND Press COMMAND.
Appendix C Easy Entry™ User's Guide DOOR STRIKE ABC SECURITY FRI 2: 5 1 A M From the Status List, present your card to the reader. Once it is validated by the system, the Door Strike relay activates. If you are entering an armed area which you are assigned, accessing the area will automatically cause it to be disarmed. POWER While the keypad is in the Status List, present your access card. The relay activates momentarily during which you must open the door.
Pager Direct™ User's Guide Pager Direct uses the reporting capability of your security system to dial your pager number and send reports much like someone sending you a pager message. You can receive reports of alarms, troubles, or armings and disarmings of the system and know at a glance the status of your system.
Alphanumeric Pager Display Numeric Pager Display 00128–301 234 Account Number Whenever the system sends a message to your pager, it will always send the account number first to identify itself.
FA113 User's Guide These instructions guide you through the operation of your system using the FA113 Wireless Keychain Remote. The FA113 uses the audible output capability of the Security Command keypad to sound confirmation tones. It is recommended that you use the FA113 within hearing distance of these keypads. Disarming the System 1. Press the OFF button once. The Security Command keypads emit a single two second beep to confirm the disarming. Arming an Area System 1.
Frequently asked questions This section attempts to answer questions you might have regarding the operation of your Security Command system. Q. If I bypass an exit delay door when I arm the system, will I get an alarm if I come through it later? A. You will not get an alarm from the door because it is bypassed, but if you also walk through a motion detector or other armed door inside the premises you will get an alarm. Q. When I arm or disarm my Area system, I get ALL? NO YES displayed.
Common Keypad Displays Appendix D Listed below are several keypad messages you may see on the display. Follow the instructions in the Possible Solutions column to correct the problem. In many cases, you will need to call a service person to correct the problem.
Common Keypad Displays Continued Message AC Trouble Battery Trouble Phone Line 1 Trouble System Trouble or Service Required System Busy 4-Wire Bus Trouble Transmit Trouble Transmit Fail Wireless Trouble Non-Polled Address 58 Meaning The system is not getting proper power. Battery is either low or missing. The panel is looking for phone jack supervision. There is a problem with one or more of the components in the system. The system is performing another task with a higher priority.
Index 2-Button Panic Keys ................ 3 485B System Setup Record ....... 37 Alarm Silence ........................ 13 ALERT Buttons ...................... 55 Ambush Codes ...................... 26 Anti-Pass Back ....................... 5 AREA LATE! ........................... 27 Area Names and Numbers Record38 Armed Areas Display ............... 15 Arming ................................. 8 Bank Safe & Vault .................. 36 Browser .............................. 53 Add User Codes ................
LT-0364 (3/03)