
User`s guide
20
20
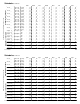
Schedules
User Code Level: 7 and above.
Function: The Schedules function allows you to program into the
system the times at which you normally turn your burglary protection
on and off each day of the week. This information can then used by
the system to automatically arm or disarm the burglary protection.
If your system does not use automatic arming, you can use the
Closing Check/Extend feature with Schedules to help ensure your
system is armed manually at a specific time. This option sounds the
keypad buzzer and displays CLOSING TIME! when a schedule
expires. Users still on the premises are reminded to arm the system
or extend the schedule to a later time. If the system is not armed, or
the schedule extended, a report is sent to the central station.
Schedules can also be used to restrict access to the system by users
with a 1 or 2 level or special Allow (ALOW) authority assigned to their
user codes.
Your system provides you with four different types of schedules and
Holiday dates:
1. Permanent (PRM), Primary (PRI), and Secondary (SEC)
schedules occur at the same time until you change or delete
them.
2. Temporary (TEMP) schedules occur only once and then are
cleared. These are typically used to allow someone off hours
access to the premises when used with a level 1 or 2 code or
special Allow authority.
3. Output (OUT) schedules allow you to set the times when relay
outputs connected to your system turn on and off automatically.
4. Door (DOOR) schedules allow you to set times when door strikes
turn on and off automatically.
5. Holiday (HOL) dates allow you to enter dates that are used to
activate schedules.
Setting an Arming and Disarming Schedule
1. Access the User Menu and press COMMAND until SCHEDULES?
displays. Press any SELECT key.
2. The keypad displays PRM TMP OUT DOOR (or PRI SEC OUT
DOOR). Press the SELECT key under PRM (or PRI). This will
allow you to enter a schedule that remains in place until you
change or delete it.
3. The keypad displays SUN MON TUE WED. Press the COMMAND
key to display THU FRI SAT HOL. Press the SELECT key under
the day you want the schedule to begin.
Note: After selecting the day of the week for the schedule to begin,
the keypad displays any currently programmed Opening and
Closing times previously set for that day. This feature allows you
to review programmed schedules at any time. A schedule entered
in HOL (holiday) will be active and override SUN MON TUE etc.
schedules anytime a Holiday Date occurs.
4. If Opening and Closing times are displayed, the keypad then
displays DELETE KEEP. Press the SELECT key under
DELETE to enter new times.
5. The keypad then displays OPENING TIME? followed by the
display MON – : AM PM. Enter the new opening time and
select AM or PM.
Enter all schedule times using a 12 hour clock. For example, to
enter 6 AM you would enter a 0 + 6 + 0 + 0 and press the SELECT
key under AM.
The keypad then displays CLOSING TIME? followed by the
display MON – : AM PM. Enter the new closing time and select
AM or PM. Pressing the SELECT key under the day MON
(whichever day is displayed) allows you to scroll through the days
of the week and create a schedule window that spans multiple
days.
User Menu
Schedules
User Code Level: 7 and above.
Function: The Schedules function allows you to program into the
system the times at which you normally turn your burglary protection
on and off each day of the week. This information can then used by the
system to automatically arm or disarm the burglary protection.
If your system does not use automatic arming, you can use the Closing
Check/Extend feature with Schedules to help ensure your system is
armed manually at a specific time. This option sounds the keypad
buzzer and displays CLOSING TIME! when a schedule expires. Users
still on the premises are reminded to arm the system or extend the
schedule to a later time. If the system is not armed, or the schedule
extended, a report is sent to the central station.
Schedules can also be used to restrict access to the system by users
with a 1 or 2 level or special Allow (ALOW) authority assigned to their
user codes.
Your system provides you with four different types of schedules and
Holiday dates:
1. Permanent (PRM), Primary (PRI), and Secondary (SEC)
schedules occur at the same time until you change or delete them.
2. Temporary (TEMP) schedules occur only once and then are
cleared. These are typically used to allow someone off hours
access to the premises when used with a level 1 or 2 code or
special Allow authority.
3. Output (OUT) schedules allow you to set the times when relay
outputs connected to your system turn on and off automatically.
4. Door (DOOR) schedules allow you to set times when door strikes
turn on and off automatically.
5. Holiday (HOL) dates allow you to enter dates that are used to
activate schedules.
Setting an Arming and Disarming Schedule
1. Access the User Menu and press COMMAND until SCHEDULES?
displays. Press any SELECT key.
2. The keypad displays PRM TMP OUT DOOR (or PRI SEC OUT
DOOR). Press the SELECT key under PRM (or PRI). This will
allow you to enter a schedule that remains in place until you
change or delete it.
3. The keypad displays SUN MON TUE WED. Press the COMMAND
key to display THU FRI SAT HOL. Press the SELECT key under
the day you want the schedule to begin.
Note: After selecting the day of the week for the schedule to begin,
the keypad displays any currently programmed Opening and
Closing times previously set for that day. This feature allows you
to review programmed schedules at any time. A schedule entered
in HOL (holiday) will be active and override SUN MON TUE etc.
schedules anytime a Holiday Date occurs.
4. If Opening and Closing times are displayed, the keypad then
displays DELETE KEEP. Press the SELECT key under
DELETE to enter new times.
5. The keypad then displays OPENING TIME? followed by the
display MON – : AM PM. Enter the new opening time and
select AM or PM.
Enter all schedule times using a 12 hour clock. For example, to
enter 6 AM you would enter a 0 + 6 + 0 + 0 and press the SELECT
key under AM.
The keypad then displays CLOSING TIME? followed by the
display MON – : AM PM. Enter the new closing time and select
AM or PM. Pressing the SELECT key under the day MON
(whichever day is displayed) allows you to scroll through the days
of the week and create a schedule window that spans multiple
days.
User Menu