XR500 User’s Guide
Silencing an Alarm 1. While the alarm bell or siren is sounding, press the COMMAND key until MENU? NO YES appears. Press the select key under YES. Enter your user code. Press the COMMAND key until ALARM SILENCE appears. Press any top row select key. The system silences the alarm bell or siren. 2. If your system is programmed to send an Abort (alarm cancel) report to the central station, the keypad displays ALARM CANCELLED. Copyright© 2003 Digital Monitoring Products, Inc.
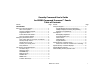
Security Command User’s Guide for XR500 Command Processor™ Panels Table of Contents Section Page Introduction About Your Security System ........................................ 1 Parts of the System ............................................ 1 Security Command Keypad.................................. 1 Keypad User Menu ............................................. 1 A Note About False Alarms .................................. 1 Test Your System Weekly ....................................
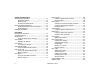
Arming and Disarming System Arming Operation ........................................... 9 Arming the System ........................................... 10 Quick Arming ................................................... 10 Checking the Armed Areas ................................ 10 System Disarming Operation ..................................... 11 Disarming the System from the keypad.............. 12 Quick Disarming ............................................... 12 Extending Schedules ..................
Schedules ................................................................ 27 Setting Shift (S1 S2 S3 S4) Schedules ................ 28 Setting Output (OUT) and Door (DOOR) Schedules29 Setting Holiday ABC Schedules for S1, S2, S3, S4, OUT, and DOOR Schedules.................................... 30 Setting Holiday Dates (HOL).............................. 31 Extending Schedules (EXT) ............................... 31 Setting the Date and Time ........................................
Appendix C Easy Entry™ User’s Guide ......................................... 50 DOOR STRIKE.................................................. 50 ARMING AND DISARMING AN AREA SYSTEM ..... 50 DISARMING WITH ENTRY DELAY ...................... 50 Using the access reader for user menu access .... 50 Frequently asked questions....................................... 51 Common Keypad Displays .........................................
About Your Security System Introduction For UL installations the Models XR500 and XR500N are listed for burglary and access control applications only. The XR500 and XR500N have not been invenstigated by UL for Þre applications. No Þre alarm devices shall be connected for UL installations. The Security Command system has been designed with your safety and comfort in mind.
Emergency Evacuation Plans The National Fire Protection Association recommends that you establish an emergency evacuation plan to safeguard lives in the event of a Þre or other emergency. Draw a floor plan of your home or business On a clean sheet of paper, draw the walls, windows, doors, and stairs. Also draw any obstacles that a person may encounter while exiting the building such as large furniture or appliances. Early detection The best way to survive a Þre or other emergency is to get out early.
The Security Command Keypad Your system may have one or more easy to use Security Command keypads that allow you to properly operate the system. COMMAND key The COMMAND key allows you to advance through the keypad displays or User Menu or complete a data entry function. The Select keys There are four keys under the display called the Select keys. These keys are one of the features that make your system so easy to operate.
Using the Keypad Keypad Displays Current Programming Most User Menu options displayed at the keypad show the currently selected option in the panel memory. These options are either shown as a number, a blank, or a NO or YES. To change a number or blank to a new number, press any top row Select key. The current option is replaced with a dash. Press the number(s) on the keypad you want to enter as the new number for that prompt. It is not necessary to enter numbers with leading zeros.
User Options The User Options allow you to make adjustments to your keypad to best Þt your environment and needs. To access the User Options portion of the keypad, press and hold the Back Arrow and COMMAND keys for two seconds. The keypad display changes to SET BRIGHTNESS. Press the COMMAND key to display the next option or the Back Arrow key to exit. Backlighting Brightness Set the brightness level of the keypad LCD, AC LED, and the Green keyboard backlighting.
Special Security Command Displays As you use your system, you occasionally see a keypad display that asks you to enter a code or that describes a condition on the system. Below are some examples of the displays you will see: ALARM A 24-hour zone (for example Þre or panic) or an armed burglary zone has been tripped. Your system may sound bells or sirens. TROUBLE There is a problem with a protection device or system component. This display is accompanied by a description of the problem.
Special Wireless Displays Your system may use wireless transmitters to send alarm and trouble information from the protection devices to the panel. Wireless systems operate the same as hard-wired and also have a few unique keypad displays. Arming Turning on the burglary protection in one or more areas of the system. When armed, the system is able to sound alarm bells or sirens and, if monitored, send alarm reports to a central station when a burglary zone is tripped.
Entry or Exit zone Almost all systems have one or more doors through which you can access the premises. These doors are programmed with a delay time to allow you to enter or exit without setting off the alarm. When you arm the system, activity on this zone is ignored until the exit delay time expires. Once that time has expired and the system is fully armed, opening the door causes the panel to start the entry delay time.
System Arming Operation Arming and Disarming Area Assignment: Your security system has been set up into separate areas. The number of areas and their names are listed in the back of this guide. Arming or Disarming: You can arm and disarm all areas at one time or each area individually. You can only arm or disarm areas authorized for your user code.
Arming the System 1. Press the COMMAND key until ARM DISARM is displayed. 2. Select ARM to arm the system. 3. Enter your user code if required. ALL? NO YES. 4. Select NO to arm only selected areas. Go to step 5. Select YES to arm all areas authorized for your user code. Go to step 6. 5. If you selected NO in step 4, the display begins to list each area to which you have access followed by NO YES. Example: OFFICE The display reads NO YES 5a. Select YES for each area you want to arm. 5b.
System Disarming Operation While the system is armed, you can only enter the premises through an entry/exit delay door without causing an alarm. After opening the door, the Security Command keypad sounds a prewarn tone to remind you to disarm the system. (See Door Access Disarming below.) You must disarm the system before the entry delay time expires or an alarm on the door zone occurs. During the entry delay time, the keypad displays ENTER CODE:. Enter your code to disarm the system.
Disarming the System from the keypad 1. Press the COMMAND key until ARM DISARM displays. During entry delay this process starts at step 3. 2. Select DISARM to disarm areas. 3. The keypad displays ENTER CODE: . Enter your user code and press COMMAND. The keypad displays ALL? NO YES. 4. Select YES to disarm all areas authorized for your user code. Depending on your system programming, when the schedule expires (the ON time) you can extend the schedule to a later time.
User Menu Many of your system features have been put into a User Menu that you can access from any Security Command keypad. The menu requires you to enter your user code and then it only shows those functions to which you have access. BYPASS ZONES Allows you to Bypass a zone or reset an already bypassed zone. ZONE MONITOR Allows you to add or remove a zone from the monitor mode.
Alarm Silence Sensor Reset Silences the alarm bells or sirens during an alarm. Resets smoke or glassbreak detectors. Also clears Fire/Supervisory alarm and trouble displays. Alarm Silence allows you to turn off the alarm bells and sirens connected to your system during an alarm. Using Alarm Silence does NOT stop an alarm report from being sent to the central station and does not reset any alarmed devices. Use the Sensor Reset function to reset devices such as smoke detectors that have latched in alarm.
Door Access Armed Areas Display Operates an electric door strike from the keypad. Displays all armed area names in the system. Door Access is used to operate the door strike relay that is built into some Security Command keypads. Power for the door strike is connected to the keypad relay and can be interrupted by using the Door Access function. The Armed Areas display lists all of the names of the armed areas in your system at the Security Command keypads.
Outputs On Off Allows you to manually turn the system or door access relay outputs ON and OFF. This function is used to individually turn your system relay and access door outputs ON and OFF. Your system may use these outputs to control door access, interior and exterior lighting, heating, air conditioning, or other appliances. The names and numbers of the relays connected to your system are located in the System Setup section of this guide.
Zone Status 8. Displays a list of armed, bypassed, or alarmed zones. Also allows you to check the status of individual zones. Zone Status can be used to give you a list of zones by category or display the current status of an individual zone number. The four categories are: Below is a list of the zone status displays: At the ZONE NO: - prompt, enter the zone number you want to check and press COMMAND. The zone number and name display followed by the zone status.
Bypass Zones Zone Monitor Allows you to bypass a zone prior to arming. Allows the system to monitor selected disarmed zones (doors, windows, or motion detectors) and display their name at the keypad as they are faulted. This feature could be used to monitor an access door. Bypassing is usually done when a zone cannot be restored to normal. A signiÞcant beneÞt of bypassing a zone is to allow a zone in a faulted or bad condition to be bypassed so arming can occur.
System Status Using the Zone Monitor Function 1. Access the User Menu. Displays the current condition of internal system hardware. 2. Press COMMAND until ZONE MONITOR? displays. 3. Press any Select key. The keypad displays ALL NBR. 4. Select ALL to place all disarmed zones into Zone Monitor. 4a. The keypad displays ALL? ADD RMV. 4b. Select ADD to add all disarmed zones to Zone Monitor. 4c. Select RMV to remove all disarmed zones. 5. Select NBR to enter a speciÞc zone number for zone monitor. 6.
System Test System Test is used to test the battery, alarm bell or siren, and communication to a central station. The System Test function begins automatically as soon as you select it. Using the System Test Function 1. Access the User Menu. 2. Press COMMAND until SYSTEM TEST? displays. 3. The keypad displays SYSTEM PANICS. Press the Select key below SYSTEM. 3.
User ProÞles Add, delete, or change User ProÞles, that deÞne the authority of each user code in the system. Several characteristics deÞne the authority of each User ProÞle within the system. ProÞle Number - Each proÞle may be assigned a unique number from 1 to 99. ProÞle Name - Each proÞle may be assigned a 16-character name. The ProÞle Number is the default name. Area Number - Each proÞle may be assigned speciÞc areas of the system for arming and disarming.
User ProÞles Chart Menu Display 22 Privilege ARM/DIS ALM SLNC SNSR RST DOOR ACS ARM AREA OUTPUTS ZN STATS BYPAS ZN ZONE MON SYS STAT NO NO NO NO NO NO NO NO NO NO YES YES YES YES YES YES YES YES YES YES Arm and Disarm Alarm Silence Sensor Reset Door Access Armed Areas Outputs ON/OFF Zone Status Bypass Zones Zone Monitor System Status SYS TEST PROFILES USR CODE SCHEDULS TIME DIS EVNT SERV REQ FIRE DRILL EXTEND TEMP CODE ANTI PASS ALOW: 1234 NO NO NO NO NO NO NO NO NO NO NO ___ YES YES YES YES YES YE
Deleting User Profiles 1. Access the User Menu. 2. Press COMMAND until USER PROFILES? displays. 3. Press any Select key. The keypad displays ADD DEL CHG. 4. Press the second Select key, under DEL, to delete a user proÞle. 5. At the PROFILE NO: - prompt, enter a proÞle number and press COMMAND. The display changes to DELTD. Note: User codes assigned to deleted proÞles will not function. Changing User Profiles 1. Access the User Menu. 2. Press COMMAND until USER PROFILES? displays. 3.
User Codes 4. This option allows you to add, delete, or change a user code. You may also assign speciÞc User ProÞles to individual users. Press the Select key under ADD or BAT (Batch) to add a new user code. 5. At the USER NUMBER: - prompt, enter a user number and press COMMAND. The display changes to CODE NO: - . 1234 = User Number 34812 = User Code John Smith = User Name 7 ProÞle = Note: Do NOT program a code for user number 1 unless you intend to use the Ambush function. See Ambush. 6.
Browser Feature Refer to Appendix B at the back of this guide for a diagram showing you how to use the User ProÞles Change browser. Deleting User Codes 1. Access the User Menu. 2. Press COMMAND until USER CODES? displays. 3. Press any Select ADD DEL CHG BAT. 4. Press the second Select key, under DEL, to delete a user code from the system. To delete a user code, you must have a user code with a proÞle that has user code authority. key.
Forgive Failure to Exit Ambush Codes Failure to Exit is an Anti-pass back violation in which a user assigned with anti-pass back has attempted to re-enter an area that they did not exit through. Your system may be programmed to allow user number 1 to be used as an Ambush code. This Ambush code functions identically to a standard code with the exception that it sends a silent alarm to the central station.
Schedules Your system provides you with Þve different types of schedules: Schedules are ideal for individual area auto arming and disarming and for creating Opening/Closing windows during which users can access the building or disarm the system. Having separate schedules allows you to create Opening/Closing windows for each day. One could be for normal business activity and another could be for cleaning crews or a second shift. Once programmed, these schedules operate continually until changed.
Setting Shift (S1 S2 S3 S4) Schedules 1. Access the User Menu and press COMMAND until SCHEDULES? displays. Press any Select key. 2. The keypad displays S1 S2 S3 S4. Press the Select key under the shift you want to program. This will allow you to enter a schedule that remains in place until you change or delete it. 5. If Opening and Closing times display, the keypad then displays DELETE KEEP. Press the Select key under DELETE to enter new times. 6.
Setting Output (OUT) and Door (DOOR) Schedules The Schedules function allows you to set up to 100 different scheduled times for relay outputs and door access relays connected to your system to turn ON and OFF automatically. The maximum number of schedules that can be assigned per door access relay or relay output is 8. 1. Access the User Menu. 2. Press COMMAND until SCHEDULES? displays. 3.
Setting Holiday ABC Schedules for S1, S2, S3, S4, OUT, and DOOR Schedules Three Holiday schedules are available for each shift (S1, S2, S3, S4), each output relay (OUT), each door access relay (DOOR), and through their respective menu options. This allows a shift, output, or door to have three different schedules for holidays. For example, Holiday Schedule A for those holidays when the building stays closed, Holiday Schedule B for a day that only opens for a morning, etc.
Setting Holiday Dates (HOL) Setting Holiday Dates provides the system with dates in the year when the normal opening and closing schedules are not used and superseded by one of the Holiday Schedules A or B or C. When the panel determines that it is a holiday, the Holiday Schedule supersede the current schedule for that day. Up to twenty different holiday dates can be entered. 1. After you access the SCHEDULES? menu and the schedule options, S1 S2 S3 S4, display, press the COMMAND key once more.
Setting the Date and Time Display Events Allows you to change the current date and time displayed on the Security Command keypad and used by the system. Allows you to review up to 12,000 past door access and system events. There are six event types: Setting the System’s Date and Time 1. Access the User Menu. Zone Activity - Zone alarms, troubles, and restorals. 2. Press COMMAND until TIME? displays. Press any Select key. 3. The keypad displays the current day and time. Press the COMMAND key.
Using the Display Events 1. Access the User Menu. 7. 2. Press the COMMAND key until DISPLAY EVENTS? displays. Press any Select key. 3. The keypad displays FRST LST PRT SRT. Select FRST (Þrst) to view the oldest to newest events. Select LST (last) to view the newest to oldest events. If you select FIRST, use the COMMAND key to scroll up through the events. If you select LAST, use the Back Arrow key to scroll down through the events. 4.
Service Request Fire Drill Your user code proÞle may be programmed for Service Request. This User Menu feature allows you to simply press any top row Select key when SERVICE REQUEST? displays and have the system automatically send a “Request for Service” message to the central station. The display changes momentarily to REQUEST MADE to conÞrm your request was sent. Fire Drill is used to test the Þre bells or Þre horns in your system.
System Setup Record System Setup Security Command Keypad Record We have provided this System Setup section to allow you to track the current and future status of the programmable options on your Security Command system. If you make changes to the system, you should update the information contained on these pages. Your system is monitored by a central station.
Which keypads display System Status? !1 !2 !3 !4 Which keypads provide Door Access reports? !1 !2 !3 !4 !5 !6 !7 !8 !5 !6 !7 !8 !9 ! 10 ! 11 ! 12 !9 ! 10 ! 11 ! 12 ! 13 ! 14 ! 15 ! 16 ! 13 ! 14 ! 15 ! 16 ! N/A ! N/A Which keypads display Armed Status? !1 !2 !3 !4 !5 !6 !7 !8 !9 ! 10 ! 11 ! 12 ! 13 ! 14 ! 15 ! 16 36 ! N/A XR500 User’s Guide System Setup
Area Names and Numbers Record Your system may be divided into 32 separate areas, each area can have a name or description that displays at the keypad. This can help you easily track events when and wherever they occur in your system.
ProÞle # 38 ProÞle Name Arm/Disarm Area Access Area Output Group XR500 User’s Guide Shift/Time Access Anti-passback Temp User Code Extend Schedules Fire Drill Service Request Display Events Time Schedules User Codes User ProÞles System Test System Status Zone Monitor Bypass Zones Zone Status Outputs On/Off Armed Area Door Access Sensor Reset Alarm Silence Arm/Disarm User ProÞles Record 1234A 1234A 1234A 1234A 1234A 1234A 1234A 1234A 1234A 1234A 1234A 1234A 1234A 1234A 1234A 1234A 1
User Codes Record As you add new users or change current user codes, you can keep track of their proÞle number in the system. Use the following table to track custom user codes in your system.
Schedules Record Schedule S1 S2 S3 S4 Area # S1 S2 S3 S4 Area # S1 S2 S3 S4 Area # S1 S2 S3 S4 Area # S1 S2 S3 S4 Area # S1 S2 S3 S4 Area # S1 S2 S3 S4 Area # S1 S2 S3 S4 Area # S1 S2 S3 S4 Area # Door# Output # Door# Output # Door# Output # Door# Output # 40 Area Name Status SUN MON TUE WED THU FRI SAT Open Close Open Close Open Close Open Close Open Close Open Close Open Close Open Close Open Close Open Close Open Close Open Close Open Close : : : : : : : : : : : : : : : : : : : : : : : : : :
Holiday Date Record Your system has up to 20 holiday dates available that supersede all regular scheduled times for that day. # 1. Date (mm/dd) HOL (circle one) _____/_____ A or B or C Output Relay Record Your system has ____ output relays that are used to control various functions within the building or access around its perimeter. Below is a list of the devices they control.
About the Display Events Section Appendix A Zone Event Displays This section of the User’s Guide shows the Display Events items for 32-character keypad displays. While in the Display Events function, use the COMMAND and Back Arrow keys to go forward or backward through the list of events. To view more information about each display, press the Select key as directed in the explanations below. Arming and Disarming Event Displays This displays any system area arming or disarming events.
User Code Change Event Displays System Monitor Event Displays This displays any addition, deletion, or change to a user code. This displays any problems with the system AC power, battery, or phone line(s), or any opening of a tampered panel box. 32-Character Display ADD U:19 11:41A 10/ 17 BY U:12 Description User 19 added by user 12 at 11:41 AM. Press the Select key under either user (US:) number for the user name.
Door Access Event Displays Schedule Change Event Displays This displays the keypad address where a Door Access occurred and the user number of the person granted access. This displays Changes made to the system schedules. 32-Character Display ACC 3 5:18P 10/ 17 USER:024 Description Door (keypad) #3 was accessed by user 24 at 5:18 PM on Oct. 17. Press the Þrst Select key to display the Door name where the access occurred. Press the second Select key to display the reason access was denied.
Zone Bypass Event Displays This displays zone bypass events. 32-Character Display BYP 5:18P 10/ 17 EAST WINDOW Description The east window zone was bypassed. Press a Select key for the zone number and user number. Press again for the user name. Bypass Event Types - There are three event types: BYP - Bypass RST - Restore FRC - Force Arm Note: You may sometimes see the user as SWG. This is short for Swinger Bypass which is an automatic function that allows the system to automatically bypass a zone.
Appendix B Zone Status Browser Access the User Menu. Press COMMAND until ZONE STATUS appears. ZONE STATUS? Press any SELECT key then press the SELECT key under NBR. ARM BYPS ALR NBR Press one of the left two SELECT keys to browse through the names of zones. Bypass Zones Browser Access the User Menu. Press COMMAND until BYPASS ZONES appears. Press any SELECT key. Press either of the two left SELECT keys. ZONE NO: - SELECT AREA . . . COMMAN D This prompt allows you to search for a zone by area.
Zone Monitor Browser ZONE MONITOR? ZONE: - Add User Codes Browser Access the User Menu. Press COMMAND until ZONE MONITOR? displays. Press any SELECT key. Access the User Menu. Press COMMAND until USER CODES? displays. USER CODES? Press the SELECT key ADD DEL CHG under ADD. ALL NBR Press the SELECT key under NBR. ADD RMV Press either of the two left SELECT keys. At this prompt, you can enter a new user number or scroll through the available user numbers. USER NUMBER: - Enter a new user number.
Delete User Codes Browser USER CODES? Change User Codes Browser Access the User Menu. Press the COMMAND key until USER CODES? displays. USER CODES? Press the SELECT key ADD DEL CHG under DEL. USER NUMBER: - Press the SELECT key under CHG. At this prompt, you can enter a user number or scroll through the list of user names. ADD DEL CHG USER NUMBER: - View current user names. Enter a user number. USER NUMBER: 12 1 2 3 Enter a user number. USER NUMBER: 12 1 4 2 3 4 COMMAND Press COMMAND.
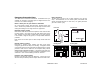
Entering User Names - 1 To enter a custom name into the keypad, you'll be using the 3 rows of number keys. { 1 2 3 5 6 7 9 0 4 8 COMMAN D 1 2 Once you've cleared the default name, the display shows just a dash on the left side. 3 A BC With the number displayed, press the SELECT key that matches the position of the letter. See example. 1 Under each number key are three letters. To enter a custom name, press the number key above the letter you want to enter.
Easy Entry™ User’s Guide Appendix C DOOR STRIKE From the Status List, present your card to the reader. Once validated by the system, the Door Strike relay activates. If you are entering an armed area to which you are assigned, accessing the area automatically causes it to be disarmed. While the keypad is in the Status List, present your access card. The relay activates momentarily during which you must open the door.
Frequently asked questions This section attempts to answer questions you might have regarding Security Command system operation. Q. If I bypass an exit delay door when I arm the system, will I get an alarm if I come through it later? A. You will not get an alarm from the door because it is bypassed, but if you happen to walk through a motion detector space or other armed door inside the premises an alarm activates. Q. When I arm or disarm my Area system, ALL? NO YES displays.
Common Keypad Displays Listed below are several keypad messages you may see on the display. Follow the instructions in the Possible Solutions column to correct the problem. In many cases, you will need to call a service person to correct the problem. Displays that are not discussed here mean that your service representative should be called. Message Meaning Invalid Area The user has attempted a door access for an area they are not assigned. Change the user access areas if access to the area is needed.
Index Symbols 2-Button Panic Keys 3 A Alarm Silence 14 Ambush Codes 26 Anti-Pass Back 6 AREA LATE! 27 Area Names and Numbers Record 37 Armed Areas Display 15 Arming 9 B Browser Add User Codes 47 Bypass Zones 46 Change User Codes 48 Delete User Codes 48 Entering User Names 49 Zone Monitor 47 Zone Status 46 C F CLOSING TIME! 27 Common Keypad Displays 54 Failure to Exit 26 False Alarms 1 Fire Drill 34 Forgive Failure to Exit 26 Frequently asked questions 53 D Date and Time 32 Disarming 11 Display Event
P S T Pager Direct™ User’s Guide 51 ProÞles 21 Schedules 27 TEMP CODE 23 Adding 21 Changing 23 Deleting 23 Name 21 Number 21 Extending Schedules 7, 31 Extend (EXT) 27 Holiday (HOL) 27 Output (OUT) 27 Setting Holiday ABC Schedules 30 Setting Output and Door Schedules 29 Setting Shift Schedules 28 Shift (S1, S2, S3, S4) 27 Schedules Record 40 Security Command Keypad 1, 3 Security Command Keypad Record 35 Sensor Reset 14 Service Request 34 Status List 8 System Setup Record 35 System Status 19 System Te
This page has been intentionally left blank.
LT-0683 (11/03)