
User Manual


Rev. 20190228A
To Contents 7 of 23
Options for User Mode
The following headings describe enabling options and features requiring only a User PIN.
For Administration options see Options for Admin Mode on page 11.
This Section:
• Enabling Read-Only in User Mode
• Enabling Read/Write in User Mode
• Setting the Timeout Lock in User Mode
• Disabling the Timeout Lock in User
Mode
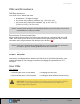
Procedures that end with these LEDs [ ], will eventually change to .
NOTE: All procedures require the Drive to be connected to a computer with the USB
cable.
NOTE: Each step in all procedures listed below have a ten second window to perform the
next step. In general, a blinking LED times out after ten seconds.
ENABLING READ-ONLY IN USER MODE
The User is able to write content to the Drive and then restrict access to read-only (R-O).
Once R-O Mode is activated, access is limited to reading only, until Read/Write is
enabled which can be accomplished by a User (or an Administrator, described in the
Admin section).
Setting to Read-Only does not unlock the drive.
1. With the Drive locked, press [ ]
2. Enter your User PIN. [ ]
3. Press [ ]
4. Wait for , then press [ ]
5. Press 7,6 (R,O for Read-Only) [ ]
6. Press [ ]
If successful, the next time the Drive is unlocked it will be in R-O Mode as indicated by
the slow blinking green LED (as well as messages provided by your computer when you
try to save or delete a file).
ENABLING READ/WRITE IN USER MODE
Read-Only (Write Restriction) can be turned off restoring Read and Write access. Note
that setting the drive to R-W does not unlock the drive.
1. With the Drive locked, press [ ]
2. Enter your User PIN. [ ]
3. Press [ ]
4. Wait for , then press [ ]
5. Press 7,9 (R,W for Read/Write) [ ]
6. Press [ ]