
User's Manual
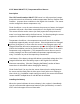
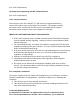

To install the battery, do the following:
1. Carefully remove the top cover from the base by
pressing on the end release button (see Figure 1)
and then remove the cover.
2. Remove the depleted battery and dispose of the
battery as required by local laws. (Disregard this step
for new system installation.)
3. Insert the replacement battery with the + sign facing
towards the middle of the sensor. (The side with the
spring is the – side of the battery.)
4. Replace the top cover.
5. Verify programming and RF communication with the
Digital Life Controller.
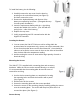
Locating the Sensor
1. You can mount the SW-ATT-SW on a wall or ceiling within the
protected area for temperature only, sensor can only be mounted 4 foot
or less from the probe when used for flood detection. Care should be
taken not to locate the sensor near air ducts as the effect of the airflow
from the duct affect the temperature reading.
2. Avoid mounting the sensor in areas with a large quantity of metal or
electrical wiring.
Mounting the Sensor
The SW-ATT-TF is supplied with a mounting plate and accessory
hardware. While the sensor can be mounted directly to a surface,
it is recommended that the mounting plate be used for ease of
removal for servicing.
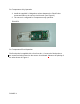
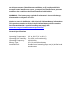
1. Use the device mounting plate as a template for locating
the mounting holes and mark the locations with a pencil
(See Figure 2).
2. Drill the holes for the screws
3. Secure the mounting plate with the screws provided.
4. Secure the sensor to the mounting plate by carefully guiding the sensor
over the mounting plate. The sensor will snap into place when it is
secured into place (See Figure 2)
Sensor Set-up