
User's Manual
AT&T. All Rights Reserved. 4 P/N 0000 – Rev. A – 10 Oct 11
1. Wait at least 10 minutes after installation to test the
CO Alarm.
2. Make sure the green Power LED is flashing for
normal operation.
3. Set the control panel to sensor test mode.
4. Press and hold the Test/Hush button until the unit
beeps three times (approximately 10 seconds), and
then release the button. The unit will enter the
functional gas test mode. The Power LED will blink
once per second while in functional test mode.
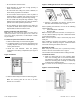
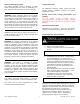
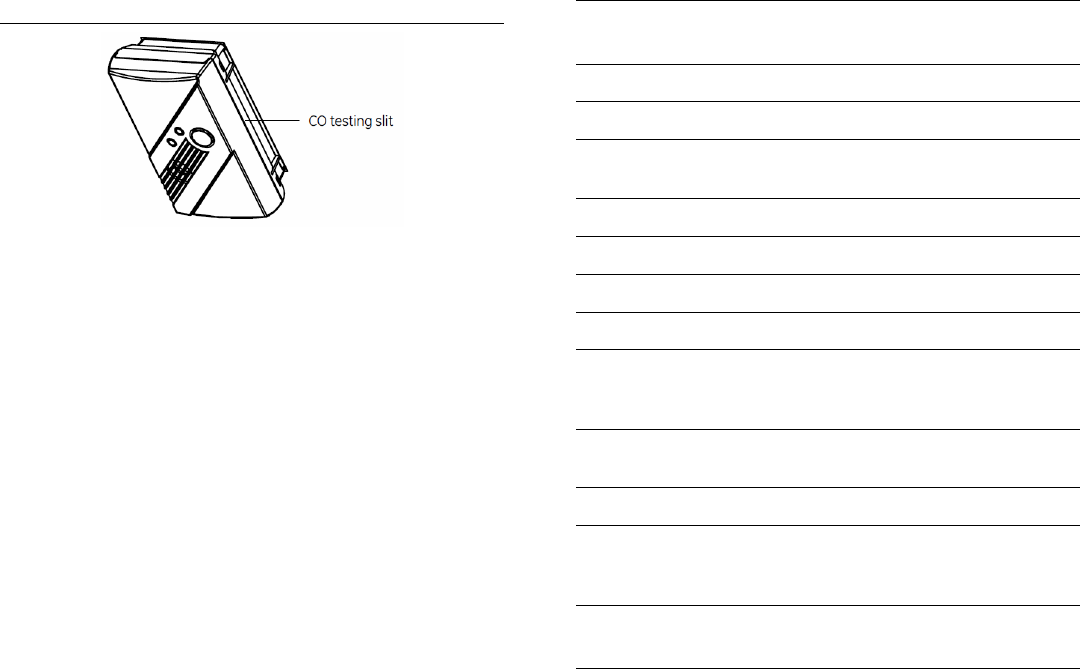
5. Apply UL approved CO test agent to the slit as
shown in Figure 7 below. When CO is detected, the
unit will activate a CO Alarm. The unit will send RF
test packets to the control panel when the CO
Alarm is activated.
Figure 7: CO testing slit
6. The control panel will beep and display the number
of RF packets received.
7. At the control panel, exit sensor test mode.
8. Exit functional gas test mode:
9. Press and release the Test/Hush button; or A 2
minute timeout will automatically cause the CO to
return to normal operating mode.
Troubleshooting
This information is provided to help you diagnose and
solve various problems that may arise while configuring
or using the wireless CO Alarm.
Unit does not power up properly or reports low
battery:
• Make sure the batteries are fully seated within the
battery compartment and the polarity is correct.
• Make sure that all three batteries are installed.
• Check the battery voltage (1.5 VDC nominal per
battery).
Control panel does not respond:
• Use the 60-401 RF Sniffer to make sure the CO
Alarm is sending messages for activation.
• Move or rotate the CO Alarm position.
• Make sure the CO Alarm is properly enrolled into the
control panel.
• Make sure that you are using a compatible control
panel (see “Specifications” below).
Tamper condition does not restore:
• Make sure the CO Alarm body is properly installed
on the mounting plate.
• Make sure there are no trouble indications at the CO
Alarm.
• Make sure that you are using a compatible control
panel (see “Specifications” below).
If a tamper alarm occurs:
• Make sure that you are using a compatible control
panel (see “Specifications” below).
• Make sure that the control panel is in sensor test
mode during sensor testing.
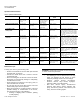
Specifications
Compatible Panels Digital Life Controller
SKU #: RTL.69237
Power Three (3) AA batteries
Battery Type 1.5 VDC Alkaline
Required Batteries Duracell MN 1500, Duracell MX 1500
Energizer E91
Sensor Life 7 years
Frequency 433 Mhz
Supervisory Interval 64 minutes
Audible Alarm Temporal 4
Alarm Response times 70 PPM = 60-240 min.
150 PPM = 10-50 min.
400 PPM = 4-15 min.
Dimensions 4.68 x 2.75 x 1.85 in. (119 x 70 x 47
mm)
Storage Temperature - 4 to 140
o
F (- 20 to 60
o
C)
Operating Environment
Temperature 40 to 100
o
F (4.4 to 37.8
o
C)
Relative Humidity 10 to 95% non-condensing
Regulatory Information
ETL Rating ANSI/UL 2034
FCC Compliance
The device complies with part 15 of the FCC Rules devices as well as
Industry Canada Rules and Regulations licence-exempt RSS
standard(s). Operation is subject to the following two conditions: (1)
This device may not cause harmful interference, and (2) this device
must accept any interference received, including interference that may
cause undesired operation. Changes or modifications not expressly
approved by the party responsible for compliance could void the user’s
authority to operate the equipment.
Conformité Réglementaire
Ce dispositif est conforme à la réglementation de la IC et (Partie 15) de la
FCC. Son fonctionnement est soumis à deux conditions : (1) ce dispositif ne
doit pas causer d’interférences nuisibles, et (2) ce dispositif doit accepter
toute interférence reçue, y compris les interférences pouvant entraîner des
conditions de fonctionnement indésirables.