
User's Manual
AT&T. All Rights Reserved. 2 P/N 0000 – Rev. A – 10 Oct 11
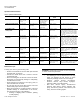
• Do not install on metal surfaces.
• Avoid mounting in areas with a large quantity of
metal or electrical wires.
• Do not install near ceiling fans, doors, windows, or
areas directly exposed to the weather.
• Do not install in dead air spaces, such as peaks of
vaulted ceilings or gabled roofs, where CO may not
reach the sensor in time to provide early warning.
• Do not install near deep-cell large batteries. Large
batteries have emissions that can cause the alarm to
perform at less than optimum performance.
• Do not obstruct the vents located on the alarm. Do
not place the alarm where drapes, furniture, or other
objects block the flow of air to the vents.
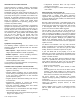
Battery installation and replacement
Note: Place the control panel into sensor test mode prior to
replacing the batteries. If the control panel is not in sensor test
mode during battery replacement, an alarm/tamper condition
may be indicated.
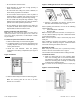
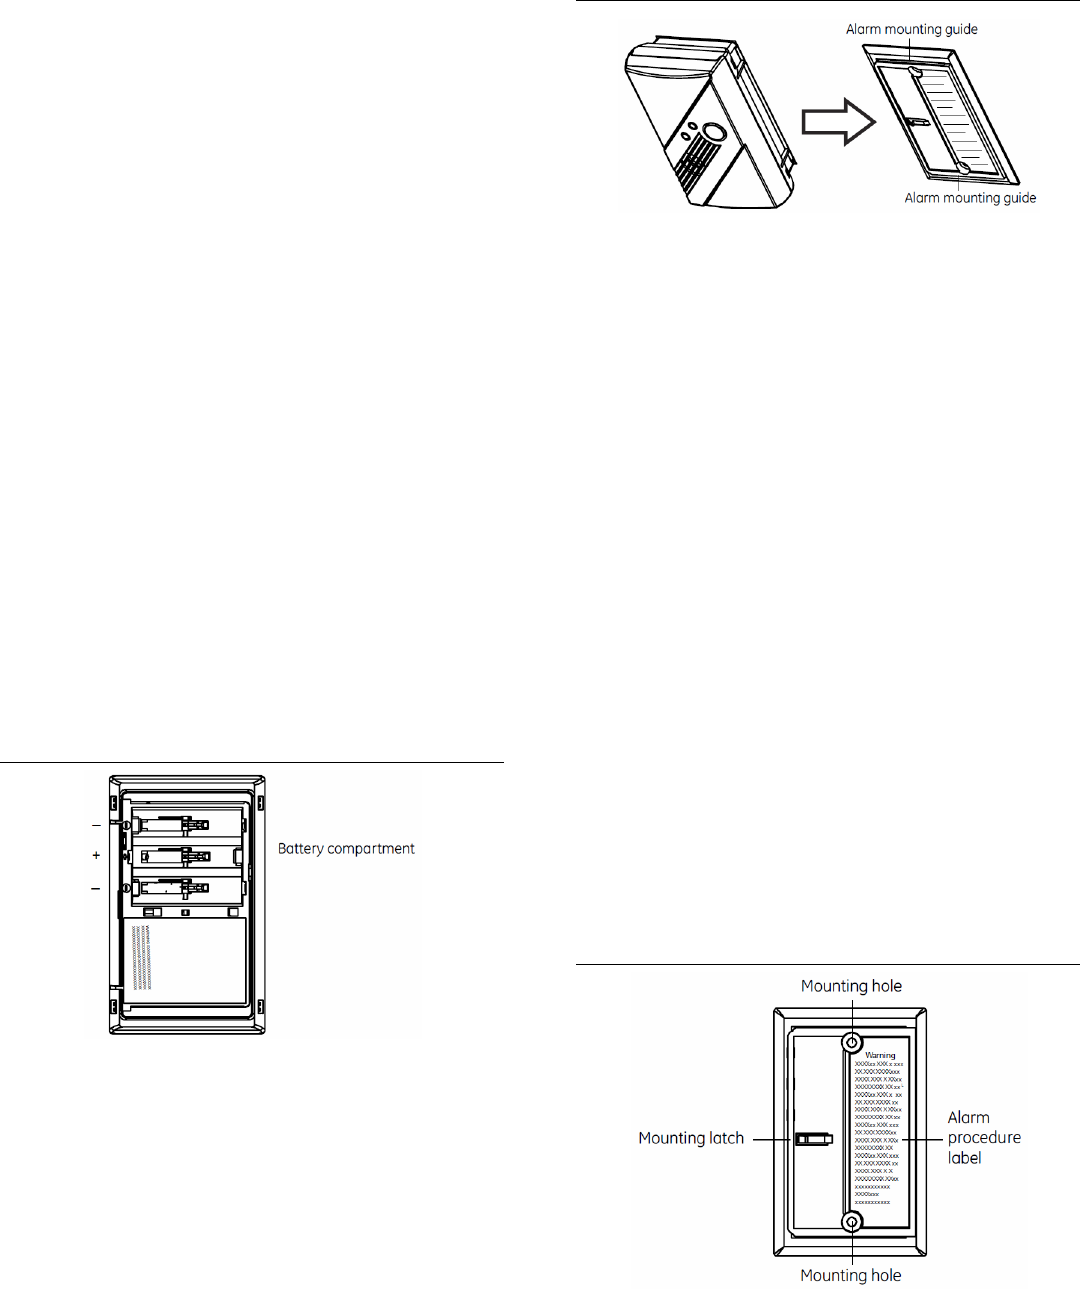
To install or replace the batteries in this alarm:
1. Slide the alarm body off of the mounting plate.
2. If replacing batteries, remove the old batteries and
properly dispose of them as recommended by the
battery manufacturer.
3. Install the new batteries. Note the polarity
illustration in the battery compartment (see Figure 3
below).
Figure 3: Batteries
4. Slide the alarm body back onto the mounting plate.
Note: The mounting plate will not close if all three
batteries are not installed.
Figure 4: Sliding the alarm on the mounting plate
5. Perform a sensor/RF test with the control panel.
See “RF communication test” on page 3
When replacing the batteries, use one of the following
approved brands:
• Duracell MN1500 or MX1500
• Energizer E91
Note: For battery replacement information, see interlogix.com.
Use of a different battery may have a detrimental effect
on the alarm operation.
Note: Constant exposures to high or low humidity may reduce
battery life.
After installing or changing the batteries, reinstall your
alarm. Test your alarm by using the Test/Hush button
and check that the green Power LED is on.
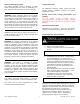
Mounting the alarm
Note: Verify RF performance prior to permanently mounting
the alarm. See “RF communication test” on page 3.
The CO Alarm can be wall mounted or ceiling mounted.
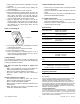
To mount the alarm:
1. Slide the alarm body off of the mounting plate.
Place the mounting plate in the desired location,
and mark the location of the two mounting holes.
Orient the mounting plate vertically or horizontally
as shown in the following figures.
Note: The alarm can also be directly mounted to a single gang
box.
Figure 5: Vertical mounting