USER’S GUIDE Webwasher SSL Scanner Version 6.5 www.securecomputing.
Part Number: 86-0946643-A All Rights Reserved, Published and Printed in Germany ©2007 Secure Computing Corporation. This document may not, in whole or in part, be copied, photocopied, reproduced, translated, or reduced to any electronic medium or machine-readable form without prior consent in writing from Secure Computing Corporation. Every effort has been made to ensure the accuracy of this manual.
Contents Chapter 1 1.1 1.2 1.3 1.3.1 1.3.2 1.3.3 1.4 1.4.1 1.4.2 1.5 Chapter 2 2.1 2.2 2.2.1 2.2.2 2.2.3 2.3 2.3.1 2.4 2.4.1 2.5 2.5.1 2.5.2 2.5.3 2.6 2.6.1 2.6.2 2.6.3 2.7 2.7.1 2.8 2.8.1 2.8.2 Chapter 3 3.1 3.2 3.2.1 3.3 3.3.1 3.3.2 3.3.3 ....................................................................................... About This Guide ........................................................................... What Else Will You Find in This Introduction? ......................................
User’s Guide 3.4 3.4.1 Document Inspector ....................................................................... Document Inspector ....................................................................... 3–19 3–20 3.5 3.5.1 Archive Handler ............................................................................. Archive Handler ............................................................................. 3–26 3–27 3.6 3.6.1 Generic Header Filter .................................................
Chapter 1 Introduction Welcome to the User’s Guide Webwasher® SSL Scanner. It provides you with the information needed to configure and use the Webwasher SSL Scanner, which is one of the Web Gateway Security products developed by Secure Computing. The Webwasher SSL Scanner enables you to extend your existing Web usage and security policies to the HTTPS protocol and to prevent certificate misuse.
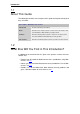
Introduction 1.1 About This Guide The following overview lists the chapters of this guide and explains briefly what they are about: User’s Guide – Webwasher SSL Scanner Introduction Provides introductory information. Home Describes basic features that are common to the SSL Scanner and other Webwasher Web Gateway Security products. Common Describes filtering features that are common to the SSL Scanner and other Webwasher Web Gateway Security products.
Introduction 1.3 Using Webwasher A user-friendly, task-oriented Web interface has been designed for handling the Webwasher features. It looks like this: The following sections provide some information to make you familiar with this interface. These sections: • List the first level tabs of this interface and explain their meanings, see 1.3.1. • Describe a sample procedure showing how a setting is configured for a Webwasher feature, see 1.3.2.
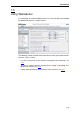
Introduction 1.3.1 First Level Tabs The Web interface displays a number of tabs and sections for configuring the Webwasher features. On the topmost level, there are these ten tabs: • Home, Common, URL Filter, Anti Malware, Anti Spam, SSL Scanner, User Management, Reporting, Proxies, and Configuration Their meaning is as follows: Home, Common – These tabs are for configuring basic and filtering features that are used not only by the SSL Scanner, but also by other Webwasher Web Gateway Security products.
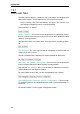
Introduction 1.3.2 Configuring a Sample Setting This section explains how to configure a sample setting of a Webwasher feature. The feature chosen here for explanation is the Animation Filter. In order to avoid the download of bandwidth-consuming animated images, this filter detects and modifies or removes them. For this sample setting, just suppose you want to enable the filter and let it remove any such images from the filtered objects.
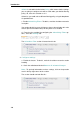
Introduction default is selected in the line below Policy, which means that the settings you are going to configure now will be valid under your default filtering policy. So, leave this selection as it is. Otherwise, you could select a different filtering policy, using the drop-down list provided here. c. Enable Advertising Filters. To do this, mark the checkbox next to the inscription.
Introduction 3. Make settings effective Click on the Apply Changes button: This completes the sample configuration. 1.3.3 General Features of the Web Interface This section explains more about the features that are provided in the Web interface for solving general tasks, e. g. applying changes to the Webwasher settings or searching for a term on the tabs of the interface.
Introduction Clicking on this arrow will display a button, which you can use to apply changes to all policies. After clicking on this button, your modifications will be valid for settings of all policies. When you are attempting to leave a tab after modifying its settings, but without clicking on Apply Changes, an alert is displayed to remind you to save your changes: Answer the alert by clicking Yes or No according to what you intend to do about your changes.
Introduction The click history is only recorded for the current session, i. e. until you log out. After logging in for a new session, the recording of tabs and paths will start all over again. Information Update Some parts of the information that is provided on the tabs of the Web interface will change from time to time. In these cases, the information display is updated automatically every three seconds by Webwasher. So, e. g. you might have performed a manual update of the anti-virus engines.
Introduction Search A Search input field and button are located in the top right corner of the Web interface area.
Introduction After modifying the interval specified there, click on Apply Changes to make the modification effective. When a session has timed out, the following notification is displayed: Click OK to acknowledge the notification. After clicking on a tab or button of the Web interface, the login window opens, where you can login again and start a new session. System Information At the top of the Web interface area, system information is provided on the current Webwasher session.
Introduction The following is provided in this section for the Webwasher Web Gateway Security products: • An overview of the documents on the main products, see 1.4.1 • An overview of the documents on products for special tasks and environments, see 1.4.2 1.4.1 Documentation on Main Products This section introduces the user documentation on the main Webwasher Web Gateway Security products.
Introduction 1.4.2 Documentation on Special Products This section introduces the user documentation on the Webwasher Web Gateway Security products for special tasks and environments. Document Group Document Name What about? Content Reporter Documents Content Reporter Installation and Configuration Guide Installing and configuring the Webwasher Content Reporter, which is done separately from the main products. Content Reporter User’s Guide for Reporting Creating reports.
Introduction 1.5 The Webwasher Web Gateway Security Products The Webwasher Web Gateway Security products provide an optimal solution for all your needs in the field of Web gateway security. They are unique in that they offer best-of-breed security solutions for individual threats and at the same time a fully integrated architecture that affords in-depth security and cost/time savings through inter-operability. A brief description of these products is given in the following.
Introduction These two products have their own user interfaces, which are described in the corresponding documents: Webwasher® Content Reporter Features a library of rich, customizable reports based on built-in cache, streaming media, e-mail activity, Internet access and content filtering queries, all supported by unmatched convenience and performance features.
Chapter 2 Home The features that are described in this chapter are accessible over the Home tab of the Web interface: These are basic features that are common to the SSL Scanner and other Webwasher products, e. g. system alerts, contacting the support, licensing features, etc. The upcoming sections describe how to handle these features. The description begins with an overview.
Home 2.1 Overview The following overview shows the sections that are in this chapter: User’s Guide – Webwasher SSL Scanner Introduction Home Overview – this section Dashboard, see 2.2 Overview (Feature), see 2.3 Support, see 2.4 TrustedSource, see 2.5 Manuals, see 2.6 Preferences, see 2.7 License, see 2.8 Common SSL Scanner 2.
Home The dashboard provides the following tabs: They are described in the upcoming sections: • Executive Summary, see 2.2.1 • Traffic Volume, see 2.2.2 • System, see 2.2.3 Before this is done, however, the following subsection provides some general information on the dashboard. Handling the Dashboard The dashboard allows you to view summary information on a number of Webwasher and system parameters at a glance. This information is in most cases displayed with regard to a particular time interval, e. g.
Home On the right side of a section, parameter values are shown as they developed in time, using either a line or a stacked mode, see also further below: More information about the values that are measured and displayed is provided in the upcoming sections. The following activities can be performed for most of the dashboard values: • Selecting categories You can select the categories you want to have values displayed for with regard to a particular parameter.
Home Note that the color of a category in the selection list is also used when the category is displayed in proportion to other categories by means of a pie chart. Furthermore, this color is used to represent the category in stacked or line mode: There is a limit to the display of some parameters. There may be values in more than six categories for these parameters, but only six categories and their values are shown at the same time. By default, these are the categories with the top six values.
Home Since only the categories are shown that yielded the top six values or the categories you selected on your own, values that may have occurred in other categories are ignored here. To get a representation of the total amount of values, you need to select Others as a category: The values for five selected categories will then be shown, together with Others, which means that actually all categories and their values are covered.
Home • Selecting stacked or line mode You can have parameter values displayed in stacked or line mode: — In line mode, lines are displayed to represent the development of values within a given time interval: — In stacked mode, filled-out areas are displayed to represent the development of values within a given time interval, but with value areas “stacked” one on top of the other.
Home 2.2.1 Executive Summary The Executive Summary tab looks like this: There are three sections on this tab: • URL Executive Summary • Mail Executive Summary • Number of Feedbacks Sent They are described in the following.
Home URL Executive Summary The URL Executive Summary section displays the number of URLs that were processed by the Webwasher filters within a given time interval and either passed without restrictions or were blocked by one of these filters. Values are shown for the following action categories: • Good This category is for URLs that passed the Webwasher filters without any restrictions.
Home • Spam level low This category is for e-mails that were classified as low-level spam. Number of Feedbacks Sent The Number of Feedbacks Sent section displays the number of feedbacks that were sent to Webwasher by customers within a given time interval. Customers can send these feedbacks using the link provided in the URL Filter Database Feedback section on the Feedback tab under Home > TrustedSource.
Home 2.2.2 Traffic Volume The Traffic Volume tab looks like this: There are two sections on this tab: • Traffic Volume per Policy • Traffic Volume per Protocol They are described in the following. Traffic Volume per Policy The Traffic Volume per Policy section displays the traffic volume (in bytes, see also the Prefix List at the end of this subsection) for the various policies that have been configured under Webwasher. These may be the default policies, but also policies that you have set up yourself.
Home • Emergency Prefix List The list below shows the prefixes that are used for multiples of bytes, with byte values calculated in binary mode, to measure and display, e. g. traffic volumes. It also shows the use of these prefixes with regard to multiples of 10 to measure and display other values, e. g. numbers of hits.
Home 2.2.3 System The System tab is shown here in two parts because of its size.
Home The lower part looks like this: There are seven sections on this tab: • Update Status • Open Ports • CPU Utilization • Memory Usage • Swap Utilization • Filesystem Utilization • Network Utilization They are described in the following.
Home Update Status The Update Status section displays the status of several Webwasher filtering features, e. g. SmartFilter, Secure Anti Malware, etc., which can be updated to ensure that the latest filtering rules, methods, signatures, etc. are used by Webwasher.
Home CPU Utilization The CPU Utilization (All CPUs) section shows to what extent the CPUs of the system Webwasher is running on have been used. within a given time interval.
Home • Used Amount of swap memory that was used Filesystem Utilization (Used Capacity) The Filesystem (Used Capacity) section displays the percentages of used memory on the file systems where the various Webwasher folders reside. Memory values are shown as they occurred within a given time interval.
Home 2.
Home 2.3.1 Overview (Feature) The Overview tab looks like this: There are four sections on this tab: • System Alerts • System Summary • One-Click Lockdown • Version Information They are described in the following.
Home System Alerts The System Alerts section looks like this: This section displays alerts to make you aware of any problems concerning the system status. The function underlying these alerts is also known as “Security Configurator”. To the left of each alert text, a field in red, orange, or yellow color indicates the relative importance of the alert. To the right of each alert text, a link is displayed.
Home System Summary The System Summary section looks like this: This section displays information on the system status. Information is provided on the user who is currently logged in and on the anti virus engines that are installed showing also their current versions. Furthermore, the last updates of the databases containing the rules for filtering URLs, viruses and spam are displayed, as well as the version of the certificate revocation list. Clicking on the links that are provided here, e. g.
Home To enable the emergency mode: • Click on the Activate emergency mode button. This button is a toggle switch. After enabling the emergency mode, the inscription on it will read Back to normal mode. To disable the emergency mode: • Click on the Back to normal mode button. When the emergency mode is enabled, there is also an alert in the System Alerts section of this tab to remind you it is enabled: It is recommended to turn the emergency mode off when it is no longer needed.
Home 2.4 Support The Support options are invoked by clicking on the corresponding button under Home: The options are arranged under the following tab: They are described in the upcoming section: • Support, see 2.4.1 2.4.1 Support The Support tab looks like this: There is one section on this tab: • Assistance It is described in the following.
Home Assistance The Assistance section provides a link to contact the Secure Computing technical support team. A click on this link takes you to the Welcome Page of this team. Please read the information on this page and complete the activities described there in order to get the support you require. 2.
Home 2.5.1 TrustedSource The TrustedSource tab looks like this: There are four sections on this tab: • Spam False Positives Feedback Queue • Spam False Negatives Feedback Queue • Malware Feedback Queue • URL Feedback They are described in the following. Spam False Positives Feedback Queue The Spam False Positives Feedback Queue section looks like this: Using this section, you can configure the sending of feedback in order to improve the spam filter.
Home E-mails that were released from a queue after receiving a digest e-mail will be copied to the false positives queue and sent from there to Secure Computing. This feature is not enabled by default. If you would like to help improve the spam filter, please mark the checkbox next to the section heading. After specifying this setting and other settings in this section, click on Apply Changes to make these settings effective.
Home Spam False Negatives Feedback Queue The Spam False Negatives Feedback Queue section looks like this: Using this section, you can configure the sending of feedback in order to improve the spam filter. You can send e-mails that have erroneously not been classified as spam to an address that is configured in this section.
Home E-mails can be sent manually, however, using the Queue Management page, which is launched after clicking on the See Content of Queue link next to the drop-down list. On this page, click on the button labeled Send All to SecureLabs now to send the e-mails. • E-mail address In this input field, enter an e-mail address. All e-mails received by Webwasher containing this address will be moved to the queue specified above. The default address is FalseNegativesFeedback@WillBeCaughtByWebwasher.com.
Home The queue should be used for no other purpose than that of collecting malware since it will be cleared after e-mails and downloads have been sent off. To see the e-mails that are in this queue, click on the See Content of Queue link next to the drop-down list. • Send interval in . . . minutes In the input field provided here, enter a time interval (in minutes) to specify the time that is to elapse between sending e-mails. The default interval is 240 minutes.
Home Use the following item to configure the URL feedback: • Send interval in . . . minutes In the input field provided here, enter a time interval (in minutes) to specify the time that is to elapse between sending e-mails. The default interval is 240 minutes. Entering 0 here means that no e-mails will be sent automatically. E-mails can be sent manually, however, using the Queue Management page, which is launched after clicking on the See Content of Queue link next to the drop-down list.
Home Malware Feedback Media Type Black List The Malware Feedback Media Type Black List section looks like this: Using this section, you can add a media type to the Media Type Black List for malware feedback. Objects belonging to the media types on this list will not be entered in the malware feedback queue. To add a media type to the black list, use the area labeled: • Select media type from catalog Select the media type you want to have blacklisted from the drop-down list provided here, e. g.
Home To sort the list in ascending or descending order, click on the symbol next to the Media Type or Description column heading. To edit an entry, type the appropriate text in the input field of the Description column and enable or disable the following options: • Ignore in media type filter If this option is enabled the media type in question will be ignored when the Media Type Filter is applied to Web and e-mail downloads.
Home 2.5.3 Feedback The Feedback tab looks like this: There are two sections on this tab: • Feedback E-Mail Address • URL Filter Database Feedback They are described in the following. Feedback E-Mail Address The Feedback E-Mail Address section looks like this: Using this section, you can send feedback concerning the Webwasher products to Secure Computing. To send your feedback, click on the features@securecomputing.com link provided in this section.
Home URL Filter Database Feedback The URL Filter Database Feedback section looks like this: Using this section, you can submit uncategorized or incorrectly categorized URLs to Secure Computing. To do this, click on the URL Filter Database feedback link provided in this section. This will launch the login page for accessing the Webwasher Extranet. After successfully logging in there, a Welcome Page is displayed. On this page, click on the option labeled Feedback system for URL Filter categorization.
Home 2.6.1 Documentation on Main Products The Documentation on Main Products tab looks like this: There are three sections on this tab: • General Documents • Product Documents • Reference Document They are described in the following. General Documents The General Documents section looks like this: This section allows you to view user documentation on planning, installing and configuring Webwasher in general.
Home To view any of the documents listed here, click on the PDF link in the same line. This will open a .pdf format version of the document. Product Documents The Product Documents section looks like this: This section allows you to view user documentation on individual Webwasher products. To view any of the documents listed here, click on the PDF link in the same line. This will open a .pdf format version of the document.
Home 2.6.2 Documentation on Special Products The Documentation on Special Products tab looks like this: There are four sections on this tab: • Content Reporter Documents • Instant Message Filter Documents • Special Environment Documents • Appliance Documents They are described in the following. Content Reporter Documents The Content Reporter Documents section looks like this: This section allows you to view user documentation on the Webwasher reporting tool.
Home Instant Message Filter Documents The Instant Message Filter Documents section looks like this: This section allows you to view user documentation on the Webwasher instant message filtering tool. To view any of the documents listed here, click on the PDF link in the same line. This will open a .pdf format version of the document.
Home To view any of the documents listed here, click on the PDF link in the same line. This will open a .pdf format version of the document. 2.6.3 Additional Documentation The Additional Documentation tab looks like this: There is one section on this tab: • Release Notes It is described in the following. Release Notes The Release Notes section looks like this: This section allows you to view release notes and other documents containing the latest information on the Webwasher products.
Home 2.7 Preferences The Preferences options are invoked by clicking on the corresponding button under Home: The options are arranged under the following tab: They are described in the upcoming section: • Preferences, see 2.7.1 2.7.
Home They are described in the following. Change Password The Change Password section looks like this: Using this section, you can change the password you are using for access to Webwasher. After specifying the appropriate input here, click on Apply Changes to make the new password effective. Use the following input fields to change your password: • Current Password Enter your current Webwasher password here. • Password Enter the new password here.
Home If you are only interested in viewing and configuring settings for Web traffic, you can hide the e-mail related settings and vice versa. Furthermore, you can configure the change warner dialog and the configuration hash to be displayed or not. After specifying the appropriate settings, click on Apply Changes to make them effective. Use the following checkboxes to configure view options: • View web related settings Make sure this checkbox is marked if you want to view the Web related settings.
Home To what extent you are allowed to configure access permissions for other administrators, depends on your seniority level. This is measured by a value between 0 and 100. You can only configure permissions for administrators with seniority levels lower than your own. On the other hand, you may find your right to access Webwasher restricted or denied when trying to log in because an administrator with an equal or higher seniority level is currently logged in and has configured the corresponding settings.
Home — Allow read only access Check this radio button to allow read only access. • Deny simultaneous access Check this radio button to deny simultaneous access. 2.8 License The License options are invoked by clicking on the corresponding button under Home: The options are arranged under the following tabs: They are described in the upcoming sections: • Information, see 2.8.1 • Notification, see 2.8.
Home 2.8.1 Information The Information tab looks like this: There are four sections on this tab: • License Information • Webwasher End User License Agreement • Import License • Licensed Products They are described in the following.
Home License Information The License Information section looks like this: This section displays information regarding the license of the Webwasher software. Information is provided on the company that purchased the license, the time interval during which the license is valid and other licensing issues. Webwasher End User License Agreement The Webwasher End User License Agreement section looks like this: This section allows you to view the most recent version of the Webwasher end user license agreement.
Home To import a license, proceed as follows: 1. Click on the Browse button provided here and browse for the license file you want to import. Before you can import it, you will have to accept the end user license agreement. To read it, click on the end user licencse agreement link provided here. 2. If you accept the agreement, mark the checkbox labeled I have read ... This will turn the button saying You have to accept the EULA first into one saying Activate License. 3.
Home 2.8.2 Notification The Notification tab looks like this: There are two sections on this tab: • System Notifications • Too Many Clients They are described in the following. System Notifications The System Notifications section looks like this: Using this section, you can configure e-mail notifications on license issues. These will be sent to the e-mail address of the recipient you specify here.
Home After specifying the appropriate information, click on Apply Changes to make your settings effective. Use the following items to configure the system notifications: • Send notification upon license expiry Make sure the checkbox provided here is marked if you want to use this option, and enter the recipient of the notification in the Recipient input field.
Home Using this section, you can configure messages to be written to the system log if connections were refused due to heavy work load or license exhaustion. After specifying the appropriate settings, click on Apply Changes to make them effective. Use the following items to configure log messages: • Enable message to be written to system log Mark this checkbox if you want log messages to be written to the system log. — Message text In this input field, enter the message text.
Chapter 3 Common The features that are described in this chapter are accessible over the Common tab of the Web interface: These are filtering features that are common to the SSL Scanner and other Webwasher products, e. g. media type filters, the document inspector, the white list, etc. The upcoming sections describe how to handle these features. The description begins with an overview.
Common 3.1 Overview The following overview shows the sections that are in this chapter: User’s Guide – Webwasher SSL Scanner Introduction Home Overview – this section Common Quick Snapshot, see 3.2 Policy Settings Media Type Filters, see 3.3 Document Inspector, see 3.4 Archive Handler, see 3.5 Generic Header Filter, see 3.6 Generic Body Filter, see 3.7 Advertising Filters, see 3.8 Privacy Filters, see 3.9 Text Categorization, see 3.10 HTTP Method Filter List, see 3.11 FTP Command Filter List, see 3.
Common 3.2 Quick Snapshot The Quick Snapshot for the common filtering functions is invoked by clicking on the corresponding button under Common: The following tab is then provided: It is described in the upcoming section: • Quick Snapshot, see 3.2.
Common 3.2.
Common They are described in the following. Before this is done, however, the following subsection provides some general information on the quick snapshot features. Handling the Quick Snapshot The quick snapshot features on this tab allow you to view summary information about several media type filtering parameters at a glance. For two of them, information is displayed with regard to a particular time interval, e. g.
Common There is, however, a property of the quick snapshot features that is not present on the dashboard tabs. It is described in the following: • Resetting top value lists For the Media Types by Hits and Media Types by Volume parameters, top value lists are displayed, using the length of bars to indicate the number of hits or the amount of bytes for various media types: You can choose to view the top 10, 25, etc.
Common Media Types by Hits The Media Types by Hits section displays a list of the top media types, i. e. the media types that were most often processsed by the Media Type Filter, showing the number of hits for each of them. Hit numbers are accumulated until the section is reset. The following information is displayed for each media type: • Media type Name of the media type, e. g. text/html, text/plain, image/jpeg, etc. • Hits Number of times that this media type was processed by the Media Type Filter.
Common 3.3 Media Type Filters The Media Type Filters options are invoked by clicking on the corresponding button under Common: If you want to enable any of these options, make sure the checkbox on this button is also marked. The checkbox is marked by default. After modifying the setting of this checkbox, click on Apply Changes to make the modification effective. These are policy-dependent options, i. e. they are configured for a particular policy.
Common 3.3.1 Actions The Actions tab looks like this: There are two sections on this tab: • Media Type Filter • Web Upload Filter They are described in the following.
Common Media Type Filter The Media Type Filter section looks like this: Using this section, you can configure actions, e. g. Block, Block, log and notify, Allow, etc., for the Media Type Filter. This filter manages the flow of incoming media types for HTTP and FTP downloads, as well as for SMTP. A media (content) type is a general category of data content, such as an application, audio content, a text message, an image, a video stream, etc.
Common • Non-rectifiable media types with magic bytes mismatch The actions configured here will be executed when content types do not match their magic byte sequence. So, e. g., a JPEG image named as a GIF file would be affected by a filtering action, even though each of these media types are acceptable. • Response without Content-Type header The actions configured here will be executed when media type information is contained in a response header..
Common Furthermore, you need to enable an option on the REQMOD Settings tab to use this filter. To do this, click on the REQMOD Settings link provided at the bottom of this section. The option in question is labeled Apply configured filters on uploaded and posted data. Use the drop-down lists provided here to configure actions for the Web Upload Filter: • Maximal size of uploaded parameter . . . kb In the input field provided here, enter a value to limit the size limit (in KB) of uploads.
Common 3.3.2 Media Type Black List The Media Type Black List tab looks like this: There is one section on this tab: • Media Type Black List It is described in the following.
Common Media Type Black List The Media Type Black List section looks like this: Using this section, you can add a media type to the Media Type Black List. Objects belonging to the media types on this list will be blocked. To add a media type to the black list, use the area labeled: • Service Name In this input field, enter the service name. Select the media type you want to have blacklisted from the drop-down list provided here, e. g. application/ace.
Common — Add to Media Type Black List After selecting a media type, click on this button to add it to the list. This addition will be valid only under the policy you are currently configuring. To add a media type to the black list for all policies, mark the checkbox labeled Add to all policies before clicking on the button. The Media Type Black List is displayed at the bottom of this section.
Common 3.3.3 Media Type White List The Media Type White List tab looks like this: There is one section on this tab: • Media Type White List It is described in the following.
Common Media Type White List The Media Type White List section looks like this: Using this section, you can add a media type to the Media Type White List. Objects belonging to the media types on this list will be allowed. To add a media type to the white list, use the area labeled: • Select media type from catalog Select the media type you want to include in the white list from the dropdown list provided here, e. g. application/ace.
Common — Add to Media Type White List After selecting a media type, click on this button to add it to the list. This addition will be valid only under the policy you are currently configuring. To add a media type to the white list for all policies, mark the checkbox labeled Add to all policies before clicking on the button. The Media Type White List is displayed at the bottom of this section.
Common 3.4 Document Inspector The Document Inspector options are invoked by clicking on the corresponding button under Common: If you want to enable any of these options, make sure the checkbox on this button is also marked. The checkbox is marked by default. After modifying the setting of this checkbox, click on Apply Changes to make the modification effective. These are policy-dependent options, i. e. they are configured for a particular policy.
Common 3.4.1 Document Inspector The Document Inspector tab looks like this: There are five sections on this tab: • Document Download Filter • Document Upload Filter • Document Mail Filter • Document Types • General Options They are described in the following.
Common Document Download Filter The Document Download Filter section looks like this: Using this section, you can configure actions for inbound office documents that may enter your corporate network from the Web and are potentially malicious. The document formats that can be filtered include Microsoft Word 97-2003, Microsoft Excel 95-2003, Microsoft PowerPoint 95-2003 and all known versions of Adobe Portable Document Format (PDF).
Common To view or modify the actions that are currently configured for these actions, click on the Text Categorization link in the checkbox inscription. This will take you to the Text Categorization tab, where you have access to the corresponding settings. Document Upload Filter The Document Upload Filter section looks like this: Using this section, you can configure actions for outbound user-originating office documents that are potentially malicious.
Common Document Mail Filter The Document Mail Filter section looks like this: Using this section, you can configure actions for office documents that are attached to e-mails, e. g. a .pdf format document. The document formats that can be filtered include Microsoft Word 97-2003, Microsoft Excel 95-2003, Microsoft PowerPoint 95-2003 and all known versions of Adobe Portable Document Format (PDF).
Common Document Types The Document Types section looks like this: Using this section, you can configure which of the filters that are accessible over the other sections of this tab should be applied to which document formats. The document formats that can be filtered include Microsoft Word 97-2003, Microsoft Excel 95-2003, Microsoft PowerPoint 95-2003 and all known versions of Adobe Portable Document Format (PDF).
Common Use the following checkboxes to modify the assignment of filters to document formats: • Download Filter Mark or clear the checkboxes in this line to have the download filter apply to the corresponding document formats. • Upload Filter Mark or clear the checkboxes in this line to have the upload filter apply to the corresponding document formats. • Mail Filter Mark or clear the checkboxes in this line to have the mail filter apply to the corresponding document formats.
Common • Structured Storage document, like Visio or MSI, not readable From the drop-down lists provided here, select actions for documents in Web and e-mail traffic, e. g. Block or Allow. These actions will be executed if a structured storage document is unreadable. • Office document not readable From the drop-down lists provided here, select actions for documents in Web and e-mail traffic, e. g. Block or Allow.
Common The options are arranged under the following tab: They are described in the upcoming section: • Archive Handler, see 3.5.1 3.5.1 Archive Handler The Archive Handler tab looks like this: There are two sections on this tab: • Archive Handling • Archive Handling Options They are described in the following.
Common Archive Handling The Archive Handling section looks like this: Using this section, you can configure blocking and other actions for encrypted, corrupted, multi-part archives, archives containing mail bombs (an archive is a mail bomb if its content size exceeds the limit set by the user), and archives exceeding the maximum recursion level, i. e. how deep archives are nested within each other.
Common After specifying the appropriate settings click on Apply Changes to make them effective. Use the following input fields to configure limits for archives: • Maximum size of unpacked archive Enter the maximum size (in MB) here that should be allowed for an archive. • Maximum recursion level Enter the maximum number of recursion levels here that should be allowed for an archive. 3.
Common 3.6.1 Generic Header Filter The Generic Header Filter tab looks like this: There is one section on this tab: • Header Filter List It is described in the following.
Common Header Filter List The Header Filter List section looks like this: Using this section, you can configure the Generic Header Filter to delete headers and header content, add customized headers, modify existing header content, and execute any pre-defined or customized action on appropriate filtering conditions. The filter can be configured for Web traffic using the HTTP or HTTPS protocol, as well as for e-mail traffic. For e-mail traffic, there are two options to choose from: SMTP and Mail.
Common 3.7 Generic Body Filter The Generic Body Filter options are invoked by clicking on the corresponding button under Common: If you want to enable any of these options, mark the checkbox that is on this button. Then click on Apply Changes to make this setting effective. These are policy-dependent options, i. e. they are configured for a particular policy. When you are configuring these options, you need to specify this policy.
Common 3.7.1 Generic Body Filter The Generic Body Filter tab looks like this: There is this section on this tab: • Body Filter List It is described in the following.
Common Body Filter List The Body Filter List section looks like this: Using this section, you can configure the Generic Body Filter blocking and other actions for Web and e-mail content according to keywords, regardless of the URL it originates from. So, you could use the Generic Body Filter, e. g. to block Win32 executables.
Common So, to block, e. g. all HTML pages encoded as UTF-16 you can configure a rule like the following: 0-128 Contains I"<\00h\00t\00m\00l\00" I"\00<\00h\00t\00m\00l" Or 0-128 Contains With this rule, the first expression blocks UTF-16LE, and the second blocks UTF-16BE. The rules for filtering body content in this way and the actions that are executed when a rule matches, are entered in the fields of this section. For an explanation of them, see the corresponding online help page.
Common 3.8.
Common • Advertising Filter Settings They are described in the following. Link Filter The Link Filter section looks like this: Using this section, you can configure the filtering of content based on information from the URL of an object and specify different types of content that you want to have filtered. URLs can be added for filtering to the built.in filter list or edited. The list can be accessed on the Link Filter List tab.
Common
Common — Text links Enables or disables the filtering of text links. A text link is the grouping of linked text that, when clicked on, takes you to another page either within the same Web site, or to an entirely different Web server. It will often open up another browser window when clicked on. — Backgrounds Enables or disables the filtering of background images. This option only removes advertising backgrounds, but not all background images in general.
Common Their meaning is as follows: — Images Enables or disables the filtering of images. — Applets Enables or disables the filtering of Java applets. These are small programs accompanying a Web page that is sent to a user. Java applets are able to perform interactive animations, instant calculations and conversions etc., without having to send a user request back to the server. — Plug-ins Enables or disables the filtering of plug-ins.
Common Use the following checkbox to configure the additional setting: • Also disable manually opened windows If this option is enabled, pop-ups will not be opened even if the user clicks on the corresponding link. Script Filter The Script Filter section looks like this: Using this section, you can configure a filter to manage the code that manipulates browsers and systems. If you want to use this filter, mark the checkbox next to the section heading.
Common • Prevent modification of the browser’s status bar If this option is enabled, the filter will prevent the status bar of the browser from being modified by a Web page, i. e. scrolling text. Animation Filter The Animation Filter section looks like this: Using this section, you can configure a filter to detect animated images. Animations will either be filtered completely or restricted in their execution. If you want to use this filter, mark the checkbox next to the section heading.
Common Advertising Filter Settings The Advertising Filter Settings section looks like this: Using this section, you can configure settings that will apply to all the filters on this tab. After specifying the appropriate settings, click on Apply Changes to make them effective. Use the following checkboxes and radio buttons to configure these settings: • Replace filtered objects with Mark this checkbox if you want to have filtered objects replaced with something.
Common Then check the radio buttons below to further specify the exclusion: — the same path Enable this option to exclude objects within the same place from filtering. — the same domain Enable this option to exclude objects within the same domain from filtering. • Do not reduce filtered frame size Mark this checkbox to prevent filtered frame sizes from being reduced. 3.8.
Common Link Filter List The Link Filter List section looks like this: Using this section, you can add URLs to the Link Filter List and edit them. To do this, use the area labeled: • Add new URL Select String or International Domain Name from the first of the dropdown lists provided here. In the input field next to it, enter a string to specify the object using shell expressions.
Common — do not filter Enable this option to exclude the URL you entered above from filtering. — Add to Link Filter List After specifying the information for a URL, click on this button to add it to the list. This addition will be valid only under the policy you are currently configuring. To add a URL to the list for all policies, mark the checkbox labeled Add to all policies before clicking on the button.
Common 3.8.3 Dimension Filter List The Dimension Filter List tab looks like this: There is this one section on this tab: • Dimension Filter List It is described in the following.
Common Dimension Filter List The Dimension Filter List section looks like this: Using this section, you can add dimension settings to the Dimension Filter List and edit them. These an be used for filtering images, applets and plug-ins. To do this, use the area labeled: • Add new dimension In the input field provided here, enter a pair of pixel values to specify the height and width of an object that should be filtered, e. g. 60x52.
Common — Add to Dimension Filter List After specifying the dimensions settings in the way described above, click on this button to add them to the list. This addition will be valid only under the policy you are currently configuring. To add dimensions to the list for all policies, mark the checkbox labeled Add to all policies before clicking on the button.
Common 3.9 Privacy Filters The Privacy Filters options are invoked by clicking on the corresponding button under Common: If you want to enable any of these options, mark the checkbox that is on this button. Then click on Apply Changes to make this setting effective. These are policy-dependent options, i. e. they are configured for a particular policy. When you are configuring these options, you need to specify this policy.
Common 3.9.1 Settings The Settings tab looks like this: There are four sections on this tab: • Web Bug Filter • Referer Filter • Prefix Filter • Cookie Filter They are described in the following.
Common Using this section, you can configure a filter to eliminate Web bugs. These are also known as clear GIFs or Web beacons. They are are usually 1 pixel x 1 pixel mini-images in size and are used to track user navigation behavior on Web sites and in e-mail to see if an e-mail was opened by the recipient. The filter is also applied to the same technique used in HTML messages. If you want to use this filter, make sure the checkbox next to the section heading is marked. The checkbox is marked by default.
Common It leaves the referer unaffected if you the user moves through the same or subsequent path. This option may be enabled if user movement should be hidden, but there are services that rely on a referer to work properly. — if the domain is different If this option is enabled a referer is removed in case the user came from a different Web site. It leaves the referer unaffected if the user moves through the same Web site. This allows the Webmaster to track user movement through this Web site.
Common Cookie Filter The Cookie Filter section looks like this: Using this section, you can configure a filter to block bad cookies. You can set the life span for neutral cookies or let them expire after finishing the browser session. The Cookie Filter controls the data stream between users and the Web in both directions, a requirement for efficient filtering. Transmitted cookies coming in on the Web server, in addition to those from the browser, are controlled by Webwasher.
Common • Neutral cookies expire after Use the radio buttons and input fields provided here in the following way: — a time period of . . . h . . . min Make sure this radio button is checked if you want to configure a life span for neutral cookies. The radio button is checked by default. Enter the appropriate time periods (in hours and minutes) in the input fields provided here. The default value is 24 hours.
Common 3.9.2 Cookie Filter List The Cookie Filter List tab looks like this: There is one section on the tab: • Cookie Filter List It is described in the following.
Common Cookie Filter List The Cookie Filter List section looks like this: Using this section, you can add entries to the Cookie Filter List and edit them. Shell expressions in this list will be compared to the domain where the cookie was sent from or will be sent to, in order to determine whether the cookie is good, neutral or bad. Good cookies can pass, bad cookies are filtered out and neutral cookies will vanish after the configured life span.
Common The Cookie Filter List is displayed at the bottom of this section. To display only a particular number of list entries at a time, type this number in the input field labeled Number of entries per page and enter it using the Enter key of your keyboard. If the number of entries is higher than this number, the remaining entries are shown on successive pages. A page indicator is then displayed, where you can select a particular page by clicking on the appropriate arrow symbols.
Common To do this, select a policy from the drop-down list labeled Policy, which is located above the Media Type Filters button: The options are arranged under the following tabs: They are described in the upcoming sections: • Settings, see 3.10.1 • Categorization List, see 3.10.2 3.10.1 Settings The Settings tab looks like this: There is one section on this tab: • Text Categorization It is described in the following.
Common Text Categorization The Text Categorization section looks like this: Using the text categorization filter you can specify single keywords and combinations of words and filter office documents and e-mail attachments containing these words. In this section, you configure the actions that should be taken whenever the text categorization filter matches. You can configure different actions for particular categories of documents.
Common 3.10.2 Categorization List The Categorization List tab looks like this: There is one section on this tab: • Text Categorization List It is described in the following.
Common Text Categorization List The Text Categorization List section looks like this: Using the text categorization filter you can specify single keywords and combinations of words and filter office documents and e-mail attachments containing these words. In this section, you can configure rules for the keywords and combinations of keywords that should be filtered and add them to the Text Categorization List.
Common In the input fields, enter the words or word combinations you want to filter, e. g. Bahamas, Maledives, work to set up a rule like the following: Bahamas AND Maledives AND NOT work — [term 1] more than [term 2] times per [term 3] words Check the radio button in this line to configure a rule according to the second method provided here. It is based on counting how often a particular word or combination appears in the text body of an office document or an e-mail message.
Common Use the following items to perform other activities relating to the list: • Filter Type a filter expression in this input field and enter it using the Enter key of your keyboard. The list will then display only entries matching the filter. • Delete Selected Select the entry you wish to delete by marking the Select checkbox next to it and click on this button. You can delete more than one entry in one go. To delete all entries, mark the Select all checkbox and click on this button. 3.
Common 3.11.1 HTTP Method Filter List The HTTP Method Filter List tab looks like this: There is one section on this tab: • HTTP Method Filter List It is described in the following.
Common HTTP Method Filter List The HTTP Method Filter List section looks like this: Using this section, you can configure rules for assigning actions to particular HTTP methods that occur in user requests and add these rules to a list. The rules may also include a categorization of the method and specify the URL it is applied to. So, you could set up a rule that, e. g. categorizes the GET method when applied to a particular URL as Entertainment and blocks the corresponding request.
Common — Category From this drop-down list, select a URL filtering category you want to assign to the HTTP method. Setting this category is also optional. — Action From this drop-down list, select the action you want to have executed if the rule matches. — Continue If this checkbox is marked, Webwasher will look for further matches after the rule matched for the first time. Otherwise, filtering activities will be stopped after the first match. — Description Enter a description of the rule here.
Common Use the following items to perform other activities relating to the list: • Filter Type a filtering term in the input field of the URL or Description column or in both or select a method, category or action or any combination of them from the drop-down lists and enter this using the Enter key of your keyboard. The list will then display only entries matching the filter. • Delete Selected Select the entry you wish to delete by marking the Select checkbox next to it and click on this button.
Common These are policy-dependent options, i. e. they are configured for a particular policy. When you are configuring these options, you need to specify this policy. To do this, select a policy from the drop-down list labeled Policy, which is located above the Media Type Filters button: The options are arranged under the following tab: They are described in the upcoming section: • FTP Command Filter List, see 3.12.1 3.12.
Common FTP Command Filter List The FTP Command Filter List section looks like this: Using this section, you can configure rules for assigning actions to particular FTP commands that occur in user requests and add these rules to a list. The rules may also include a categorization of the command and specify the URL it is applied to. So, you could set up a rule that, e. g. categorizes a Server Access command when applied to a particular URL as Chat and blocks the corresponding request.
Common To add a rule to the list, use the area labeled: • Add rule Use the following items to configure the rule: — Command category
Common The FTP Command Filter List is displayed at the bottom of the section. You can edit list entries, change their order or delete them. To display only a particular number of list entries at a time, type this number in the input field labeled Number of entries per page and enter it using the Enter key of your keyboard. If the number of entries is higher than this number, the remaining entries are shown on successive pages.
Common 3.13 Welcome Page The Welcome Page options are invoked by clicking on the corresponding button under Common: If you want to enable any of these options, mark the checkbox that is on this button. Then click on Apply Changes to make this setting effective. These are policy-dependent options, i. e. they are configured for a particular policy. When you are configuring these options, you need to specify this policy.
Common 3.13.1 Welcome Page The Welcome Page tab looks like this: There are three sections on this tab: • Welcome Page Options • Manipulate User History • Upload They are described in the following. Welcome Page Options The Welcome Page Options section looks like this: Using this section, you can configure options for the Welcome Page. You can configure the time and frequency of its appearance and also if it should appear at all.
Common Use the following items to configure the Welcome Page options: • Show once a day at . . . To let the Welcome Page appear only once a day, make sure the radio button provided here is checked and enter the time of appearance in the input field. Use the 24-hours format to enter a time (1 p. m. = 13:00). • Show each . . . minutes To let the Welcome Page appear after a particular time interval has elapsed, check the radio button provided here and enter the time interval (in minutes) in the input field.
Common • Show again Click on this button to let the Welcome Page appear again for this user. This means that the page is displayed not only once, but also for the following requests of this user. • Show never again Click on this button to hide the Welcome Page from this user. Upload The Upload section looks like this: Using this section, you can configure and perform the upload of a file to display its content on the Welcome Page.
Common Use the following items to handle the upload of a Welcome Page: • Filename In this input field, enter the name of the file you want to upload. Type the file name or use the Browse button next to the input field to browse to the file. Then click on the Upload button to perform the upload. • Store as In this input field, enter the name you want store the uploaded file under. If you are uploading an archive, you need not enter a name here since the file name will be used that is in the archive.
Common 3.14 White List The White List options are invoked by clicking on the corresponding button under Common: These are policy-dependent options, i. e. they are configured for a particular policy. When you are configuring these options, you need to specify this policy. To do this, select a policy from the drop-down list labeled Policy, which is located above the Media Type Filters button: The options are arranged under the following tab: They are described in the upcoming section: • White List, see 3.
Common 3.14.1 White List The White List tab looks like this: There is one section on this tab: • White List It is described in the following.
Common White List The White List section looks like this: Using this section, you can add an object to the White List and exclude it from the application of particular Webwasher filters. The objects can be specified using shell expressions. Furthermore, you can . specify the type of object you would like to exclude from filtering, e. g. Web, E-Mail, Media Type, etc.
Common To add an object to the white list, use the area labeled: • Add new entry Select String or International Domain Name from the first of the dropdown lists provided here. In the input field next to it, enter a string to specify the object using shell expressions. To specify the object type, select Web, E-Mail, Archive, Media Type, Embedded Object, or Header from the drop-down list below the first one. You can further specify the object type by selecting a value from the dropdown list to the right.
Common To sort the list in ascending or descending order, click on the symbol next to the Media Type or Description column heading. To edit an entry, type the appropriate text in the input field for the object name or its description and enable or disable the filters as needed. Then click on Apply Changes to make these settings effective. You can edit more than one entry and make the changes effective in one go.
Common 3.15 User Defined Categories The User Defined Categories options are invoked by clicking on the corresponding button under Common: The options are arranged under the following tab: They are described in the upcoming section: • User Defined Categories, see 3.15.1 3.15.1 User Defined Categories The User Defined Categories tab looks like this: There is one section on this tab: • User Defined Categories It is described in the following.
Common User Defined Categories The User Defined Categories section looks like this: Using this section, you can configure your own categories for URL classification with names and abbreviated name formats. You can configure up to 15 categories this way. The abbreviated format is needed for two purposes: the log files and the X-Attribute header. The X-Attribute header is a type of REQMOD/RESPMOD header, and is a compatibility setting used to simplify the cooperation between the ICAP server and client.
Common • Category 1 to Category n In the input fields provided here, enter the category names you want to use and the abbreviated formats of these names. 3.16 Media Type Catalog The Media Type Catalog options are invoked by clicking on the corresponding button under Common: The options are arranged under the following tab: They are described in the upcoming section: • Media Type Catalog, see 3.16.
Common 3.16.1 Media Type Catalog The Media Type Catalog tab looks like this: There is one section on this tab: • Media Type Catalog It is described in the following.
Common Media Type Catalog The Media Type Catalog section looks like this: Using this section, you can add a media type to the Media Type Catalog. A media (content) type is a general category of data content, such as an application, audio content, a text message, an image, a video stream, etc.
Common The media type tells the application that receives the data what kind of application is needed to process the content, e. g. Real Audio is to play the audio content for a user. Each of these media types also have subtypes, e. g. the text media type has four subtypes: plain, rich text, enriched, and tab-separated values. You can also specify how a media type should be recognized by the particular magic byte sequences of the files belonging to it.
Common — Magic Bytes In the input fields provided here, enter up to five magic byte sequences and their offsets to identify a media type: Offset In the input fields of this column enter the offset values for the magic byte sequences. Magic Bytes In the input fields of this column enter the values for the magic byte sequences themselves. — Add/Modify After specifying the information for a media type, click on this button to add it to catalog.
Chapter 4 SSL Scanner The features that are described in this chapter are accessible over the SSL Scanner tab of the Web interface: These features allow you to configure the filtering of SSL-encrypted traffic, thus protecting your network against viruses and other malicious content that may be hidden behind the SSL encryption. The upcoming sections describe how to handle these features. The description begins with an overview.
SSL Scanner 4.1 Overview The following overview shows the sections that are in this chapter: User’s Guide – Webwasher SSL Scanner Introduction Home Common Overview – this section SSL Scanner Quick Snapshot, see 4.2 Policy Settings Certificate Verification, see 4.3 Scan Encrypted Traffic, see 4.4 Certificate List, see 4.5 Trusted Certificate Authorities, see 4.6 Policy-Independent Settings Global Certificate List, see 4.7 Global Trusted Certificate Authorities, see 4.8 Incident Manager, see 4.9 4.
SSL Scanner Before this is done, however, the following subsection provides some general information on this quick snapshot feature. Handling the Quick Snapshot The quick snapshot feature on this tab allows you to view summary information about the certificate verification process performed by Webwasher at a glance. The information is displayed with regard to a given time interval. Percentages are calculated for the various categories of results that the verification process may have.
SSL Scanner 4.2.1 Quick Snapshot The Quick Snapshot tab looks like this: There is one section on this tab: • Certificate Verification Overview It is described in the following. Certificate Verification Overview The Certificate Verification Overview section displays the number of times Webwasher has completed a verification process for a certificate. The result of the process may be a blocking or an another action that has previously been configured.
SSL Scanner • Wildcard Match A wildcard name has been used in a certificate for a host, which matches the host name provided by the URL. Whenever a verification process is passed by a certificate in this way, an action will be executed by Webwasher. This could also be an Allow. • Expired The certificate has expired. • Revoked The certificate has been revoked by the authority that issued it. • Unresolvable The status of a certificate could not be resolved.
SSL Scanner To do this, select a policy from the drop-down list labeled Policy, which is located above the Certificate Verification button: The options are arranged under the following tab: They are described in the upcoming section: • Certificate Verification, see 4.3.1 4.3.1 Certificate Verification The Certificate Verification tab looks like this: At the top of this tab, there is the following button: Click on this button to inspect the certificate of a particular host.
SSL Scanner Furthermore, there is this section on the tab: • Certificate Verification It is described in the following. Certificate Verification The Certificate Verification section looks like this: Using this section, you can configure actions for particular verification tests. After specifying the appropriate settings, click on Apply Changes to make them effective.
SSL Scanner If the Common Name in a certificate is, e. g. abcde.com, but the Web server’s URL is in fact www.abcde.com, no match is achieved. • Wildcard matches host name Compares the wildcard used in a certificate to represent a Common Name to the host name. So, e. g. the wildcard expression *.ccc.de matches www.ccc.de. If a match is achieved, the configured action will be executed. • Certificate is expired for more than ... days Checks if a certificate has expired.
SSL Scanner To do this, select a policy from the drop-down list labeled Policy, which is located above the Certificate Verification button: The options are arranged under the following tab: They are described in the upcoming section: • Scan Encrypted Traffic, see 4.4.1 4.4.1 Scan Encrypted Traffic The Scan Encrypted Traffic tab looks like this: There are three sections on this tab: • Tunneling by Category • Client Certificate Handling • Decryption Warning They are described in the upcoming sections.
SSL Scanner Tunneling by Category The Tunneling by Category section looks like this: Using this section, you can configure tunneling for particular URL filtering categories. You can configure up to three categories for tunneling. These may pre-defined or user-defined categories. If you want to use additional categories, you need to enter them in the .ini configuration file, which is located in the conf folder of the Webwasher program files. This tunneling option is not enabled by default.
SSL Scanner — Bypass SSL Scanner The SSL Scanner is bypassed completely, i. e. no activities whatsoever are performed. Client Certificate Handling The Client Certificate Handling section looks like this: Using this section, you can configure what should happen if the server that is requested by a client asks for a client certificate. Using this section, you can configure tunneling for particular URL filtering categories. You can configure up to three categories for tunneling.
SSL Scanner • Verify server certificate, but do not decrypt session Enable this option, to have the server certificate checked by the verification process. If this is passed successfully, the corresponding session is tunneled and allowed. • Block Session Enable this option to forbid access to the server. Decryption Warning The Decryption Warning section looks like this: Using this section, you can configure a decryption warning for HTTPS traffic.
SSL Scanner 4.5 Certificate List The Certificate List options are invoked by clicking on the corresponding button under SSL Scanner: If you want to enable any of these options, mark the checkbox that is on this button. Then click on Apply Changes to make this setting effective. These are policy-dependent options, i. e. they are configured for a particular policy. When you are configuring these options, you need to specify this policy.
SSL Scanner 4.5.1 Certificate List The Certificate List tab looks like this: There is one section on this tab: • Certificate List It is described in the following. Certificate List The Certificate List section looks like this: Using this section, you can add new exceptions to the list of certificates. You can also configure actions for an exception relating to the certificate or host in question.
SSL Scanner To add an exception to the list, use the area labeled: • Add new exception In the input field provided here, enter the exception you want to add to the certificate list. https:// has been entered in this field as default information at the beginning of an exception name.
SSL Scanner — by host Enabling the by host method means that the host is checked without a certificate being included in the verification process. If the latter method is chosen, shell expressions, e. g. *.webwasher.com, may be used to specify an exception. After enabling this method, select an action from the drop-down list provided here. For the meaning of these actions, see the description of the by certificate method above.
SSL Scanner If the number of entries is higher than this number, the remaining entries are shown on successive pages. A page indicator is then displayed, where you can select a particular page by clicking on the appropriate arrow symbols. You can also edit this list, by specifying the appropriate settings for a given entry. After doing this, click on Apply Changes to make these settings effective.
SSL Scanner 4.6.1 Trusted Certificate Authorities The Trusted Certificate Authorities tab looks like this: At the top of this tab, there is the Known Certificate Authorities link. A click on this link will take you to the tab with the same name, where you can add Certificate Authorities to the list or delete them. Furthermore, there are two sections on this tab: • Certificate Authorities • Trusted Certificate Authorities They are described in the following.
SSL Scanner Using this section, you can configure actions for content with certificates issued by known Certificate Authorities (CAs) that are either trusted or untrusted, as well as for unknown Certificate Authorities. A vendor, having signed content by issuing a certificate, may request a CA to issue a certificate to sign this vendor certificate. This CA may itself have been signed by another CA, issuing certificates on a higher level.
SSL Scanner Trusted Certificate Authorities The Trusted Certificate Authorities section looks like this: This section provides the list of Trusted Certificate Authorities (CAs). Also provided is a list of known CAs, from which you can select CAs to include them in the list of trusted CAs. When including a CA in this list, you can configure it as trusted or not trusted. If a CA has been included in the list of trusted CAs as not trusted, certificates issued by it will be explicitly forbidden, i. e.
SSL Scanner To make the addition valid for all policies, mark the checkbox labeled Add to all policies before proceeding any further. Then click on either of these two buttons, according to whether you want to add the CA as trusted or not trusted: — Trust Click on this button to add a CA to the list as trusted. — Do not trust Click on this button to add a CA to the list as not trusted. The list of trusted CAs is displayed at the bottom of this section.
SSL Scanner 4.7 Global Certificate List The Global Certificate List options are invoked by clicking on the corresponding button under SSL Scanner: If you want to enable any of these options, make sure the checkbox on this button is marked. The checkbox is marked by default. After modifying the setting of this checkbox, click on Apply Changes to make the modification effective. The options are arranged under the following tab: They are described in the upcoming section: • Global Certificate List, see 4.7.
SSL Scanner There is one section on this tab: • Global Certificate List It is described in the following. Global Certificate List The Global Certificate List section looks like this: Using this section, you can add new exceptions to the global list of certificates, i. e. to the list that is valid for all policies configured under Webwasher. You can also configure actions for an exception relating to the certificate or host in question.
SSL Scanner For the meaning of these actions, see the following table: by certificate by host Allow The exception is allowed. not available Block The exception is blocked. The exception is blocked. Tunnel The activities of the SSL Scanner are bypassed and no verification process is executed. The activities of the SSL Scanner are bypassed and no verification process is executed. Warn Incident The exception is allowed, but a warning is displayed.
SSL Scanner For the meaning of these actions, see the description of the by certificate method above. A message will then be displayed, stating if the exception has been added successfully and providing information on the result of the verification process. If the by certificate method has been configured, you are informed whether the certificate in question was issued by a trusted or not-trusted certification authority (CA) from the corresponding list.
SSL Scanner 4.8 Global Trusted Certificate Authorities The Global Trusted Certificate Authorities options are invoked by clicking on the corresponding button under SSL Scanner: The options are arranged under the following tab: They are described in the upcoming section: • Global Trusted Certificate Authorities, see 4.8.1 4.8.
SSL Scanner Trusted Certificate Authorities The Trusted Certificate Authorities section looks like this: This section provides the global list of Trusted Certificate Authorities (CAs), i. e. the list that is valid for all policies configured under Webwasher. If a CA is also in a policy-dependent list, the settings configured for this list will prevail. Also provided is a list of known CAs, from which you can select CAs to include them in the list of trusted CAs.
SSL Scanner If the number of entries is higher than this number, the remaining entries are shown on successive pages. A page indicator is then displayed, where you can select a particular page by clicking on the appropriate arrow symbols. To sort the list in ascending or descending order, click on the symbol next to the Certificate Authority column heading. To change the status of CA from trusted to not trusted or the other way round, mark or clear the Trusted checkbox in the same line.
SSL Scanner They are described in the upcoming section: • Incident Manager, see 4.9.1 4.9.1 Incident Manager The Incident Manager tab looks like this: There is one section on this tab: • Incident Manager It is described in the following.
SSL Scanner Using this section, you can inspect and manage incidents relating to SSL-encrypted communication. The Incident Manager enables you to retrieve incident.dat files from Webwasher instances. It synchronizes and displays them, adding hosts or certificates to the policy-dependent or independent (global) certificate list.e Note that an incident.
SSL Scanner A list entry consists of the following fields: • Host - URL that caused the incident. Incidents can be added to the certificate lists either by host or by certificate, as is shown in the fields used for configuring the policy-dependent and independent certificate lists. If by host was selected, the input shown here under Host becomes available. A wildcard may be used to include a range of URLs, e. g. *.webwasher.com.