
User manual

Getting Started
24
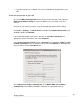
Note
Power is ON when power is applied. H/B (heart beat) flashes when the SG unit is
running. Each of the network ports has two LEDs indicating link, activity and speed. In
its factory default state, the four status LEDs next to Power flash.
If these LEDs do not behave in this manner before your SG unit is attached to the
network, perform a factory reset. Press the black Erase button on front panel twice
within two seconds to restore factory default settings. If the LEDs are still not flashing
after 30 seconds, you may need to contact customer support.
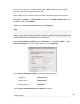
Set up a single PC to connect to the SG unit
The SG unit ships with initial network settings of:
LAN IP address: 192.168.0.1
LAN subnet mask: 255.255.255.0
The SG unit needs an IP address suitable for your LAN before it is connected. You may
choose to use the SG unit’s initial network settings above as a basis for your LAN
settings.
Note
Initial configuration is performed through a port on network switch A (A1 – A4). If you
attach A1 – A4 directly to a LAN with an existing DHCP server, or a PC running a DHCP
service, it will automatically obtain an additional address. The SG unit will still be
reachable at 192.168.0.1.
However, we strongly recommend that you do not connect the SG unit to your LAN until
instructed to do so by this guide.
All other network ports are by default inactive, i.e. they are not running any network
services such as DHCP, and they are not configured with an IP address.
Connect the supplied power cable to the power inlet on the rear panel of the SG unit and
turn on the rear panel power switch.