
User manual


Network Setup
119
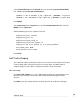
Next, share the folder. Right click on the folder and select Sharing and Security.
Select Share this folder and note the Share name, you may change this to
something easier to remember if you wish.
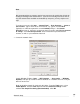
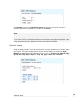
Finally, to set the security permissions of the newly created network share, click
Permissions.
If you wish to secure the network share with a username and password
(recommended), click Add and type the user name the account to be used by the SG
unit and click Check Names then OK.
Select this account, or Everyone if you are not securing the network share with a
username and password, and check Allow next to Full Control. Click OK and OK
again to finish.
•
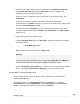
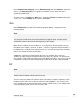
Set the SG unit to use the network share
Under the Network Share tab, check Use share. Enter the location of the network
share in the format:
\\HOSTNAME\sharename
Enter the maximum size for the cache in Cache size.
Warning
The size of this cache should be at least as big as the Cache size on the Main tab
and not be more than 90% of the space available to the network share.
Enter the Username and Password for a user that can read and write to the network
share. If you allowed Full Control to Everyone, you may leave these blank.
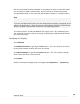
Set up LAN PCs to use the web cache
Once the web cache has been set up, PCs on the LAN must have their browsers
configured appropriately.
In Internet Explorer, select Internet Options from the Tools menu. Select the
Connections tab and click LAN Settings. Under Proxy Server, check Use proxy
server… and enter the IP address of your SG unit in Address.