
Specifications


SSG 500-series Installation and Configuration Guide
48 Replacing Power Components (SSG 550 Only)
3. Grasp the handles on each side of the PIM faceplate. On some PIMs the handles
are metal ears attached to the PIM faceplate. Other PIMs have long screws that
serve as the handles.
4. Align the edges of the PIM circuit board with the guide rails at each side of the
PIM slot.
5. Slide the PIM in until it seats firmly in the device.
6. Tighten the screws on each side of the PIM faceplate:
On PIMs with metal ear handles attached to the faceplate, tighten the
captive screws using a 1/8-inch flat-tip screwdriver.
On PIMs with long screws for handles, tighten the captive screws using a
number-2 phillips screwdriver.
7. Insert the appropriate cables into the cable connectors on the PIM.
8. If necessary, arrange the cables to prevent them from dislodging or developing
stress points:
Secure the cable so that it is not supporting its own weight as it hangs to
the floor.
Place excess cable out of the way in a neatly coiled loop.
Use fasteners to maintain the shape of cable loops.
9. Press and release the power button to power on the device. Verify that the
POWER LED lights steadily after you press the power button.
10. Verify that the PIM status LED lights steadily green to confirm that the PIM is
online.
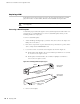
Replacing Power Components (SSG 550 Only)
The SSG 550 device has two load-sharing AC or DC power supplies located at the
rear of the chassis. Each power supply provides power to all components in the
device. The power supplies are fully redundant. If one power supply fails or is
removed, the remaining power supply instantly assumes the entire electrical load.
One power supply can provide full power for as long as the device is operational.
A power supply weighs 2.4 pounds. (1.1 kilogram.). Each power supply is
hot-swappable. To replace a power-supply unit, use the procedures described in this
section.
CAUTION: Slide the PIM straight into the slot to avoid damaging the components
on the PIM.