
Troubleshooting guide
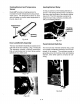
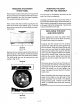


There
are nine
tabs securing the Touch Pad/LED
Assembly
to the console.
(Fig.
3-9)A
flat
bladed
screwdriver will
be
helpful
in releasing
these tabs.
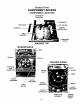
Typical Release Tab
Fig.3-8
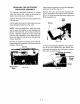
REMOVING THE
WASHER
The washer
door
can be
removed
by
removing
the
two screws securing the door hinge
to the
washer front
and
lifting
upward.
Fig.3-10
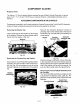
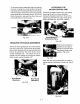
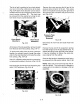
Access
to the
door switch
requires
that the water
seal boot
be
removed from
the front of the washer.
(Fig.
3-17,) Use a flat bladed screwdriver
at the
location
of the retainer
spring and
pull
the
retainer
forward
and then off the
perimeter
of the
boot.
Release
these tabs
in
sequence from left
to
right
around
the Touch Pad/LED Assembly
until allof
the tabs are
free
and the Assembly can
be
lifted
from
the console.
(Fig.3-9)
Tab
Tabl
DOOR AND DOOR SWITCH
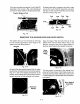
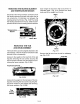
Ease the edge of the boot off of the lip of the
washer front near the
door switch.
(Fig.
3-12)
Remove
enough
of the
boot
to
gain
access to
the door switch
behind the washer front
panel.
Boot
Pulled
Back
Fig.3-12
The door switch is secured to the
washer
front
panel
with three screws. Once these screws are
removed,
the
door switch will remain in
place
until
it
is
lifted slightly and
pulled
back
from
the
washer
front
panel.
Retainer
Spring
Fig.3-9
Screws
Fig. 3-t 1
3-3
Fig.3-13