
User manual


3
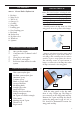
ADDITIONAL ITEMS REQUIRED
TOOLS & SUPPLIES NEEDED
in cyanoacrylate glue.
Medium cyanoacrylate glue.
30 minute epoxy.
5 minute epoxy.
Hand or electric drill.
Assorted drill bits.
Modelling knife.
Straight edge ruler.
2mm ball driver.
Phillips head screwdriver.
220 grit sandpaper.
90° square or builder’s triangle.
Wire cutters.
Masking tape & T-pins.
read-lock.
Paper towels.
� 10cc gasoline engine.
� Computer radio 5 channel with 7
servos.
� Glow plug to suit engine.
� Propeller to suit engine.
� Protective foam rubber for radio
system.
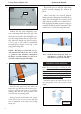
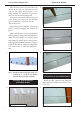
HINGING THE FLAP
Note : e control surfaces, including the ailer-
ons, elevators, and rudder, are prehinged with
hinges installed, but the hinges are not glued in
place. It is imperative that you properly adhere
the hinges in place per the steps that follow us-
ing a high-quality thin C/A glue.
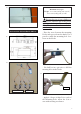
- Carefully remove the ap from one of the
wing panels. Note the position of the hinges.
- Remove each hinge from the wing panel
and ap and place a T-pin in the center of
each hinge. Slide each hinge into the aileron
until the T-pin is snug against the aileron.
is will help ensure an equal amount of
hinge is on either side of the hinge line when
the ap is mounted to the wing panel.
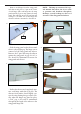
Hinge
1.
2.
- Slide the wing panel on the ap until
there is only a slight gap. e hinge is
now centered on the wing panel and ap.
Remove the T-pins and snug the aileron
against the wing panel. A gap of 1/64” or
less should be maintained between the
wing panel and ap.
T-pin
C/A Hinge
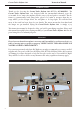
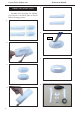
KIT CONTENTS
SEA362 Cessna Turbo Skylane 182
1. Fuselage
2. Wing set (2)
3. Tail set (2)
4. Canopy (2)
5. Cowling
6. Wing tube
7. Landing gear
8. Nose Landing gear
9. Fuel tank
10. Pushrod set
11. Ep Motor box
12. Windows
13. Spinner