Seagate Dashboard User Guide
Seagate Dashboard User Guide © 2013 Seagate Technology LLC. All rights reserved. Seagate, Seagate Technology, the Wave logo, and FreeAgent are trademarks or registered trademarks of Seagate Technology LLC, or one of its affiliates. All other trademarks or registered trademarks are the property of their respective owners. When referring to hard drive capacity, one gigabyte, or GB, equals one billion bytes and one terabyte, or TB, equals one thousand billion bytes when referring to hard drive capacity.
Contents 1. Introducing Seagate Dashboard . . . . . . . . . . . . . . . . . . . . . . . . . . . . 5 Seagate Dashboard Features . . . . . . . . . . . . . . . . . . . . . . . . . . . . . . . . . . . . Protecting Your Data (Windows Only) . . . . . . . . . . . . . . . . . . . . . . . . . . . Sharing Your Pictures and Videos . . . . . . . . . . . . . . . . . . . . . . . . . . . . . . Downloading and Saving Your Pictures . . . . . . . . . . . . . . . . . . . . . . . . .
Viewing Information About Your Drive . . . . . . . . . . . . . . . . . . . . . . . . . . . . . 29 Adjusting Drive Settings . . . . . . . . . . . . . . . . . . . . . . . . . . . . . . . . . . . . . . . 30 Getting Technical Support for Your Seagate Drive . . . . . . . . . . . . . . . . . . . 31 7. Managing the Seagate Dashboard Software . . . . . . . . . . . . . . . . . 33 Configuring Seagate Dashboard Settings . . . . . . . . . . . . . . . . . . . . . . . . . .
Introducing Seagate Dashboard Seagate Dashboard Features 1. Introducing Seagate Dashboard Seagate® Dashboard is a powerful, yet easy-to-use utility for backing up your data and sharing and saving media on your social media networks. This chapter describes the features of Seagate Dashboard, how to get started using the program, and the system requirements for the Windows® and Mac® versions of the program.
Introducing Seagate Dashboard Getting Started With Seagate Dashboard See “Using Cloud Storage” on page 23 for more information. Note: The Protect feature and Cloud Storage service are only available on the Windows version of Seagate Dashboard. For Mac systems, Seagate recommends that you back up your system using Apple Time Machine.
Introducing Seagate Dashboard • Double-click the Seagate Dashboard icon on your desktop. Figure 1: • Getting Started With Seagate Dashboard Seagate Dashboard Desktop Icon Right-click the Seagate Dashboard icon in the system tray, and select Open Seagate Dashboard from the menu. Seagate Dashboard Icon Figure 2: • Seagate Dashboard Icon in the Windows System Tray From the list of programs on the Start menu, select Seagate Dashboard > Seagate Dashboard.
Introducing Seagate Dashboard System Requirements for Seagate Dashboard System Requirements for Seagate Dashboard Seagate Dashboard runs on Windows and Mac computers. Make sure your system meets the requirements listed in this section. Note: The Protect, Share, and Save features of Seagate Dashboard only work with Dashboardenhanced Seagate drives. These features do not work on non-Dashboard-enhanced Seagate drives, or drives from other vendors.
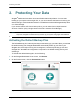
Protecting Your Data Activating the Default Backup Plan 2. Protecting Your Data Seagate® Dashboard includes a robust and flexible data backup feature. You can start backing up your system with a single click, or you can customize the feature to back up your data according to a set schedule and save it to a Dashboard-enhanced Seagate backup drive or to Cloud Storage. If you need to restore a file from a backup drive, you can select from multiple historical versions of the file.
Protecting Your Data Creating a Customized Backup Plan Seagate Dashboard starts backing up your data to your Seagate drive. If you have more than one Seagate drive connected to your computer, your data is backed up to the drive designated as the default backup drive. See “Setting Up Your Seagate Drives for Seagate Dashboard” on page 34 for information on how to set the default backup drive.
Protecting Your Data Creating a Customized Backup Plan From here, you specify the files, destination, and frequency for the backup plan, as shown in Figure 4. You can configure each backup setting individually, or you can step through the backup configuration process by clicking the < and > buttons.
Protecting Your Data Creating a Customized Backup Plan 4. Navigate to the directory or files you want to back up and place a checkmark next to each one. When you are done, click the > button to move to the next backup configuration screen. Figure 6: Selecting Specific Files to Back Up 5. Place a checkmark next to the drive(s) where you want the files to be backed up. If you have created a Cloud Storage account, it appears on this screen as a destination option.
Protecting Your Data Creating a Customized Backup Plan 6. Indicate how often the files should be backed up. Figure 8: Selecting How Often to Execute a Backup Plan You can select from the following options: • Snapshot: Executes the backup plan only once. • Monthly: Executes the backup plan a specific day of each month, at a specific time. • Weekly: Executes the backup plan a specific day of each week, at a specific time. • Daily: Executes the backup plan at a specific time each day.
Protecting Your Data Restoring Files from Backup 8. After you create a backup plan, Seagate Dashboard shows its status on the Protect screen, Figure 9: Seagate Dashboard Protect Status Screen On this screen, you can click the Pause button to temporarily stop the backup plan, the Pencil button to edit the backup plan settings, or the X button to delete the backup plan.
Protecting Your Data Restoring Files from Backup 3. Seagate Dashboard displays a list of the currently active Backup plans. Click Find Backups to display the of the backups saved on your drive, then select the backup plan that saved the file you want to restore. Figure 10: Selecting a Backup Plan for Restoring a File 4. Click the > button to list the backups saved by the selected backup plan. Figure 11: Selecting a Previous Backup 5. Select a backup that contains the file you want to restore.
Protecting Your Data Restoring Files from Backup 6. Click the > button, and select the location on your system where you want to restore the file. By default, Seagate Dashboard will save the restored files in their original location on your system. Figure 12: Selecting the Destination for the Restored File 7. Click the green checkmark to restore the file from the backup to the selected location.
Sharing Your Pictures and Videos How Picture and Video Sharing Works 3. Sharing Your Pictures and Videos Seagate® Dashboard provides an easy way to upload your pictures and videos from your local system to popular social networking services such as Facebook, Flickr, and YouTube.
Sharing Your Pictures and Videos Example: Uploading Pictures to Facebook on) in each folder. You can filter the display by entering text in the Search field. For example, entering jpg in the Search field shows only those files in the folder with jpg in the file name. Place a checkmark next to the files and folders you want to upload Enter text here to show only files with this text in the name Figure 13: Seagate Dashboard File Selection Screen 6.
Sharing Your Pictures and Videos Note: Example: Uploading Pictures to Facebook Videos uploaded to Facebook are always placed in the My Videos folder, regardless of the destination album you specify in the Album selection screen. 8. When you are finished, click the green checkmark to start the upload. Once the upload is finished, you can log into your Facebook page and view the pictures in the album.
Sharing Your Pictures and Videos Seagate Dashboard User Guide Example: Uploading Pictures to Facebook 20
Saving Your Online Pictures with Seagate Dashboard How Picture Saving Works 4. Saving Your Online Pictures with Seagate Dashboard The Save feature of Seagate® Dashboard lets you download and save pictures from your social media accounts. This is a convenient way to preserve and protect the pictures you’ve posted online, so they don’t get deleted accidentally.
Saving Your Online Pictures with Seagate Dashboard Example: Downloading Pictures from Facebook 5. On the Save screen, Seagate Dashboard shows the number of new pictures that have been posted in your account. “New” pictures are those that Seagate Dashboard has found in your account but hasn’t already downloaded. Click the Facebook icon to download them. Click here to download the files to your system Click here to set where the downloaded pictures are saved.
Using Cloud Storage About Cloud Storage 5. Using Cloud Storage This chapter explains how to set up and manage your Cloud Storage account so you can use it as a destination for your data backups. You can manage your Cloud Storage account from within Seagate® Dashboard, or you can log into your account using a Web browser. Note: The Cloud Storage service is only available in the Windows® version of Seagate Dashboard.
Using Cloud Storage Setting up a Cloud Storage Account 2. On the Seagate Dashboard Home screen, click the Cloud Storage icon at the top of the screen. Click here to set up your Cloud Storage account Figure 17: Cloud Storage Icon on the Seagate Dashboard Home Screen 3. Click the Create a new account link to display the account sign-up page. Figure 18: Cloud Storage Account Creation Screen 4. Fill in the fields on the page, and select your Dashboard-enhanced drive from the list box. 5.
Using Cloud Storage Signing Into Your Cloud Storage Account Signing Into Your Cloud Storage Account To use Cloud Storage as a destination for data backups, you must be signed into your Cloud Storage account. To sign in to your account, click the Cloud Storage icon on the Seagate Dashboard Home screen, then enter your e-mail address and Cloud Storage account password. After you sign into your account, you remain signed in as long as Seagate Dashboard is running on your system.
Using Cloud Storage Using the Cloud Storage Web Portal Click the Manage Tab to display additional settings. Figure 20: Displaying Cloud Storage Account Settings On this tab, you can select from the following options: • Information: Shows your Cloud Storage account information. • Change passwords: Lets you change the password for your Cloud Storage account. • Upgrade: Shows options for increasing the amount of storage in your Cloud Storage account.
Using Cloud Storage • Using the Cloud Storage Web Portal Open a browser and go to http://cloudstorage.seagate.com, then log in with your Cloud Storage account username and password. Figure 21: Cloud Storage Web Portal The following options are available on the Cloud Storage Web Portal: • Home: Lists the folders and files you’ve backed up to Cloud Storage. Click a folder to view its contents. Click the name of file to view, open, or download it. You can also select one or more files and delete them.
Using Cloud Storage Seagate Dashboard User Guide Using the Cloud Storage Web Portal 28
Managing Your Seagate Drives with Seagate Dashboard Viewing Information About Your Drive 6. Managing Your Seagate Drives with Seagate Dashboard Seagate® Dashboard makes it easy to adjust settings and features on your Seagate drives. Using Seagate Dashboard, you can control the power save feature on your drive, turn the LEDs on the drive on or off, perform a diagnostic test, and access technical support for your drive.
Managing Your Seagate Drives with Seagate Dashboard Adjusting Drive Settings on the drive. You can click the magnifying glass button to open a new window and explore the contents of the drive. Click here to explore the drive Figure 23: Drive Info Tab Adjusting Drive Settings Click the Manage tab to adjust settings for your Seagate drive. From this tab, you can specify settings for the drive’s power save feature, enable or disable the drive’s LEDs, and perform a diagnostic test on the drive.
Managing Your Seagate Drives with Seagate Dashboard • Getting Technical Support for Your Seagate Drive Power: Sets the amount of time before the drive’s power save feature takes effect. The power save feature places the Seagate drive in a standby mode after it has been inactive for a certain amount of time. The drive automatically returns to active mode whenever someone accesses folders and files on the drive.
Managing Your Seagate Drives with Seagate Dashboard Getting Technical Support for Your Seagate Drive If you cannot find the information you are looking for on the Seagate web site, or if you want to contact Seagate Technical Support directly, select your region from the list box at the bottom of the screen. Seagate Dashboard displays links for opening a support case, as well as phone numbers and hours for contacting Seagate Technical Support from your region.
Managing the Seagate Dashboard Software Configuring Seagate Dashboard Settings 7. Managing the Seagate Dashboard Software From the Seagate® Dashboard Settings screen, you can customize the appearance of the Seagate Dashboard software on your system, enable or disable specific features, view the Seagate Dashboard activity log, and update the Seagate Dashboard software to the latest version.
Managing the Seagate Dashboard Software Setting Up Your Seagate Drives for Seagate Dashboard Setting Up Your Seagate Drives for Seagate Dashboard The Drives tab on the Settings screen shows information about your Seagate drives and Cloud Storage account and lets you set how the drives appear in the Seagate Dashboard user interface. Figure 27: Seagate Dashboard Drives Tab On the Drives tab, you can click the following for each drive: • Register: Opens the Product Registration page for the drive.
Managing the Seagate Dashboard Software Configuring Seagate Dashboard Features Dashboard features, as well as disable Seagate Dashboard access to specific social media networks. Figure 28: Seagate Dashboard Features Tab On this tab, you can select from the following options: • Language: Sets the language used in the Seagate Dashboard user interface. If you change the language setting, you must exit and restart Seagate Dashboard in order for the new setting to take effect.
Managing the Seagate Dashboard Software Viewing the Seagate Dashboard Log Viewing the Seagate Dashboard Log Whenever Seagate Dashboard completes an operation, such as executing a backup plan, or transferring files to or from your social media networks, it records information in its log. Click the Log tab to display the contents of the Seagate Dashboard log.
Managing the Seagate Dashboard Software Updating the Seagate Dashboard Software Updating the Seagate Dashboard Software From time to time, Seagate updates the Seagate Dashboard software. Click the Updates tab to check for updated Seagate Dashboard software and download and install it. Figure 30: Seagate Dashboard Updates Tab The Updates tab shows the version of Seagate Dashboard software that is currently running on your system and checks to see if a more recent version is available.
Index default backup drive 34 diagnostic test 31 A drive settings 6, 29–32 Apple Time Machine 9 F auto save 21 Facebook 17, 21 B Flickr 17, 21 backing up data 9–16 H continuously 13 Hidden box 34 selecting files 11 I setting destination 12 icon colors 7 setting frequency 13 installing software updates 37 snapshot 13 L backup plan language setting 35 customizing 10 launching the program 6 default 9 LEDs 31 deleting 14 M disabling 35 Mac 8 pausing 14 Microsoft Windows 6, 8 Ba
disabling the feature 35 T supported file types 17 Technical Support 31 social networking services 6 disabling access from Seagate Dashboard 35 U uploading files 17 supported Seagate drives 5 W system requirements 8 weekly back up 13 Mac 8 Y Microsoft Windows 8 YouTube 17 Seagate Dashboard User Guide 39