
User Manual


InstructiuSCX.FH11 23/11/05 18:54 Pgina 6
Composicin
C M Y CM MY CY CMY K
3. When the winning car passes the finishing line, the Pit Box fuel panel will show
this by making the fuel lights flash in their box.
4. When the last car passes the finishing line the green light will stop flashing.
5. If you wish to begin another race the same as the previous one, follow the steps
below:
· Check that the green light in front of the START/STOP key is off. If this
is not the case, press the START/STOP key for 2 seconds and the light
will go out.
· Press the START/STOP key for 2 seconds; the green light in front of it will
come on and you can start the race.
If on the other hand you wish to have a race counting laps down, follow the steps
below:
1. Hold the MODE key down for 2 seconds (the letters PIT will appear on the Pit
Box base unit’s display).
2. Press the MODE key once (the letters BAS will appear on the Pit Box base unit’s
display). You are now set to race without Pit Box.
3. Press the SELECT key once (the letters UP will appear on the Pit Box base
unit’s display).
4. Press the MODE key once (the letters DO will appear on the Pit Box base unit’s
display, indicating that laps will be counted down).
5. Press the SELECT key (001 will appear on the Pit Box base unit’s display). You
now need to set the number of laps you want to do in the race. Do this by
pressing the SELECT key; each press of this key will add a lap to the race
(pressing it continuously adds laps in tens).
6. When you have set the number of laps to be completed, press the MODE key
once. ( - - - ) will appear on the display and 2 red lights only will be lit on the
Pit Box fuel panel.
7. Press the START/STOP key down for 2 seconds and the green light in front of
the key will come on, showing that you are ready to begin the race.
At the beginning of the race, when the cars pass over the starting line the number
of laps to which the race has been set will appear on the Pit Box base unit’s
display, and every time the leading car passes over the line this counter will be
reduced by one lap.
When the race finishes, an acoustic signal will sound several times to show that
it is over and the Pit Box fuel control panel will show who the winner was by
making the fuel indicator lights flash.
If when you finish the race you wish to start another with the same number of
laps and counting down, simply press down the START/STOP key for 2 seconds
again: the green light in front of it will come on and ( - - - ) will appear on the
PIT BOX base unit’s display. You can now start another race the same as the
previous one.
If when you finish the race you wish to start another with the same way of counting
the laps down but with a different number of laps from the previous race, follow
the procedure for programming the number of laps exactly as shown at the
beginning of this section.
* Where you have had a race counting the laps up and you now want to have one
counting the laps down, follow the steps below:
1. Check that the green light in front of the START/STOP key is off. If this
is not the case, press the START/STOP key for 2 seconds and the light
will go out.
2. Follow the steps for programming the number of laps exactly as shown
at the beginning of this section.
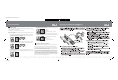
To make sure you are in “WITHOUT PIT BOX” mode
when you have finished programming the race but before
starting it, check the Pit Box base unit’s display and you
should see ( - - .- ) with the dot on the BASIC option.
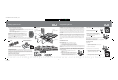
Pit Box
Race mode WITHOUT fuel load
Qualifying Race Mode
7. To do this, press the SELECT key once and 001 will appear on the Pit Box
base unit’s display. You should then press the SELECT key as many times
as there are participants in the race.
8. When you have set the number of competitors,
press the MODE key once and ( - - - ) will appear
on the PIT BOX base unit’s display.
Also, the Digital Chronometer display will show M1,
the number of laps programmed and the number of
participants. This means that the Digital Chronometer
is programmed.
9. Holt down the START/STOP key for 2 seconds and the green light in front
of it will come on. ( - - - ) will appear on the Chronometer display.
10.You may now start the qualifying race.
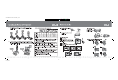
To make sure you are in “QUALIFYING” mode when you
have finished programming the race but before starting it,
check the Pit Box base unit’s display and you should see
( - - -. ) with the dot on the QUALIFY option.
During the race the Chronometer will give the lap times for each car. In the event
of a fastest lap, the display will flash.
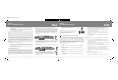
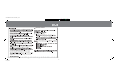
When the qualifying race is over, the Digital Chronometer’s display will show the
order in which the cars have finished and therefore the position in which they are
to be placed on the starting grid to begin the race.
Qualifying Race Mode
In order to present results it is ESSENTIAL that the Digital Chronometer be connected
(this is sold separately as ref. 25040).
All programming is to be carried out using the Pit Box.
The qualifying heat can be held with the cars competing one by one or all at the same
time. If the cars are to compete one by one the display on the Digital Chronometer will
show their lap times, and when a competitor finishes the heat their fastest lap time
will be displayed. Every time a player finishes their qualifying heat, their fastest lap
will appear on the display. When the last player finishes their qualifying heat, the
display will automatically show the final positions on the starting grid for the forthcoming
race.
If on the other hand all the cars compete at once in the qualifying heat, the Chronometer
will display all the players’ lap times and when the last player finishes all the laps in
the heat, the display will also automatically show the positions on the starting grid for
the forthcoming race.
This function involves completing a qualifying race in order to determine the order of
the cars on the starting grid for the forthcoming race. To programme this function,
follow the steps below:
1. Connect the Digital Chronometer to its own contact track. This can be recognised
because it has a red panel on the bottom. It is essential that the Digital
Chronometer ALWAYS be connected to this track, otherwise it will not work.
2. Hold down the MODE key for 2 seconds. The letters PIT will appear on the base
unit’s display.
3. Press the MODE key twice until the letters QUA appear on the PIT BOX base
unit’s display. You are now in “Qualifying Race” mode.
4. Press the SELECT key once. The letters LAP will appear on the PIT BOX base
unit’s display.
5. Press the SELECT key once more. 001 will appear on the PIT BOX base unit’s
display. You now need to set the number of laps you want for the qualifying
race. To do this press the SELECT key once for each lap you wish to programme.
Alternatively, holding the key down adds laps in tens.
6. When you have set the number of laps you want to do, press the MODE key
once. The letters PLA will appear on the base unit’s display. You should now
specify the number of cars taking part in the qualifying race.
3
www.scxdigitalsystem.comwww.scxdigitalsystem.com
-3-
-1-
-2-
-3-
Car no. 1 third place
Car no. 2 winner
Car no. 3 second place
-1-
-2-