
Installation manual


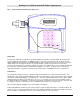


Table Of Contents
DataPage Lite (USA) Desktop UHF Radio Paging System
DPUSAlite 10/01 6 Issue 1
System Operation
1) Connect the 90 degree aerial to the BNC connector (bayonet twist lock) located at the side of the transmitter.
Slide the plastic cover over the connector, engaging the two lugs into the corresponding recesses in the side of
the case. This will maintain the aerial in an upright position, which is important for optimizing the range of the
transmitter. See Figure 1.
2) Connect the AC adaptor power lead to the socket located at the far right hand rear corner of the base station.
See Figure 2. Important note:
Only use the AC adaptor supplied with your system! The use of non-approved
adaptors will invalidate all warranty and service.
3) Check that the pagers have their batteries inserted and that they are turned on (refer to the individual pager
instruction manuals supplied with the system).
4) Plug the AC adaptor into a convenient wall socket. When the unit is first powered up the system will display
the following screen for a few seconds:
DPVB1V0 Followed by: PAGER: (1-9999)
Scope Communications >
The flashing cursor invites you to enter a pager number (this can be any number between 1 and 9,999) after
which you must press ENTER for the number to be accepted. Pressing the CANCEL key at this stage will return
the user to the pager number prompt to begin again. Pressing the SEND key in place of the ENTER key will
transmit a tone only message to the pager using the default beep type .
5) After pressing ENTER, the next screen appears to offer the selection of the beep types. Again, the flashing
cursor invites you to enter a selection.
At this point the operator may choose to select a beep type 1,2,3 or 4,
or press ENTER without making a selection. This will attach the default
beep type to the call. (It should be noted that not all pager types
currently carry the transmitter selectable beep type). In the event that BEEP TYPE (1-4):
your pagers are so equipped, selecting 1,2,3 and 4 will correspond to >
beep types A, B, C and D respectively. Pressing the SEND key at this
stage will send a tone only message together with the beep type selected.
6) After selecting the beep type, press ENTER. The screen will now prompt ENTER MESSAGE:
for you to enter a message of up to 16 digits, including [, ] and spaces. >
Note: the screen will confrim auto transmission of message if more than 16
digits are entered.
7) After selecting the message, press ENTER or SEND. The call will now
be transmitted to the pager. A confirmation message will briefly appear **Message**
on the screen. *Transmitted*
Pressing the ‘CANCEL’ key at any stage of operation and any entry level will immediately revert the unit to the
‘ENTER PAGER No:’ prompt.