
Manual


Upgrading Firmware
975-0679-01-01 Revision D 3–39
Installing Conext ComBox Upgrades from a Thumb Drive
To install an upgrade for the Conext ComBox using a thumb drive:
1. Connect the thumb drive to a computer with Internet access.
There must be only one .bdl file on the thumb drive. If there are two or more .bdl
files, there is no guarantee which .bdl file will be chosen.
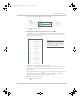
2. In a Web browser, go to http://www.schneider-electric.com/products/ww/en/
7000-solar-off-grid-and-back-up/7030-monitoring/62089-conext-combox/ to
select the upgrade you need.
3. Once you have found the upgrade, save the .bdl file to the root directory of the
thumb drive.
4. Clear the Conext ComBox internal memory. See “Clearing Conext ComBox Internal
Firmware Memory”.
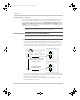
Connect the thumb drive to the USB port labeled Host on the top front of the Conext
ComBox.
The firmware upgrade begins automatically.
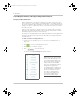
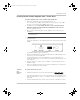
5. Watch the indicator LEDs on the Conext ComBox. When the Xanbus LED goes on, it
is now okay to remove the thumb drive.
As the upgrade progresses the Power LED flashes. The other LEDs go on to
indicate the upgrade process. This can take several minutes depending on the size
of the upgrade.
6. When the upgrade is complete, the Power LED is on to indicate that the Conext
ComBox is ready.
7. Clear your computer’s web browser cache after the upgrade before you log back in
to the Conext ComBox’s web user interface.
Clearing a
web
browser’s
cache
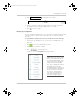
To clear the web browser’s cache:
1. In PC-based web browsers, press the keyboard shortcut .
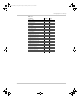
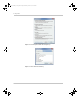
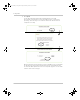
2. In the dialog box that opens (varies for each web browser), select an option to clear
temporary Internet files or “cache”. See examples in Figure 3-2 and Figure 3-3 on
page 3–40.
3. For Mac’s Safari web browser, you have to go to Preferences and then to Security.
Note: Save the .bdl file to the root directory of the thumb drive so the upgrade
can install properly.
Conext_ComBox_Owners_Guide.book Page 39 Monday, October 21, 2013 10:00 AM