
Installation Guide

Installation
2–12 975-0679-01-01 Revision F
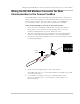
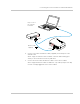
Turning On the Conext ComBox
The Conext ComBox must be wired into an Ethernet connection before it is
powered up. Follow the sequence of steps in “Connecting the Conext ComBox to
an Ethernet Network” on page 2–10.
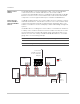
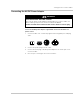
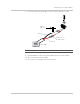
To turn on the Conext ComBox:
1. Connect a power source to the Conext ComBox. You can do either of the
following:
• Plug the AC/DC power adapter into the AC wall outlet (see “Connecting
the AC/DC Power Adapter”), or
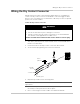
• Plug the RS 485 connector, which has been wired with a 24 V DC power
supply, to the RS 485 port on the Conext ComBox until it locks into place.
See “Wiring the RS 485 Modbus Connector for Power to the Conext
ComBox” for the wiring procedure.
2. When power is applied to the Conext ComBox, all the LEDs flash once and
then the Power LED flashes intermittently for approximately two minutes
during the application loading and initialization sequence.
Wait until the Power LED lights up steadily before proceeding to the next
step. See “LED Indicator Lights (LEDs)” on page 1–4.
3. When the Conext ComBox is ready, proceed to either “Finding the Conext
ComBox on the Network” on page 2–16 or “Logging in to the Conext
ComBox Web User Interface Using a USB Thumb Drive” on page 2–18.
WARNING
PHYSICAL INJURY HAZARD
Xanbus is a valid power source for the Conext ComBox. However, for the first
time set-up, using Xanbus as a power source is not recommended. the Conext
ComBox clock will override the other Xanbus devices’ clocks and could
trigger unintentional time-based events. Therefore, DO NOT connect the
Conext ComBox to the Xanbus network prior to setting up the internal clock of
the Conext ComBox. Refer to “Changing the Time” on page 3–5. If Xanbus is
the only source powering the ComBox, after installation verify the time settings
in all devices.
Failure to follow these instructions can result in death or serious injury.