
Installation Guide
18 INSTALLATION
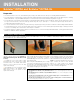
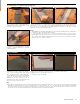
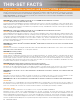
Apply DITRA or DITRA-XL to the floor, fleece side
down. Solidly embed the matting into the bonding
mortar using a float, screed trowel, or Schluter
®
-
DITRA-ROLLER (please observe the open time of
the bonding mortar).
When using the DITRA-ROLLER, place a weight
(e.g., bag(s) of mortar/grout or box of tile) not to
exceed 75 lbs on the DITRA-ROLLER shelf. Slowly
move the roller from one end of the matting to the
other, slightly overlapping successive passes.
Schluter
®
-DITRA
and
Schluter
®
-DITRA-XL
INSTALLATION
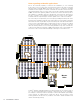
ESTIMATED THIN-SET COVERAGE
To bond DITRA to the substrate, using the DITRA trowel: Use one 50 lb. (22.68 kg) bag of mortar per 150
ft
2
(10.7 m
2
).
To bond DITRA-XL to the substrate, using the DITRA-XL trowel: Use one 50 lb. (22.68 kg) bag of mortar
per 100 ft
2
(9.3 m
2
).
To bond the tile to the DITRA, using a 1/4" x 3/8" (6 mm x 10 mm) square- or U-notched trowel: Use one
50 lb (22.68 kg) bag of mortar per 40 - 50 ft
2
(3.7 - 4.6 m
2
).
To bond the tile to the DITRA-XL, using a 1/4" x 3/8" (6 mm x 10 mm) square- or U-notched trowel: Use
one 50 lb (22.68 kg) bag of mortar per 35 - 45 ft
2
(3.3 - 4.2 m
2
).
A step-by-step installation video is available. E-mail us at info@schluter.com or call us at 800-472-4588 (USA) or 800-667-8746 (Canada).
To see a video clip, go to www.schluter.com.
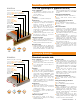
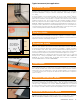
Easy Step-by-Step Installation
Using a thin-set mortar that is suitable for the
substrate, apply the thin-set mortar (mixed to a
fairly fluid consistency, but still able to hold
a notch).
For DITRA use a 1/4" x 3/16" (6 mm x 5 mm)
V-notched trowel, 5/16" x 5/16" (8 mm x 8 mm)
V-notched trowel, or the DITRA trowel which
features a 11/64" x 11/64" (4.5 mm x 4.5 mm)
square-notched design.
For DITRA-XL use a 1/4" x 1/4" (6 mm x 6 mm)
square-notched trowel or the DITRA-XL trowel,
which features a 1/4" x 1/4" (6 mm x 6 mm)
square-notched design.
1
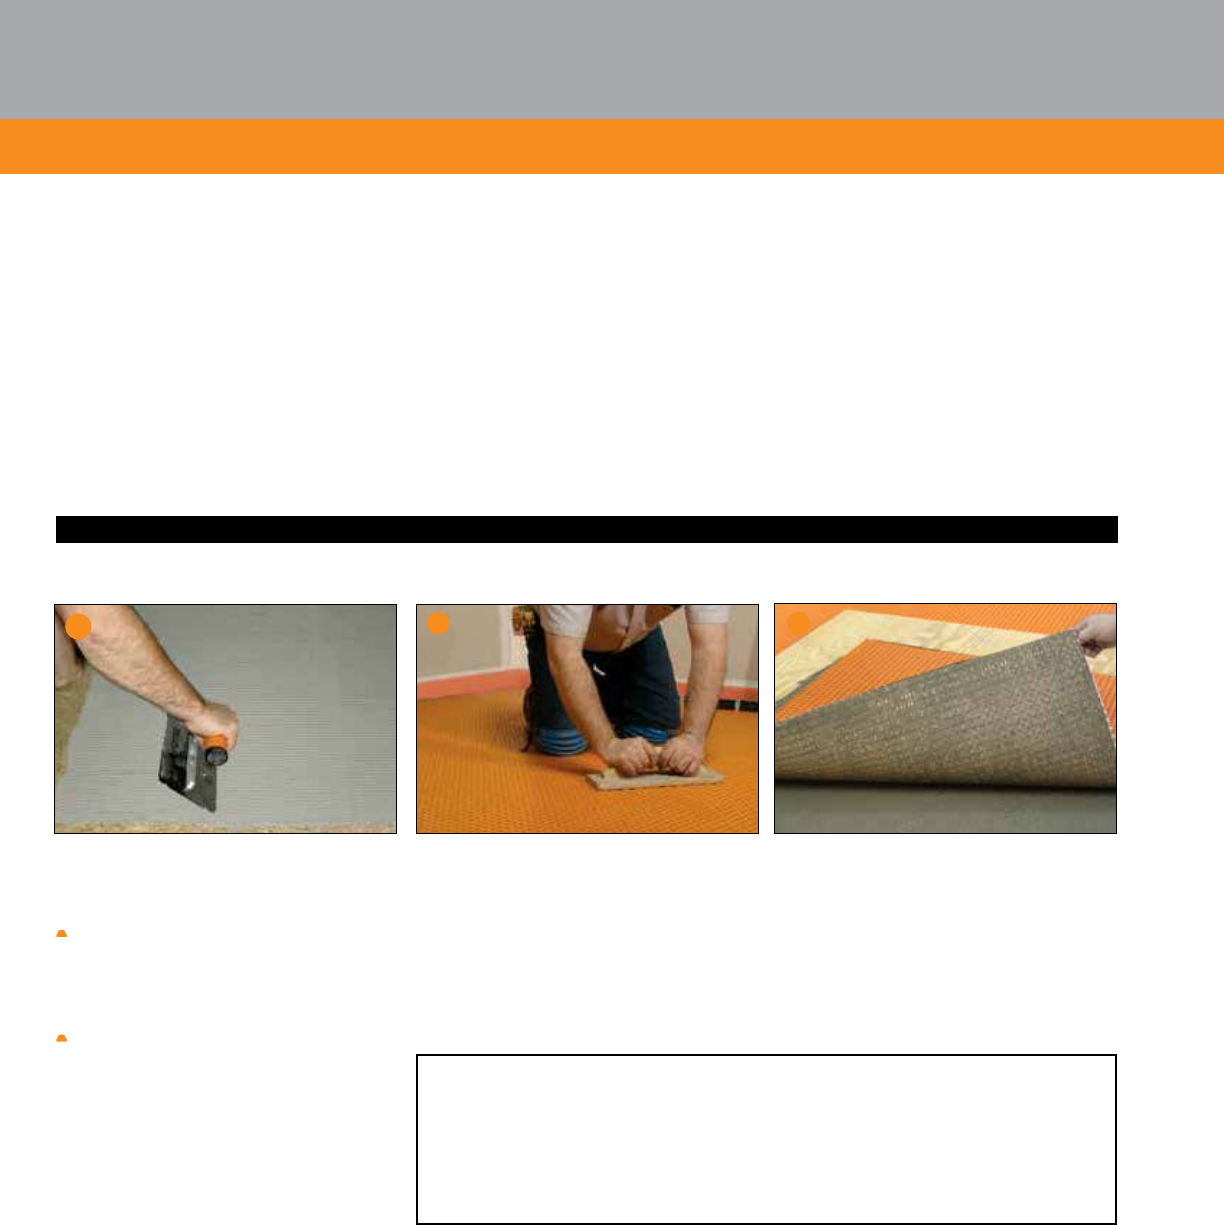
Lift up a corner of the matting to check coverage.
Proper installation results in full contact between
the fleece webbing and the thin-set mortar. Simply
abut end and side sections of adjacent sheets.
Note: Coverage may vary with mortar consistency,
angle at which the trowel is held, substrate
flatness, etc. If full coverage is not achieved,
remove and reapply, making sure to verify proper
mortar consistency and application.
2 3
Preparation
• The substrate must be clean, even, and load bearing. Any leveling of the subfloor must be done prior to installing DITRA and DITRA-XL.
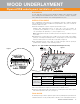
• For wood substrates, verify that panels are properly fastened. Tightly butted and/or tented plywood or OSB seams must be addressed prior to installing
DITRA and DITRA-XL. If a plywood/OSB underlayment is to be installed, follow the Wood Underlayment guidelines on page 17.
• For vinyl substrates, ensure that the structure beneath is sound and adequate and that the vinyl is well adhered. Remove any wax and clean the surface.
For vinyl over wood structures, nail off floor with ring shank flooring nails every 4" (102 mm) o.c. - fasteners must pass through entire thickness of
assembly with minimal penetration into joists.
• For concrete substrates, remove any waxy or oily films and curing compounds (if present) by mechanical scarification. When bonding DITRA and DITRA-
XL to particularly dry, porous concrete, the slab should be moistened to saturate the concrete and help prevent premature drying or skinning of the bond
coat. Excess or standing surface water must be removed prior to installation.
• For gypsum substrates, residual moisture in gypsum screed must be 2.0% or less before installing DITRA and DITRA-XL. Follow gypsum manufacturer’s
directions for additional substrate preparation.