
User guide

Installation 15
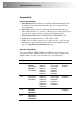
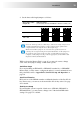
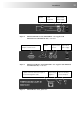
4. Set the three cable length jumpers as follows:
Interconnect Cable
Length (m)
Jumper Position
(as viewed from front, with RJ45 connector towards you)
0 – 100 No jumpers (default)
100 – 200
200 – 300
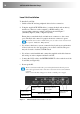
If you are at the top end of a cable range, and you are using a high screen
resolution (1024x768 or higher), you may achieve better quality video
compensation by selecting the next cable length range.
Ensure that all three jumpers are set to the same position. If you are
carrying out a test placement prior to final installation, set the jumpers to
the positions appropriate to the test cable’s length. When your tests are
complete, set the jumpers to the positions appropriate for the CATx cable
length used in the full installation.
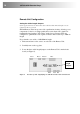
While you have the Remote Unit’s cover off, you may also want to change
some of the other jumper settings or DIP switch options:
Serial Port Setup
If you are installing an SDLink1/S or SDLink2/S extender kit, or SDLink/RS
Remote Unit, you may want to configure the unit(s) for serial communication at
this point. Please refer to Appendix D: Serial Port Setup and Operation on
page 39.
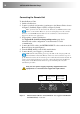
Scroll Lock Function
PS/2 versions of the SDLink extenders redefine the function of the Scroll Lock
key. If necessary, you can restore the normal Scroll Lock key action. See page
24 for details.
Dual Access Setup
If your Extender system is capable of dual access (SDLink2, SDLink2/S or
SDLink2/SU kits), you may want to change some of the default DIP switch
settings. See page 27 for details.