CReader V User’s Manual PDF version provided by ScanTool.net, LLC www.scantool.
LAUNCH CReaderV Trademark Information LAUNCH is a registered trademark of LAUNCH TECH CO., LTD. (LAUNCH) in China and other countries. All other LAUNCH trademarks, service marks, domain names, logos and company names referred to in this manual are either trademarks, registered trademarks, service marks, domain names, logos and company names of or are otherwise the property of LAUNCH or its affiliates.
LAUNCH CreaderV User’s Manual End User License Agreement IMPORTANT: PLEASE READ THIS END USER LICENSE AGREEMENT CAREFULLY. USING LAUNCH OR LAUNCH-SUPPLIED PRODUCTS AND SOFTWARE CONSTITUTES ACCEPTANCE OF THIS AGREEMENT. LAUNCH IS WILLING TO LICENSE THE PRODUCTS, INFORMATION, SOFTWARE AND DOCUMENTS (COLLECTIVELY, “MATERIALS”) TO YOU ONLY UPON THE CONDITION THAT YOU ACCEPT ALL OF THE TERMS CONTAINED IN THIS LICENSE AGREEMENT.
LAUNCH CreaderV User’s Manual not to: (i) Transfer, assign or sublicense its license rights to any other person or entity, or use the Materials on unauthorized or secondhand LAUNCH equipment, and Customer acknowledges that any attempted transfer, assignment, sublicense or use shall be void; (ii) Make error corrections to or otherwise modify or adapt the Materials or create derivative works based upon the Materials, or permit third parties to do the same; (iii) Reverse engineer or decompile, decrypt, disas
LAUNCH CreaderV User’s Manual Proprietary Notices. Customer agrees to maintain and reproduce all copyright and other proprietary notices on all copies, in any form, of the Materials in the same form and manner that such copyright and other proprietary notices are included on the Materials. Except as expressly authorized in this Agreement, Customer shall not make any copies or duplicates of any Materials without the prior written permission of LAUNCH. Term and Termination.
LAUNCH CreaderV User’s Manual reserved to make change at any time without notice. Safety Precautions and Warnings To prevent personal injury or damage to vehicles and/or the CreaderV, please read this instruction manual first carefully and observe the following safety precautions at a minimum whenever working on a vehicle: z z z z z z z z z z z Always perform automotive testing in a safe environment. Do not attempt to operate or observe the tool while driving a vehicle.
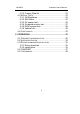
LAUNCH CreaderV User’s Manual Table of Contents SAFETY PRECAUTIONS AND WARNINGS .....................VI 1. INTRODUCTION ............................................................. 3 2. GENERAL INFORMATION-ABOUT OBDII/EOBD ......... 3 2.1 ON-BOARD DIAGNOSTICS (OBD) II ................................ 3 2.2 DIAGNOSTIC TROUBLE CODES (DTCS)........................... 4 2.3 LOCATION OF THE DATA LINK CONNECTOR (DLC) ............ 5 2.4 OBD II READINESS MONITORS ...................................... 6 2.
LAUNCH CreaderV User’s Manual 4.2.2 Custom Data list ............................................... 23 4.3 SPECIAL TESTS .......................................................... 23 4.3.1 I/M Readiness .................................................. 24 4.3.2 MIL Status ........................................................ 25 4.3.3 O2 sensor test.................................................. 25 4.3.4 On-board monitor test ...................................... 27 4.3.5 EVAP system test.........
LAUNCH CreaderV User’s Manual 1. INTRODUCTION CreaderV is newly developed by LAUNCH, specially designed for car owners or DIYs to diagnose any vehicle that is compliant to OBDII/EOBD. It not only can read/clear DTCs, but also can read live data in 2 modes, and perform many special tests. Tri-languages make it operation easily for a technician. The feature of upgrading online ensures it can test new model cars and/or functions in the future.
LAUNCH CreaderV User’s Manual commanded 'on' or 'off'; 2) Which, if any, Diagnostic Trouble Codes (DTCs) are stored; 3) Readiness Monitor status. 2.2 Diagnostic Trouble Codes (DTCs) OBD II Diagnostic Trouble Codes are codes that are stored by the on-board computer diagnostic system in response to a problem found in the vehicle. These codes identify a particular problem area and are intended to provide you with a guide as to where a fault might be occurring within a vehicle.
LAUNCH CreaderV User’s Manual DTC Example P0202 Systems P=Powrtrain B=Body C=Chassis U=Network Code Type Generic(SAE) P0,P2,P34-P39 B0,B3 C0,C3 U0,U3 Manufacturer Specific: P1,P30-P33 B1,B2 C1,C2 U1,U2 Identifying specific malfunctioning section of the systems Sub-systems 1=Fuel and air metering 2=Fuel and air metering 3=Ignition system or misfire 4=Auxiliary emission controls 5=Vehicle speed,idle control, and auxiliary inputs 6=Computer and auxiliary outputs 7=Transmission 8=Transmission 9=Transmissio
LAUNCH CreaderV User’s Manual some Asian and European vehicles, the DLC is located behind the ashtray and the ashtray must be removed to access the connector. If the DLC cannot be found, refer to the vehicle’s service manual for the location. 2.4 OBD II Readiness Monitors An important part of a vehicle’s OBD II system is the Readiness Monitors, which are indicators used to find out if all of the emissions components have been evaluated by the OBD II system.
LAUNCH CreaderV User’s Manual emissions control strategy. Continuous Monitors -- Some of the vehicle components or systems are continuously tested by the vehicle’s OBD II system, while others are tested only under specific vehicle operating conditions.
LAUNCH CreaderV User’s Manual drive cycle that enables a monitor and sets readiness codes to “Ready” varies for each individual monitor. Once a monitor is set as “Ready” or “Complete”, it will remain in this state. A number of factors, including erasing of diagnostic trouble codes (DTCs) with a code reader or a disconnected battery, can result in Readiness Monitors being set to “Not Ready”. Since the three continuous monitors are constantly evaluating, they will be reported as “Ready” all of the time.
LAUNCH CreaderV User’s Manual Enabling Criteria -- Also termed Enabling Conditions. They are the vehicle-specific events or conditions that must occur within the engine before the various monitors will set, or run. Some monitors require the vehicle to follow a prescribed “drive cycle” routine as part of the enabling criteria. Drive cycles vary among vehicles and for each monitor in any particular vehicle.
LAUNCH CreaderV User’s Manual 3. Product Descriptions 3.1 Outline of CReaderV ① Cable with OBD II CONNECTOR -- Connects the CReaderV to the vehicle’s Data Link Connector (DLC). ② LCD DISPLAY -- Indicates test results. ③ EXIT BUTTON -- Returns to previous menu. ④ UP/DOWN BUTTONs – Move cursor up or down for selection; or turn page up or down when more one page displayed ⑤ ENTER BUTTON--Confirms a selection (or action) from a menu list ⑥ USB PORT -- Connects to computer to update the CReaderV online.
LAUNCH CreaderV User’s Manual 3.2 Specifications 1) Display: Backlit, 160 x 160 pixels 2) Operating Temperature: 0 to 60°C (32 to 140 F°) 3) Storage Temperature: -20 to 70°C (-4 to 158 F°) 4) Power: 8 to 18 Volts provided via DLC 5) Unit Dimensions: 126 mm × 88 mm × 22 mm (0.80”) (Length× Width×Thickness) 6) Test Cable length: 0.9m 3.3 Accessories Included 1) User’s Manual -- Instructions on tool operations 2) USB cable--Connect to a computer for upgrading online 3.
LAUNCH CreaderV User’s Manual The CReaderV allows you to make the following adjustments, settings and self-test: 1) Adjust Contrast: Adjust the contrast of the LCD display Choose [Adjust Contrast] and press [ interface as shown below: ], the screen will display the In the [Adjust Contrast] interface, you can adjust the contrast of screen. Press [ ] to increase contrast or press [ ] to decrease contrast according to you desired.
LAUNCH CreaderV User’s Manual 2) Select Language: Selects desired language. Choose [Select Language] and press [ ], the screen will display the interface as shown below: You can press [ ] [ ] key to choose English, French or Spanish. And then you press[ ] to confirm. The system will convert to the chosen language interface at once.
LAUNCH Press [ ] or [ CreaderV User’s Manual ] to select unit and press [ ] to confirm. 4) Self test: Test buttons and LCD operation. In the [Self Test] interface, you can do LCD Test and Buttons Test.
LAUNCH CreaderV User’s Manual And then the screen will display with a dark background automatically. You can see if there is hot pixel against the dark background. After check is complete, please press [ ] to return to the previous interface. And choose [Keyboard Test], press [ ] to perform keyboard test. You can press [ ], [ ] or [ ]. If they appear on the screen, it indicates that the Button is normal and you can use them for testing.
LAUNCH CreaderV User’s Manual After all the operation is complete, Press [ and end the test. ] to return to Main Menu 3.6 Vehicle Coverage The CReaderV is specially designed to work with all OBD II compliant vehicles, including Control Area Network (CAN). It is required by EPA that all 1996 and newer vehicles (cars and light trucks) sold in the United States must be OBD II compliant and this includes all American, Asian and European vehicles.
LAUNCH CreaderV User’s Manual CAUTION: Don’t connect or disconnect any test equipment with ignition on or engine running. 4.1 Diagnostic Codes Select [Read Codes] in Main Menu and press [ display as following figure: ], the Screen will 4.1.1 Read Codes Select [Read Codes] and press [ 17 ].
LAUNCH CreaderV User’s Manual screen will display the codes as shown below: 01/06 indicates that there are 6 codes totally, and now P0100 is the first code to display. The screen will also show the content of the code below the number of code. You can use [ ] key to view the next code.
LAUNCH CreaderV User’s Manual Now you can use [ ] [ ] key to move the cursor (>) to select the carmaker to which the code belong. We choose [BENZ] to view the definition: After viewing the manufacturer-defined codes, you can press [ ] key to view the next codes. After viewing all the codes, you can press [ ] to return to the Diagnostic Codes Menu.
LAUNCH CreaderV User’s Manual 4.1.
LAUNCH z CreaderV User’s Manual trouble codes. After clearing, you should retrieve trouble codes once more or turn ignition on and retrieve codes again. If there are still some trouble codes for hard troubles, please find the reason caused the trouble code firstly, and then solve the problem. Now, the trouble codes can be erased. 4.1.3 View Freeze Data When an emission-related fault occurs, certain vehicle conditions are recorded by the on-board computer.
LAUNCH CreaderV User’s Manual interface and then press [ ] button to confirm, the screen will display the interface as shown below: You can view all data stream items or select a certain item of live data with a graph. 4.2.
LAUNCH CreaderV User’s Manual 4.2.2 Custom Data list Select Custom Data list and press [ ] button to confirm, a tips window will be displayed that tells you how to select, after you select one live data desired and press [ ] button, the window will be like as shown below: Upper is live data name/value, lower is a graph of engine speed variation. 4.
LAUNCH CreaderV User’s Manual 4.3.1 I/M Readiness I/M refers to Inspection and Maintenance that is legislated by the Government to meet federal clean-air standards. I/M Readiness indicates whether or not the various emissions-related systems on the vehicle are operating properly and are ready for Inspection and Maintenance testing. The purpose of the I/M Readiness Monitor Status is to indicate which of the vehicle’s Monitors have run and completed their diagnosis and testing (as described in 2.
LAUNCH You can use [ CreaderV User’s Manual ][ ] key to view other data of vehicle. 4.3.2 MIL Status MIL Status indicates the status of malfunction indicator lamp (MIL). The MIL on vehicle will be light only when there are DTCs. Select [MIL Status] and press [ ], the screen will display MIL status. 4.3.3 O2 sensor test The results of O2 sensor test are not live values but instead the results of the ECU’s last O2 sensor test.
LAUNCH CreaderV User’s Manual Select O2 sensor test in Special Tests menu and press [ screen will display as shown below: Press [ ] [ ] button to select a sensor and press [ will display as shown below: 26 ] and the ], the screen
LAUNCH CreaderV User’s Manual In this window, there are two items: Max sensor voltage (V) and Sensor Period (S), you can use[ ] [ ] button to select a item and press [ ], the screen will display as shown below: 4.3.4 On-board monitor test This function can be utilized to read the results of on-board diagnostic monitoring tests for specific components/systems.
LAUNCH CreaderV User’s Manual You can use [ ] [ ] button to select a item and press [ screen will display as shown below: ], the 4.3.5 EVAP system test The EVAP test function lets you initiate a leak test for the vehicle’s EVAP system. The CreaderV does not perform the leak test, but signals to vehicle’s on-board computer to initiate the test. Before using the system test function, refer to the vehicle’s service repair manual to determine the procedures necessary to stop the test.
LAUNCH CreaderV User’s Manual Select [EVAP System Test] and press [ ], the screen will display the relative information about EVAP system. Some vehicle manufacturers do not allow external devices to control vehicle system. If the car doesn’t support this function, it may display as below: If the vehicle’s supports this function, it may display as below: 4.3.
LAUNCH CreaderV User’s Manual ID) and CVN (Calibration verify number). 4.4 Code Lookup Select [Code Lookup] in the Main Menu and press [ will display the interface as shown below: ] and the screen You can use [ ] [ ] key to change the first letter. It can be switched among “P”, “B”, “C” and “U”. And press [ ] moves the cursor to next. And then press [ ] [ ] key to input number. After you input the code number, press [ ] to view the definition of the code.
LAUNCH CreaderV User’s Manual 31
LAUNCH CreaderV User’s Manual 5.2 User registration As you buy a CreaderV, please visit www.crecorder.com to register, only after successfully registered, you can logon at the site and can download the CreaderV driver & latest version program of CreaderV. 5.3 Driver download & installation 5.3.1 Driver download Log on www.crecorder.com,download CreaderV driver, and then unzip it to local disk. 5.3.
LAUNCH CreaderV User’s Manual Please click "Next", enter the following window: Select "Search for a suitable driver for my device (recommended)" and click "NextÆ" 33
LAUNCH CreaderV User’s Manual Select "Specify a location", and click "NextÆ", You can input the direction of driver saved or click "Browse…" to search it, as following figure: 34
LAUNCH CreaderV User’s Manual Click "OK", Select "slabw2k.
LAUNCH CreaderV User’s Manual Click "NextÆ", Click "Finish", CreaderV driver installation is finished.
LAUNCH CreaderV User’s Manual 5.4 COM PORT Connect CreaderV to locate which COM Port no.
LAUNCH CreaderV User’s Manual Click ‘Hardware’, and then ‘Device Manager’, another dialog box will pop-up shown below: Click ‘Port (COM & LPT)’ you will see ‘CODELINK for OBD&CAN USB Controller (COM3)’ the CreaderV has been connected at COM3.
LAUNCH CreaderV User’s Manual 5.4.1 Upgrading Log on www.crecorder.com,download latest version CreaderV program upgrade-package and unzip it to local disk. Connect the CreaderV to computer through USB cable and Open the CreaderV Upgrade.exe, The following box will appear: Select the COM Port no. using the pull-down menu, which belong to CreaderV (see 5.4 COM PORT). Click "Start", when a message of upgrading succeed pops out, unplug USB cable. Upgrading ends.
LAUNCH CreaderV User’s Manual Warranty THIS WARRANTY IS EXPRESSLY LIMITED TO PERSONS WHO PURCHASE LAUNCH PRODUCTS FOR PURPOSES OF RESALE OR USE IN THE ORDINARY COURSE OF THE BUYER’S BUSINESS. LAUNCH electronic product is warranted against defects in materials and workmanship for one year (12 months) from date of delivery to the user.
LAUNCH CreaderV User’s Manual Customer Service If you have any questions on the operation of the unit, please contact us: Tel: 86-755-84528431/84528822 E-mail: X431@cnlaunch.com If your unit requires repair service, return it to the manufacturer with a copy of the sales receipt and a note describing the problem. If the unit is determined to be in warranty, it will be repaired or replaced at no charge.