
User manual


26 Chapter 2. Using IDEA
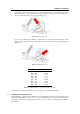
2.2.1 Free mode acquisition
When the acquisition procedure is initiated, with the Open head button , it will be displayed the interface
shown in Figure 2.14.
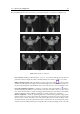
Figure 2.14: Acquisition interface.
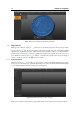
The scan panel (Figure 2.15) shows a combo-box by which the following options can be chosen:
• 3D Scan: allows to perform 3D scans in free mode, described in this section;
• Setup ottico: allows to go back to the physical configuration of the scanner (ref. 2.1.1).
Keep the selection 3D Scan to perform the 3D acquisition of the framed area of the object; the scan panel
shows also the following buttons:
Figure 2.15: Scan panel.
•
/
Turn on / Turn off live
: allows to activate and deactivate the visualization of the object
and to place the scanner at the appropriate distance;
• 3D Scan: launches the acquisition of the part of data currently framed by the cameras;
In the lower part of the panel it is also possible to set the name of the scans, as well as set the initial value of
their progressive numeration.
In case the progressive numeration is decreased, the new acquisitions will replace the ones already
existing.
The acquisition settings’ tools, displayed in Figure 2.16, allow to modify the parameters related to the
acquisition (ref. Sect. 1.1.3.2).
Figure 2.16: Acquisition settings panel.