
User manual


2.1 Optical set-up 23
• the approximate framed area;
• the type of master he/she wants to use.
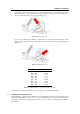
Figure 2.10: Optical head calibration settings.
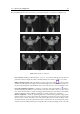
Once confirmed these choices IDEA starts the Calibration mode as shown in Figure 2.11.The purpose of the
calibration is to acquire a sequence of images to elaborate in order to produce entry data for the procedure
that calculates the scanner’s operational parameters.
Figure 2.11: Calibration mode.
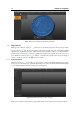
The calibration panel (Figure 2.12) is shown at the center-bottom of the page, and offers the following
features:
• Calibration/ recalibration mode
: allows to carry out either a complete calibration or a recalibration;
the complete calibration determines all the operational parameters and uses at least 9 images; the
recalibration only determines the parameters regarding the orientation of the camera and uses at least
3 images. Recalibration cannot be used if the scanner’s optical setup has been changed.
•
/
Turn on / Turn off live
: allows to activate and deactivate the visualization of the master
framed by the two cameras;
• Initialize calibration
: starts the acquisition procedure of 3 images of the calibration plate, which
allows to extract the light intensity and framed field parameters;
• Grab image pair: captures and elaborates on a pair of images of the calibration master;
• Next pair: goes to the next image pair that needs to be captured;
• Previous pair: goes to the previous image pair that needs to be acquired;