
User manual


2.1 Optical set-up 19
Area Pattern
From 80 to 120 mm 100×100 pitch 5.00 mm
From 120 to 200 mm 200×150 pitch 7.50 mm
From 200 to 350 mm 400×300 pitch 15.00 mm
From 400 to 500 mm 400×400 pitch 30.00 mm
Table 2.2: Relationship scanning area – calibration master’ pattern.
2.1.1 Optical set-up mode
The first time the scanner is used, and every time the scanning area changes, the scanner has to be configured
and then calibrated. Clicking on the button Open head the scanner connects to the software; at first use
IDEA detects that the setup and calibration procedure has never been carried out and will automatically open
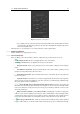
the optical setup in the mode combo-box. The program’s interface presents itself as shown in Figure 2.3.
The optical setup panel (Figure 2.4) is displayed in the center at the bottom of the window.
Figure 2.3: Optical setup mode.
Figure 2.4: Optical setup panel.
With this panel it is possible to carry out the following operations:
•
/
Turn on / Turn off live
: allows to activate or deactivate the live visualization of the master
framed by the two cameras; By clicking on the button Turn on live two windows will appear in the
3D view panel. Such windows show the surface currently framed by the cameras, together with a
crosshair, as shown in Figure 2.4;
• Start calibration procedure: terminates the optical setup procedure and start the calibration;
• cameras’ regulation operations: