
User's Manual

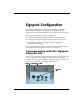
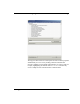
Table Of Contents
- Savi Signpost SP-65X Series Installation Guide
- Contents
- Figures
- Introduction
- Hardware Installation
- Signpost Configuration

&+$37(5
6LJQSRVW&RQILJXUDWLRQ
6DYL6LJQSRVW63;6HULHV,QVWDOODWLRQ*XLGH
$GGLQJDQG&RQILJXULQJWKH6LJQSRVW
LQ6PDUW&KDLQ6LWH0DQDJHU
To add a device to the network, you can use auto-discovery or add a
signpost manually. Whenever possible, Savi recommends using auto-
discovery to add a device.
'LVFRYHULQJD6LJQSRVW
(WKHUQHW&RQQHFWLRQ
The RJ-45 connector provides Ethernet connection for the Savi Signpost
SP-65X Series.
1RWH
5HSODFHDQGWLJKWHQWKHSURWHFWLYHFDSZKHQWKH5-SRUWLVQRW
XVHG
A signpost that is plugged into an Ethernet broadcasts discovery packets.
When you start a SmartChain Site Manager that is connected to the
Ethernet, it recognizes these broadcasts and responds to the signpost that a
SmartChain Site Manager at a given IP address is available for connection.
The signpost must reside on the same subnet mask as the SmartChain Site
Manager to be managed properly.
When a DHCP domain server is connected to the same network as the
SmartChain Site Manager and signpost, the signpost initiates a DHCP
operation to obtain a valid IP address to replace its default IP address
(10.7.19.11). If you are installing multiple signposts, it is a good idea to
connect one signpost to the network at a time to avoid IP address conflicts.
When a BOOTP domain server is connected to the same network as the
SmartChain Site Manager and signpost, the BOOTP server automatically
assigns an IP address to the signpost. The following four parameters must
be changed in SmartChain Site Manager to set up the BOOTP server.