
Owner manual
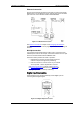
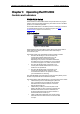


Table Of Contents
- General Information
- Installation
- Operating the ETC2002
- Connecting to the ETC2002
- Setting Up the ETC2002
- Changing the Password and Security
- Changing Time and Date
- Configuring Local Time Settings
- Configuring Serial Ports
- Configuring the Network
- Configuring Dial-Up Connections
- Configuring Wireless RF Connections
- Configuring Gateway Options
- Configuring Device Routing Table
- Configuring eXpertPower Client
- Configuring Data Server
- Upgrading Device Firmware
- Device Maintenance
- Technical Specifications
Chapter 2 Installation Electrical Installation
ETC2002 Network Communicator 11
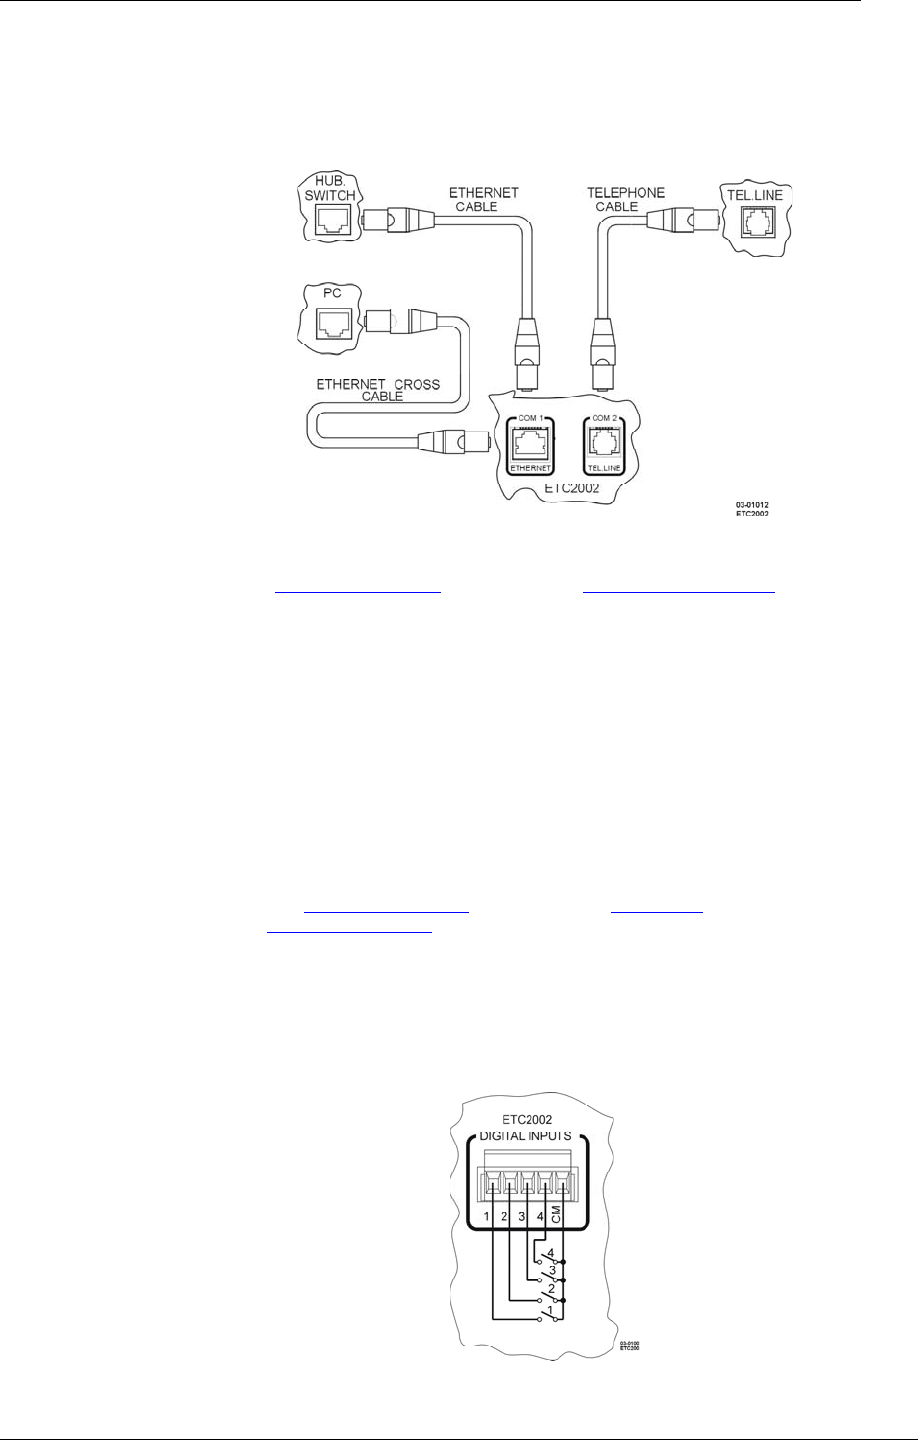
Ethernet Connection
Plug the end of the Ethernet cable that came with your device into the wall
Ethernet jack or into the Ethernet hub jack, and the other end into the RJ45
jack at the front of the ETC2002 marked COM1/ETHERNET.
Figure 2-12 Network Connections
See Internet Connections
in Chapter 3 and Configuring the Network in
Chapter 5 for instructions on how to program your device for networking via
Ethernet.
Dial-Up Connection
If you ordered your ETC2002 with the modem option, plug the end of the
standard phone cord into the wall jack, and the other end into the RJ11 jack
at the front of the ETC2002 marked COM2/TEL.LINE.
The device modem provides two modes of operation:
• Regular dial-in connection to the ETC2002 server from
a remote computer through Dial-Up networking.
• Dial-out connection to a remote server via your Internet
service provider – used for eXpertPower™ services.
See Internet Connections
in Chapter 3 and Configuring
Dial-Up Connections in Chapter 5 for instructions on how
to program your device for Dial-Up networking.
Digital Input Connection
The ETC2002 has four optically isolated dry-contact digital inputs for
monitoring external digital signals.
Figure
2-13 Digital Input Connections