
User`s guide

5.
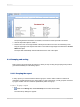
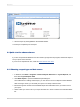
After you have added all the tables you want to work with, click OK on the Database Expert.
Note:
If you select more than one table in the Database Expert dialog box, the Links tab appears. For
more information on linking, see Linking multiple tables.
The Design tab appears with Report Header, Page Header, Details, Page Footer, and Report Footer
areas. A report is created by inserting and formatting items in each of these areas.
Note:
To use additional database tables for a report and match them up on a record-by-record basis,
click Database Expert on the Expert Tools toolbar, select the table(s), and then set up the links on the
Links tab when it appears.
2.4.2 Working with report elements on the Design tab
1.
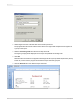
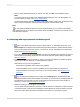
Each of the default report areas contains a single section. To add additional sections, click
Section Expert on the Expert Tools toolbar and use the Section Expert to add the desired sections.
Once you have added sections to an area, you can move, merge, and delete them in the Section
Expert. See Designing with guidelines .
2.
To turn the grid on or off, choose the Options command from the File menu and select or clear the
Grid check box in the Design View area of the Layout tab when the Options dialog box appears.
See Using the grid.
3.
If you are working with the grid off and you want to use snap-to guidelines for positioning objects,
click the top or left ruler wherever you want guidelines to appear.
Some further ways you can use guidelines:
• Drag a field to a guideline until it snaps to the guideline.
• Drag the guideline arrow to move the guideline (and any objects that are snapped to it).
• Drag the guideline arrow away from the ruler to remove the guideline. See Designing with
guidelines .
4.
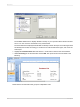
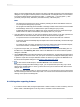
If the Field Explorer dialog box is not visible, click Field Explorer on the Standard toolbar.
Expand the Database Fields node to display a list of fields. To speed the entry of multiple fields, this
box will remain on-screen until you close it. This dialog box can be moved to a new location or
resized, if you wish. See Placing data on the report.
5.
Select the field(s) you want to appear on the report.
You can select and place them one at a time, or use the Shift-click combination to select a number
of contiguous fields, or the Ctrl-click combination to select fields from the list at random. Drag and
drop is also active. Place the fields in the Details section where you want them to appear.
2012-03-1447
Quick Start