
User`s guide


Tip:
Another way to do this is to click the Export button on the Standard toolbar.
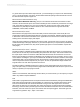
The Export dialog box appears.
3.
Select the export format type from the Format drop-down list.
In this case, choose Microsoft Excel (XLS).
4.
Select Application from the Destination drop-down list.
5.
Click OK.
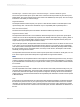
The Excel Format Options dialog box appears.
Note:
• The options in the "Column width" area let you define the width of the Excel cells in your output
based on a point width (a constant width) or a width determined by objects in various sections
of your Crystal report.
• Selecting "Whole Report" does not necessarily emulate the layout of your Crystal report. Rather,
the Excel cell width is based on objects found in any section of your report. Likewise, for example,
selecting "Details" creates cell widths based on the objects found only in the report's Details
section.
6.
Change the formatting options as needed.
7.
Click OK.
The Exporting Records dialog box appears.
Tip:
Click Cancel Exporting to cancel the export process.
The program exports the report and opens it in the appropriate application. In this example, Microsoft
Excel opens with the exported data.
18.1.3.4 Exporting to a disk file
If you export to a disk file, the program saves the report to the disk or diskette you have specified.
18.1.3.4.1 To export to a disk file
1.
Open the report you would like to export.
2.
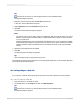
On the File menu, point to Export, and then click Export Report.
Tip:
Another way to do this is to click the Export button on the Standard toolbar.
The Export dialog box appears.
2012-03-14385
Printing, Exporting, and Viewing Reports