
User`s guide


2.3.2.14 Adding a field heading
As you can see, the Contact Name field is the only field without a heading. In this section you will create
a heading.
2.3.2.14.1 To add a field heading
1.
Click Insert Text Object on the Insert Tools toolbar.
2.
Insert the text object in the Page Header section directly above the Contact Name field.
3.
Click Underline on the Formatting toolbar, and then type Contact Name into the text object.
4.
Click your cursor outside the text object.
The Contact Name field now has a heading that looks just like the other field titles.
2.3.2.15 Saving the report
1.
Click Save on the Standard toolbar to save your work.
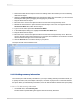
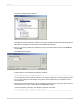
Since this is the first time you are saving the report, the Save As dialog box appears displaying the
default directory where the file will be saved. Notice that a default file name, based on the report
title you defined earlier, is also displayed.
2.
Type Custlist.rpt in the File name box and click Save.
Your report is saved to the default directory or another directory you chose.
3.
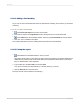
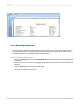
Click the Preview tab to view the report.
The report should now look similar to the following:
2012-03-1436
Quick Start