
User`s guide


When a text-based object is placed on a report, the object is represented by an object frame. The height
of the object frame is based on the height of the font. The width, however, is determined differently,
depending on the object you are working on.
• For database fields that are not memo fields, the width is initially determined by the width of the field
as defined in the database, and by the average character width as provided by the selected font
and font size.
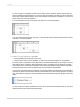
For example, you have a database field called {customer.LAST NAME} and your database defines
this field as a text field with a length of 35 characters. When you place this field on your report, the
width of the boundary is 35 times the average character width of the font and font size that the
database field is formatted to. Remember that this is the initial default boundary width. The width
can always be resized to increase or decrease as you see fit.
• For text-based objects, the default width is approximately 19 average character widths wide. Text
objects are different from database fields in that their width automatically expands as you enter in
text and/or database fields into the object. As with all other text-based objects, the width can be
resized by the user.
• For different number fields (double, single, integer, long integer, and byte) the default widths are all
different. As with all objects, the width can be resized by the user.
11.3.7.1 Preventing the truncation of text inside an object
Whether the default widths are accepted or the text-based objects are resized, a problem could arise
if the text inside the object prints right to the edge of the object frame. While the report may look fine
on the machine it was designed on, when the report is printed using another printer driver that measures
the font wider, the length of the text grows, but the object frame remains fixed. The resulting text is
cut-off or truncated.
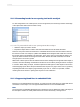
11.3.7.1.1 To prevent the truncation of text inside an object
1.
Right-click the text object you want to format to bring up the shortcut menu.
Tip:
Another way to do this is to click the Format button on the Expert Tools toolbar.
2.
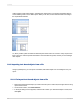
On the shortcut menu, click Format Text.
The Format Editor dialog box appears.
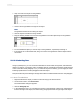
3.
On the Common tab, select the Can Grow check box.
4.
Click OK to save your changes.
The object is then formatted to print on multiple lines. If the text prints wider than the object, the text
wraps onto additional lines.
2012-03-14221
Formatting