
Operation Manual
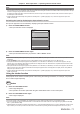

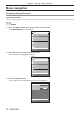
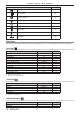

Table Of Contents
- Read this first!
- Chapter 1 Preparation
- Chapter 2 Getting Started
- Chapter 3 Basic Operations
- Switching on/off the projector
- Projecting
- Operating with the remote control
- Switching the input
- Using the shutter function
- Using the on-screen display function
- Using the automatic setup function
- Switching the image aspect ratio
- Using the function button
- Displaying internal test pattern
- Using the status function
- Using the AC voltage monitor function
- Setting ID number of the remote control
- Chapter 4 Settings
- Menu navigation
- [PICTURE] menu
- [POSITION] menu
- [ADVANCED MENU] menu
- [DISPLAY LANGUAGE] menu
- [3D SETTINGS] menu
- [DISPLAY OPTION] menu
- [COLOR MATCHING]
- [LARGE SCREEN CORRECTION]
- [SCREEN SETTING]
- [AUTO SIGNAL]
- [AUTO SETUP]
- [BACKUP INPUT SETTING]
- [SIMUL INPUT SETTING]
- [RGB IN]
- [DVI-D IN]
- [HDMI IN]
- [DIGITAL LINK IN]
- [SDI IN]
- [ON-SCREEN DISPLAY]
- [IMAGE ROTATION]
- [BACK COLOR]
- [STARTUP LOGO]
- [UNIFORMITY]
- [SHUTTER SETTING]
- [FREEZE]
- [WAVEFORM MONITOR]
- [CUT OFF]
- [PROJECTOR SETUP] menu
- [PROJECTOR ID]
- [PROJECTION METHOD]
- [OPERATION SETTING]
- [LIGHT OUTPUT]
- [BRIGHTNESS CONTROL]
- [STANDBY MODE]
- [NO SIGNAL SHUT-OFF]
- [NO SIGNAL LIGHTS-OUT]
- [INITIAL STARTUP]
- [STARTUP INPUT SELECT]
- [DATE AND TIME]
- [SCHEDULE]
- [RS-232C]
- [REMOTE2 MODE]
- [FUNCTION BUTTON]
- [LENS CALIBRATION]
- [LENS MEMORY]
- [STATUS]
- [AC VOLTAGE MONITOR]
- [SAVE ALL USER DATA]
- [LOAD ALL USER DATA]
- [INITIALIZE]
- [SERVICE PASSWORD]
- [P IN P] menu
- [TEST PATTERN] menu
- [SIGNAL LIST] menu
- [SECURITY] menu
- [NETWORK] menu
- Chapter 5 Maintenance
- Chapter 6 Appendix
Chapter 3 Basic Operations — Operating with the remote control
ENGLISH - 73
Using the function button
The <FUNCTION> button of the remote control can be used as a simplied shortcut button by assigning the
following functions: [P IN P], [SUB MEMORY], [SYSTEM SELECTOR], [SYSTEM DAYLIGHT VIEW], [FREEZE],
[WAVEFORM MONITOR], [LENS MEMORY LOAD], [LEFT/RIGHT SWAP], [PROJECTION METHOD]
button
1) Press the <FUNCTION> button.
Note
f Assignment of the function is performed from the [PROJECTOR SETUP] menu → [FUNCTION BUTTON] (x page 140).
Displaying internal test pattern
The projector has eight types of internal test patterns to check the condition of the projector body. To display test
patterns, perform the following steps.
button
1) Press the <TEST PATTERN> button.
2) Press qw to select the test pattern.
Note
f Setting is also available from the [TEST PATTERN] (x page 148) menu.
f Settings of position, size, and other factors will not be reected in test patterns. Make sure to display the input signal before performing
various adjustments.
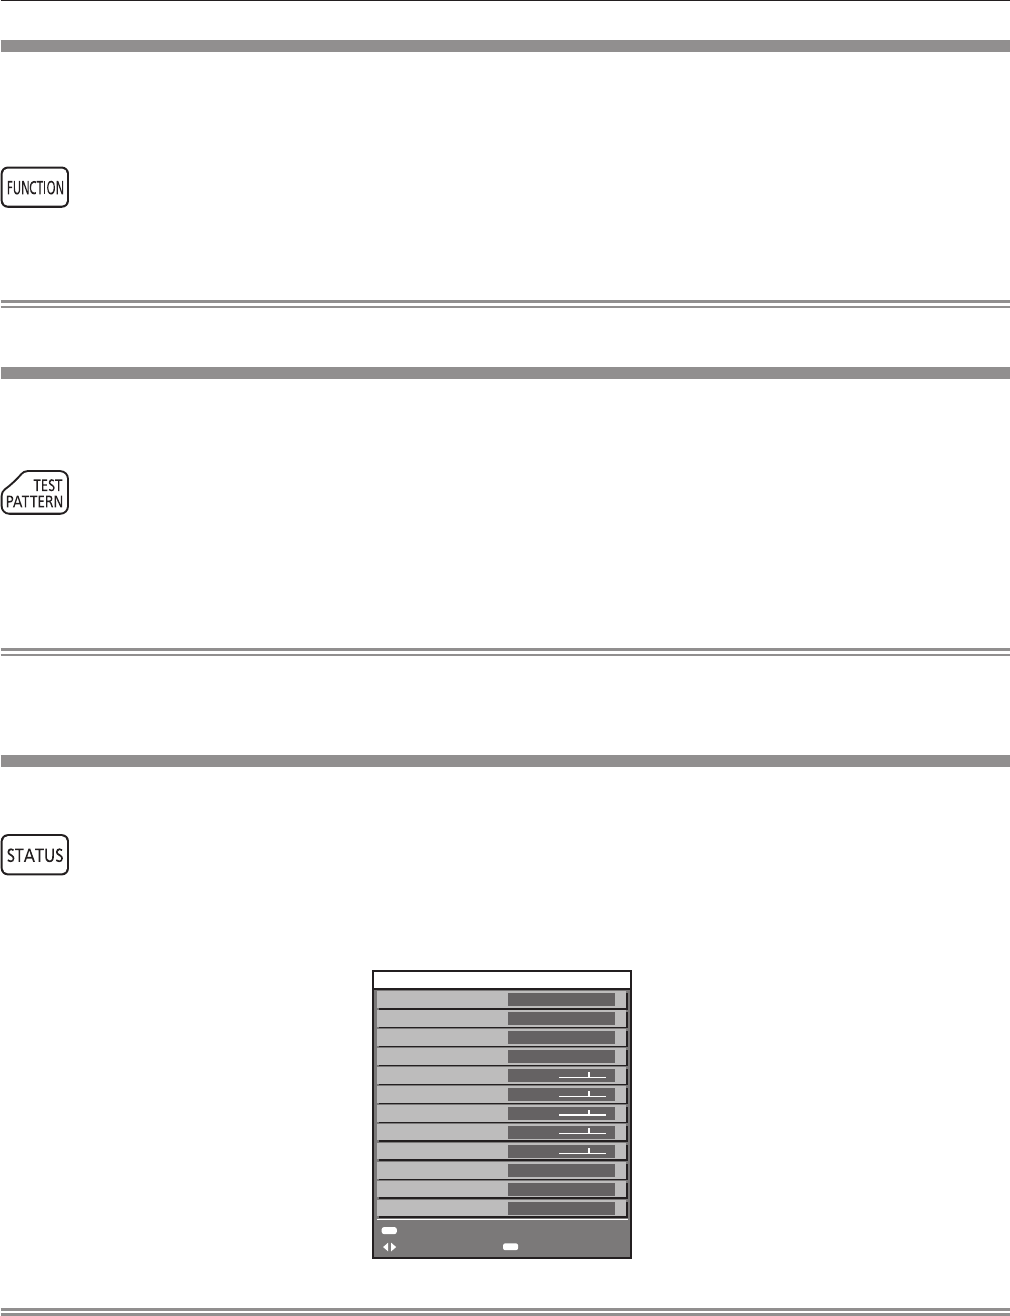
Using the status function
Display the status of the projector.
button
1) Press the <STATUS> button.
f The [STATUS] screen is displayed.
100000h
100000h / 100000h
1.00 / 1.00
1/5
31°C/87°F
27°C/80°F
31°C/87°F
31°C/87°F
31°C/87°F
1013hPa
MENU
EXITCHANGE
ENTER
SEND E-MAIL
SELF TEST
ATMOSPHERIC PRESSURE
AUTO - FLOOR
NO ERRORS
COOLING CONDITION
AROUND LIGHT2 TEMP.
AROUND LIGHT1 TEMP.
EXHAUST AIR TEMP.
OPTICS MODULE TEMP.
INTAKE AIR TEMP.
MAIN/SUB VERSION
LIGHT RUNTIME
PROJECTOR RUNTIME
PROJECTOR TYPE
STATUS
RZ12K(123456789012)
Note
f This can be displayed from the [PROJECTOR SETUP] menu → [STATUS] (x page 142).