
Operation Manual
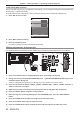
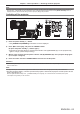
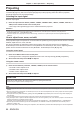
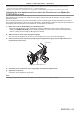
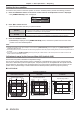
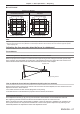
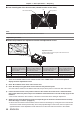

Table Of Contents
- Read this first!
- Chapter 1 Preparation
- Chapter 2 Getting Started
- Chapter 3 Basic Operations
- Switching on/off the projector
- Projecting
- Operating with the remote control
- Switching the input
- Using the shutter function
- Using the on-screen display function
- Using the automatic setup function
- Switching the image aspect ratio
- Using the function button
- Displaying internal test pattern
- Using the status function
- Using the AC voltage monitor function
- Setting ID number of the remote control
- Chapter 4 Settings
- Menu navigation
- [PICTURE] menu
- [POSITION] menu
- [ADVANCED MENU] menu
- [DISPLAY LANGUAGE] menu
- [3D SETTINGS] menu
- [DISPLAY OPTION] menu
- [COLOR MATCHING]
- [LARGE SCREEN CORRECTION]
- [SCREEN SETTING]
- [AUTO SIGNAL]
- [AUTO SETUP]
- [BACKUP INPUT SETTING]
- [SIMUL INPUT SETTING]
- [RGB IN]
- [DVI-D IN]
- [HDMI IN]
- [DIGITAL LINK IN]
- [SDI IN]
- [ON-SCREEN DISPLAY]
- [IMAGE ROTATION]
- [BACK COLOR]
- [STARTUP LOGO]
- [UNIFORMITY]
- [SHUTTER SETTING]
- [FREEZE]
- [WAVEFORM MONITOR]
- [CUT OFF]
- [PROJECTOR SETUP] menu
- [PROJECTOR ID]
- [PROJECTION METHOD]
- [OPERATION SETTING]
- [LIGHT OUTPUT]
- [BRIGHTNESS CONTROL]
- [STANDBY MODE]
- [NO SIGNAL SHUT-OFF]
- [NO SIGNAL LIGHTS-OUT]
- [INITIAL STARTUP]
- [STARTUP INPUT SELECT]
- [DATE AND TIME]
- [SCHEDULE]
- [RS-232C]
- [REMOTE2 MODE]
- [FUNCTION BUTTON]
- [LENS CALIBRATION]
- [LENS MEMORY]
- [STATUS]
- [AC VOLTAGE MONITOR]
- [SAVE ALL USER DATA]
- [LOAD ALL USER DATA]
- [INITIALIZE]
- [SERVICE PASSWORD]
- [P IN P] menu
- [TEST PATTERN] menu
- [SIGNAL LIST] menu
- [SECURITY] menu
- [NETWORK] menu
- Chapter 5 Maintenance
- Chapter 6 Appendix
Chapter 3 Basic Operations — Projecting
ENGLISH - 67
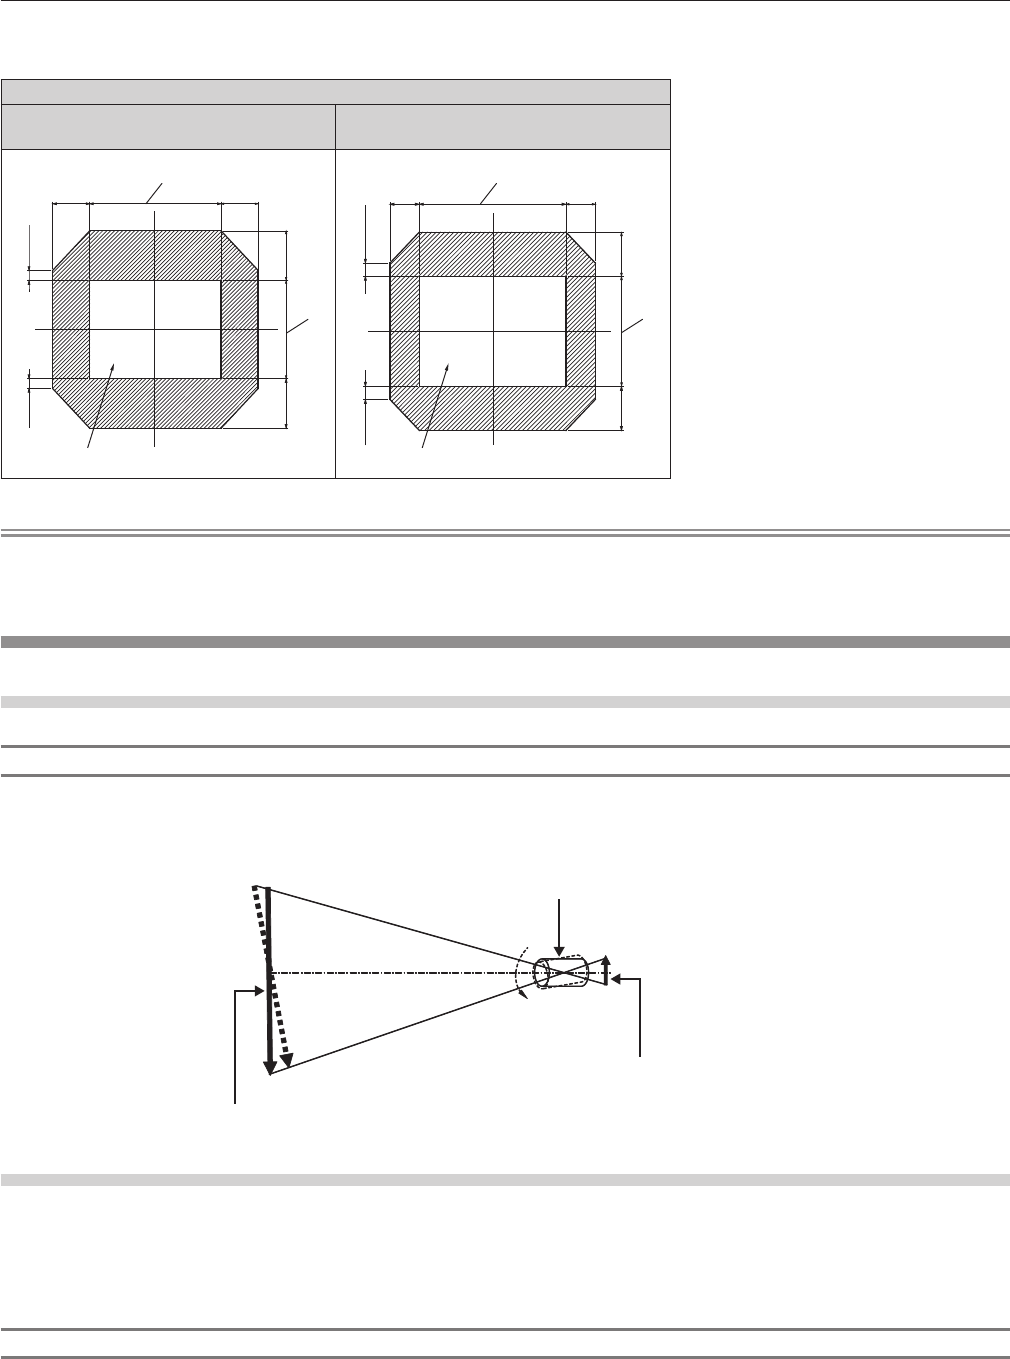
r For PT-RS11K
Projection lens Model No.
ET-D75LE8, ET-D75LE10, ET-D75LE20,
ET-D75LE30, ET-D75LE40
ET-D75LE6
Projected image width H
Standard projection position
Projected image height V
0.3 H
0.3 H
0.1 V
0.1 V
0.5 V
0.5 V
Projected image width H
Standard projection position
Projected image height V
0.2 H
0.2 H
0.4 V
0.4 V
0.12 V
0.12 V
Note
f When the optional Fixed-focus Lens (Model No.: ET-D75LE50) is attached, use it in the standard projection position without adjusting shift.
f When the optional Fixed-focus Lens (Model No.: ET-D75LE90) is attached to the PT-RS11K, use it in the reference projection position
without adjusting shift.
Adjusting the lens mounter when the focus is unbalanced
Focus balance
Relationship between the tilt of the lens and the screen focus surface
When the projection lens is tilted in contrast with the image forming surface, tilting the front side (screen side)
of the projection lens downwards (in the direction of the dotted arrow line), the upper side of the screen focus
surface will tilt inwards and the lower side will tilt outwards as shown in the example.
Projection lens
Image forming surface
Screen focus surface
How to adjust the focus balance (adjustment by tilting the lens mounter)
When the entire screen surface is not uniform even if the focus has been adjusted, the lens mounter has focus
adjustment screws in three locations.
f Tool used: Hex driver or Allen wrench (diagonal 2.5 mm (3/32"))
f The Allen wrench is included with the projection lens ET-D75LE6, ET-D75LE8.
Lens mounter structure
Focus adjustment screws (a), (b), and (c) can be turned to move the lens mount bracket back and forth.
Also, tightening the xed screws locks the lens mount bracket in place so it does not move.
When a projection lens with a large weight is installed, or when the projector is installed on an inclination, the
lens may tilt and the focus may become unbalanced. In these cases, perform adjustment by referring to the
relationship between the adjustment location and adjustment screws.