
Operation Manual
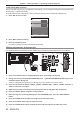
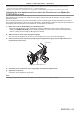
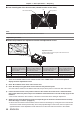

Table Of Contents
- Read this first!
- Chapter 1 Preparation
- Chapter 2 Getting Started
- Chapter 3 Basic Operations
- Switching on/off the projector
- Projecting
- Operating with the remote control
- Switching the input
- Using the shutter function
- Using the on-screen display function
- Using the automatic setup function
- Switching the image aspect ratio
- Using the function button
- Displaying internal test pattern
- Using the status function
- Using the AC voltage monitor function
- Setting ID number of the remote control
- Chapter 4 Settings
- Menu navigation
- [PICTURE] menu
- [POSITION] menu
- [ADVANCED MENU] menu
- [DISPLAY LANGUAGE] menu
- [3D SETTINGS] menu
- [DISPLAY OPTION] menu
- [COLOR MATCHING]
- [LARGE SCREEN CORRECTION]
- [SCREEN SETTING]
- [AUTO SIGNAL]
- [AUTO SETUP]
- [BACKUP INPUT SETTING]
- [SIMUL INPUT SETTING]
- [RGB IN]
- [DVI-D IN]
- [HDMI IN]
- [DIGITAL LINK IN]
- [SDI IN]
- [ON-SCREEN DISPLAY]
- [IMAGE ROTATION]
- [BACK COLOR]
- [STARTUP LOGO]
- [UNIFORMITY]
- [SHUTTER SETTING]
- [FREEZE]
- [WAVEFORM MONITOR]
- [CUT OFF]
- [PROJECTOR SETUP] menu
- [PROJECTOR ID]
- [PROJECTION METHOD]
- [OPERATION SETTING]
- [LIGHT OUTPUT]
- [BRIGHTNESS CONTROL]
- [STANDBY MODE]
- [NO SIGNAL SHUT-OFF]
- [NO SIGNAL LIGHTS-OUT]
- [INITIAL STARTUP]
- [STARTUP INPUT SELECT]
- [DATE AND TIME]
- [SCHEDULE]
- [RS-232C]
- [REMOTE2 MODE]
- [FUNCTION BUTTON]
- [LENS CALIBRATION]
- [LENS MEMORY]
- [STATUS]
- [AC VOLTAGE MONITOR]
- [SAVE ALL USER DATA]
- [LOAD ALL USER DATA]
- [INITIALIZE]
- [SERVICE PASSWORD]
- [P IN P] menu
- [TEST PATTERN] menu
- [SIGNAL LIST] menu
- [SECURITY] menu
- [NETWORK] menu
- Chapter 5 Maintenance
- Chapter 6 Appendix
Chapter 3 Basic Operations — Projecting
ENGLISH - 65
f When the main power is switched off during shift adjustment, a lens calibration error screen will be displayed during the next shift
adjustment. Execute the [PROJECTOR SETUP] menu → [LENS CALIBRATION].
f When the lens calibration error is displayed even though [LENS CALIBRATION] was executed, ask your dealer to repair the unit.
Adjusting the lens position and focus when the Fixed-focus Lens (Model No.:
ET-D75LE90) is used
After attaching the projection lens, adjust the lens position and the focus with the projector correctly installed
against the screen.
The focus balance between the center and periphery of the projected image will differ depending on the size of
the projected image when the Fixed-focus Lens (Model No.: ET-D75LE90) is attached. Adjust the focus balance of
the periphery with the Fixed-focus Lens (Model No.: ET-D75LE90) as necessary.
1) Move the lens to the ET-D75LE90 lens standard position.
f While the shift adjustment screen is displayed, press the <DEFAULT> button on the remote control to
display the [HOME POSITION] screen. Select [D75LE90] to move the lens to the lens standard position.
Refer to “Setting the lens position” (x page 66) for details.
2) Adjust the focus at the center of projected image.
f For the steps to adjust the focus, refer to “How to adjust focus, zoom, and shift” (x page 64).
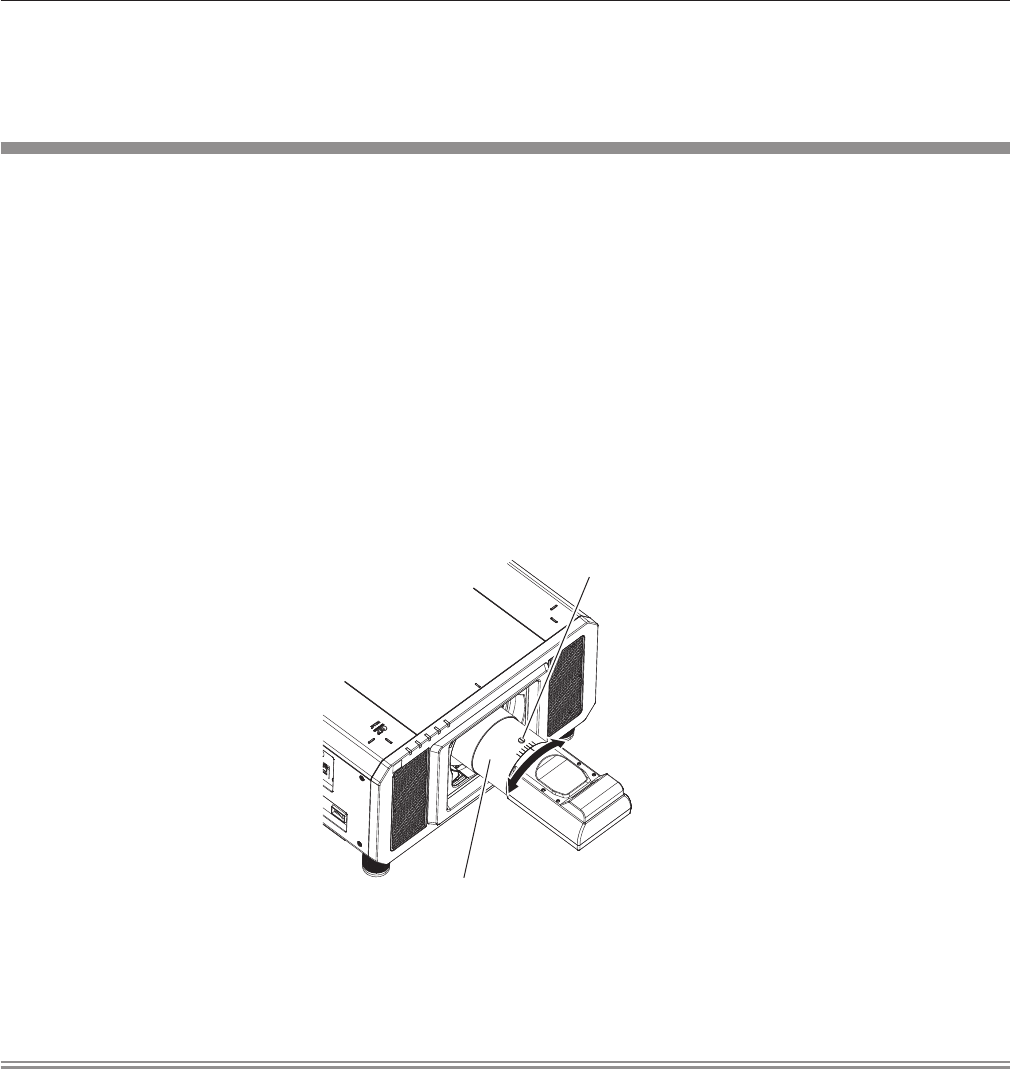
3) Loosen the lock screw and turn the periphery focus adjustment ring by hand to adjust the focus in
the periphery of the screen.
Periphery focus adjustment ring
Lock screw
4) Check the focus at the center of the image again and make fine adjustments.
5) Tighten the lock screw.
f Periphery focus adjustment ring is xed.
Note
f The projected image size and scale shown on the periphery focus adjustment ring are an approximate guide.