
Operation Manual


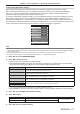
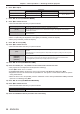
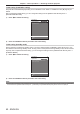
Table Of Contents
- Read this first!
- Chapter 1 Preparation
- Chapter 2 Getting Started
- Chapter 3 Basic Operations
- Switching on/off the projector
- Projecting
- Operating with the remote control
- Switching the input
- Using the shutter function
- Using the on-screen display function
- Using the automatic setup function
- Switching the image aspect ratio
- Using the function button
- Displaying internal test pattern
- Using the status function
- Using the AC voltage monitor function
- Setting ID number of the remote control
- Chapter 4 Settings
- Menu navigation
- [PICTURE] menu
- [POSITION] menu
- [ADVANCED MENU] menu
- [DISPLAY LANGUAGE] menu
- [3D SETTINGS] menu
- [DISPLAY OPTION] menu
- [COLOR MATCHING]
- [LARGE SCREEN CORRECTION]
- [SCREEN SETTING]
- [AUTO SIGNAL]
- [AUTO SETUP]
- [BACKUP INPUT SETTING]
- [SIMUL INPUT SETTING]
- [RGB IN]
- [DVI-D IN]
- [HDMI IN]
- [DIGITAL LINK IN]
- [SDI IN]
- [ON-SCREEN DISPLAY]
- [IMAGE ROTATION]
- [BACK COLOR]
- [STARTUP LOGO]
- [UNIFORMITY]
- [SHUTTER SETTING]
- [FREEZE]
- [WAVEFORM MONITOR]
- [CUT OFF]
- [PROJECTOR SETUP] menu
- [PROJECTOR ID]
- [PROJECTION METHOD]
- [OPERATION SETTING]
- [LIGHT OUTPUT]
- [BRIGHTNESS CONTROL]
- [STANDBY MODE]
- [NO SIGNAL SHUT-OFF]
- [NO SIGNAL LIGHTS-OUT]
- [INITIAL STARTUP]
- [STARTUP INPUT SELECT]
- [DATE AND TIME]
- [SCHEDULE]
- [RS-232C]
- [REMOTE2 MODE]
- [FUNCTION BUTTON]
- [LENS CALIBRATION]
- [LENS MEMORY]
- [STATUS]
- [AC VOLTAGE MONITOR]
- [SAVE ALL USER DATA]
- [LOAD ALL USER DATA]
- [INITIALIZE]
- [SERVICE PASSWORD]
- [P IN P] menu
- [TEST PATTERN] menu
- [SIGNAL LIST] menu
- [SECURITY] menu
- [NETWORK] menu
- Chapter 5 Maintenance
- Chapter 6 Appendix
Chapter 3 Basic Operations — Switching on/off the projector
54 - ENGLISH
Switching on/off the projector
Connecting the power cord
Make sure that the supplied power cord is securely xed to the projector body to prevent it from being
removed easily.
Conrm that the <MAIN POWER> switch is on the <OFF> side before connecting the power cord.
Use the power cord matching with the power supply voltage and the shape of the outlet.
For details of power cord handling, refer to “Read this rst!” (x page 5).
How to attach the power cord
1) Check the shapes of the <AC IN> terminal on the side of the projector and the power cord connector,
then insert the connector completely in the correct direction.
How to remove the power cord
Lock button
1) Confirm that the <MAIN POWER> switch on the side of the projector is on the <OFF> side, and
remove the power plug from the outlet.
2) Remove the power cord connector from the <AC IN> terminal of the projector while pressing the lock
button.
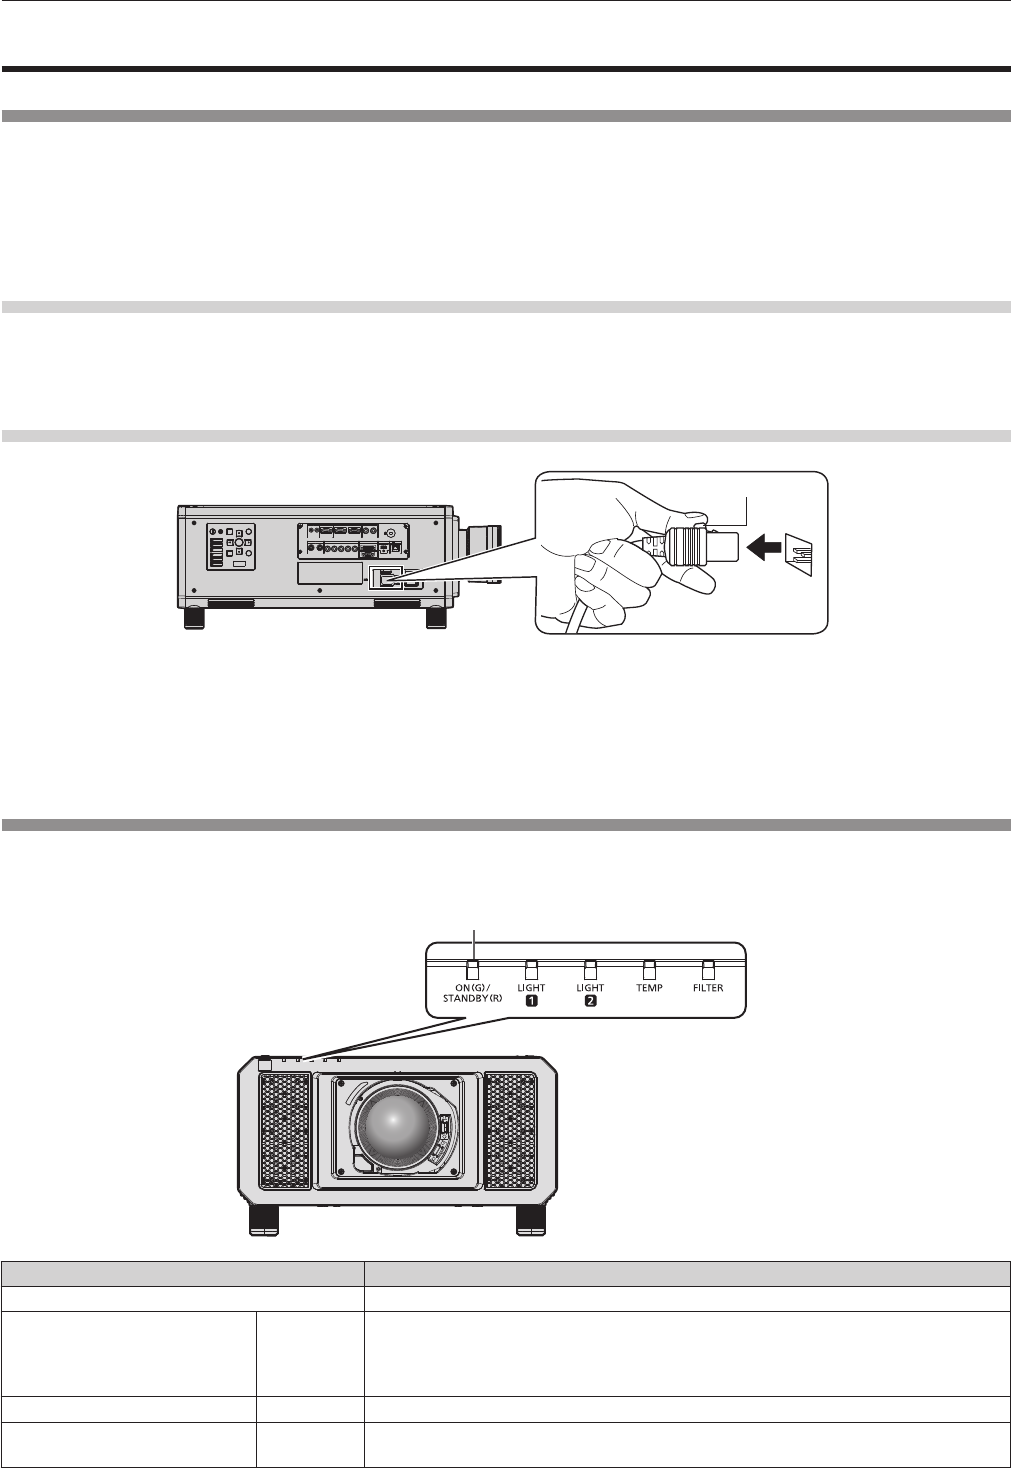
Power indicator
Indicate the status of the power. Check the status of the power indicator <ON (G)/STANDBY (R)> before operating
the projector.
Power indicator <ON (G)/STANDBY (R)>
Indicator status Projector status
Off The main power is switched off.
Red Lit
The power is switched off. (standby mode)
Projection will start when the power on <b> button is pressed.
f The projector may not operate when the light source indicators <LIGHT1>/<LIGHT2>
or the temperature indicator <TEMP> are blinking. (x page 182)
Green Lit Projecting.
Orange Lit
The projector is preparing to switch off the projector.
The power is switched off after a while. (Changes to the standby mode.)