
Operation Manual
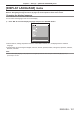


Table Of Contents
- Read this first!
- Chapter 1 Preparation
- Chapter 2 Getting Started
- Chapter 3 Basic Operations
- Switching on/off the projector
- Projecting
- Operating with the remote control
- Switching the input
- Using the shutter function
- Using the on-screen display function
- Using the automatic setup function
- Switching the image aspect ratio
- Using the function button
- Displaying internal test pattern
- Using the status function
- Using the AC voltage monitor function
- Setting ID number of the remote control
- Chapter 4 Settings
- Menu navigation
- [PICTURE] menu
- [POSITION] menu
- [ADVANCED MENU] menu
- [DISPLAY LANGUAGE] menu
- [3D SETTINGS] menu
- [DISPLAY OPTION] menu
- [COLOR MATCHING]
- [LARGE SCREEN CORRECTION]
- [SCREEN SETTING]
- [AUTO SIGNAL]
- [AUTO SETUP]
- [BACKUP INPUT SETTING]
- [SIMUL INPUT SETTING]
- [RGB IN]
- [DVI-D IN]
- [HDMI IN]
- [DIGITAL LINK IN]
- [SDI IN]
- [ON-SCREEN DISPLAY]
- [IMAGE ROTATION]
- [BACK COLOR]
- [STARTUP LOGO]
- [UNIFORMITY]
- [SHUTTER SETTING]
- [FREEZE]
- [WAVEFORM MONITOR]
- [CUT OFF]
- [PROJECTOR SETUP] menu
- [PROJECTOR ID]
- [PROJECTION METHOD]
- [OPERATION SETTING]
- [LIGHT OUTPUT]
- [BRIGHTNESS CONTROL]
- [STANDBY MODE]
- [NO SIGNAL SHUT-OFF]
- [NO SIGNAL LIGHTS-OUT]
- [INITIAL STARTUP]
- [STARTUP INPUT SELECT]
- [DATE AND TIME]
- [SCHEDULE]
- [RS-232C]
- [REMOTE2 MODE]
- [FUNCTION BUTTON]
- [LENS CALIBRATION]
- [LENS MEMORY]
- [STATUS]
- [AC VOLTAGE MONITOR]
- [SAVE ALL USER DATA]
- [LOAD ALL USER DATA]
- [INITIALIZE]
- [SERVICE PASSWORD]
- [P IN P] menu
- [TEST PATTERN] menu
- [SIGNAL LIST] menu
- [SECURITY] menu
- [NETWORK] menu
- Chapter 5 Maintenance
- Chapter 6 Appendix
Chapter 4 Settings — [3D SETTINGS] menu
ENGLISH - 103
Select [6], [7], or [8] for the second and subsequent projectors.
f Stereo synchronization is a signal having a 50 % duty cycle where High is for the left eye and Low is for
the right eye.
f “H” is output to the 3D image display and “L” is output to the 2D image display from the terminal for which
3D trigger output is selected.
Note
f [11] in [3D SYNC MODE] is the setting when the 3D IR transmitter TY-3DTRW of Panasonic (production discontinued) is used with the
projector. Consult your dealer regarding the connection method.
[3D INPUT FORMAT]
Set the 3D format for the image signals being input.
Set a 3D format that matches the input signal.
1) Press as to select [3D INPUT FORMAT].
2) Press the <ENTER> button.
f The [3D INPUT FORMAT] screen is displayed.
3) Press as to select a 3D format.
[AUTO]
*1
Automatically detects 3D format of input image signals to display images.
[NATIVE] Forcibly displays 2D images regardless of input image signals.
[SIMULTANEOUS]
*2
Forcibly displays 3D images in simultaneous format regardless of input video signals.
[SIDE BY SIDE] Forcibly displays 3D images in side by side format regardless of input image signals.
[TOP AND BOTTOM] Forcibly displays 3D images in top and bottom format regardless of input image signals.
[LINE BY LINE]
*3
Forcibly displays 3D images in line by line format regardless of input video signals.
[FRAME SEQUENTIAL]
*4
Forcibly displays 3D images in frame sequential format regardless of input image signals.
*1 Only during DVI-D or HDMI input
*2 Only during 3G-SDI level B input
*3 Only while signals other than interlaced signals are input
*4 Only while progressive signals with the vertical scanning frequency of 100 Hz or 120 Hz are input to the <RGB1>/<RGB2>/<DVI-D> terminals
4) Press the <ENTER> button.
Note
f When [AUTO], [SIMULTANEOUS], [SIDE BY SIDE], [TOP AND BOTTOM], [LINE BY LINE], or [FRAME SEQUENTIAL] is set, 3D images
are not displayed with the [DISPLAY OPTION] menu → [SIMUL INPUT SETTING]. In [AUTO], however, this only occurs when 3D format
can be recognized.
f This may not function properly for some connected external devices.
[LEFT/RIGHT SWAP]
Display images by inverting the timing when the left and right images are swapped. Change the setting when
there is something wrong with the 3D image being viewed.
1) Press as to select [LEFT/RIGHT SWAP].
2) Press qw to switch the item.
f The items will switch each time you press the button.
[NORMAL] Do not change the [NORMAL] setting if the 3D images are displayed correctly.
[SWAPPED] Select this item when left and right 3D images are swapped to be displayed.
Note
f This function is disabled when [3D SYSTEM SETTING] is set to anything other than [SINGLE].
[3D COLOR MATCHING]
Switch the color matching correction data applied to displayed image.
1) Press as to select [3D COLOR MATCHING].
2) Press qw to switch the item.
f The items will switch each time you press the button.