
User's Manual


50
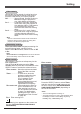
Setting
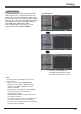
Picture in Picture
Picture in Picture
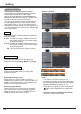
Select the Picture in Pictrue mode among P in P,
and .
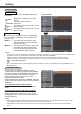
Mode
Provide the images of Main picture and
Sub picture at the ratio of Screen aspect
in the Screen Menu.
Provide the images of Main picture and
Sub picture at the ratio of Screen aspect
in the Screen Menu.
Turn off the Picture in Picture function.
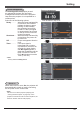
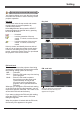
Press the Point ◄► buttons to change
the
Subpicture size among
Small, Middle and Large.
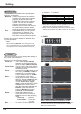
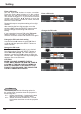
During Picture in Picture mode, and being
undisplayed On Screen Menu, press the SELECT
button to select Sub picture. (A red frame will be
displayed on the selected picture.)
When Main picture or Sub picture is selected,
input source can be set by pressing the INPUT
button on the top control or COMPUTER1/2 or
HDMI buttons on the remote control.
•ThePictureinPicturefunctionisnot
available depending on the input signals and
the selected input terminals. Refer to
Picture in Picture for details. (p.77)
• When the input signal(s) is/are incompatible,
mark will be displayed on the Main/Sub
picture
.
•
and
works only under P in P mode.
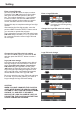
This function is used to project two images
simultaneously by placing a separate small sub
screen within or next to the main screen.
Use the Point ▲▼ buttons to select Picture in
Picture and then press the SELECT button or the
Point ►button to access the submenu.
Only the sound from the source of Main picture
is valid, while the source of Sub picture cannot
output the sound. ( In P in P, the larger picture is
main picture, and the smaller one is sub picture; in
P by P, the left picture is main picture, and the right
one is sub picture.)
Adjust the Subpicture position.
Press the Point ◄► buttons to change
the
Subpicture position.
X