
Installation guide
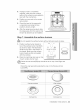


3.
Place
the
left,
center,
and
right
surface
burner
grates
on
the
cooktop.
The
edges
of
the
grates
should
match
up
with
the
edges
of
the
cooktop.
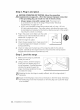
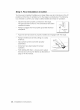
Step
8.
Check
the
ignition
of
surface
burners
and
oven
burners
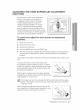
Check
the
operation
of
all
cooktop
and
oven burners
after
the
range
has
been
installed
and
assembled,
gas
supply
lines
have
been
carefully
checked
for
leaks,
and
electrical
power
cord
has
been
plugged
in.
All
surface
and
oven
burners
have
electronic
ignition.
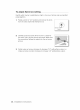
To
turn
on
a
surface
burner:
1.
Push
in
and
turn
the
control
knob
for
that
surface
burner
to
the
LITE
position.
The
“clicking”
sound
indicates
the
electronic
ignition
system
is
operating
properly.
The
burner
will
light
in
about
4
seconds,
after
the
air
has
been
purged
from
the
supply
line.
2.
After
the
burner
lights,
turn
the
control
knob
to
the
desired
setting.
The
“clicking”
sound
will
stop
and
the
flame
height
will
change
from
Max.
to
Min.
during
turning
the
control
Knob.
3.
Repeat
steps
1
and
2
to
check
the
operation
of
each
surface
burner
insuccession.
(P,
Place
food
in
the
oven
after
preheating
if
the
recipe
calls
for
it.
Preheating
is
important
for
good
baking
results.
After
the
oven
has
reached
the
desired
cooking
temperature,
it
will
beep
6
times.
To
start
the
bake
burners:
1.
Press
the
BAKE
pad.
The
oven
will
beep
every
time
a
pad
is
pressed.
The
default
temperature
350
°
and
the
Start
indicator
will
blink
on
the
display.
If
the
default
temperature
is
the
desired
cooking
temperature,
skip
to
step
2.
2
2.
Press
the
number
pads
to
change
the
temperature
setting
to
the
desired
temperature
setting.
The
selected
cooking
temperature
and
the
Start
indicator
will
blink
on
the
display.
34_
installation
instructions