
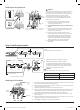
Quick Guide


2 - English
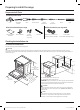
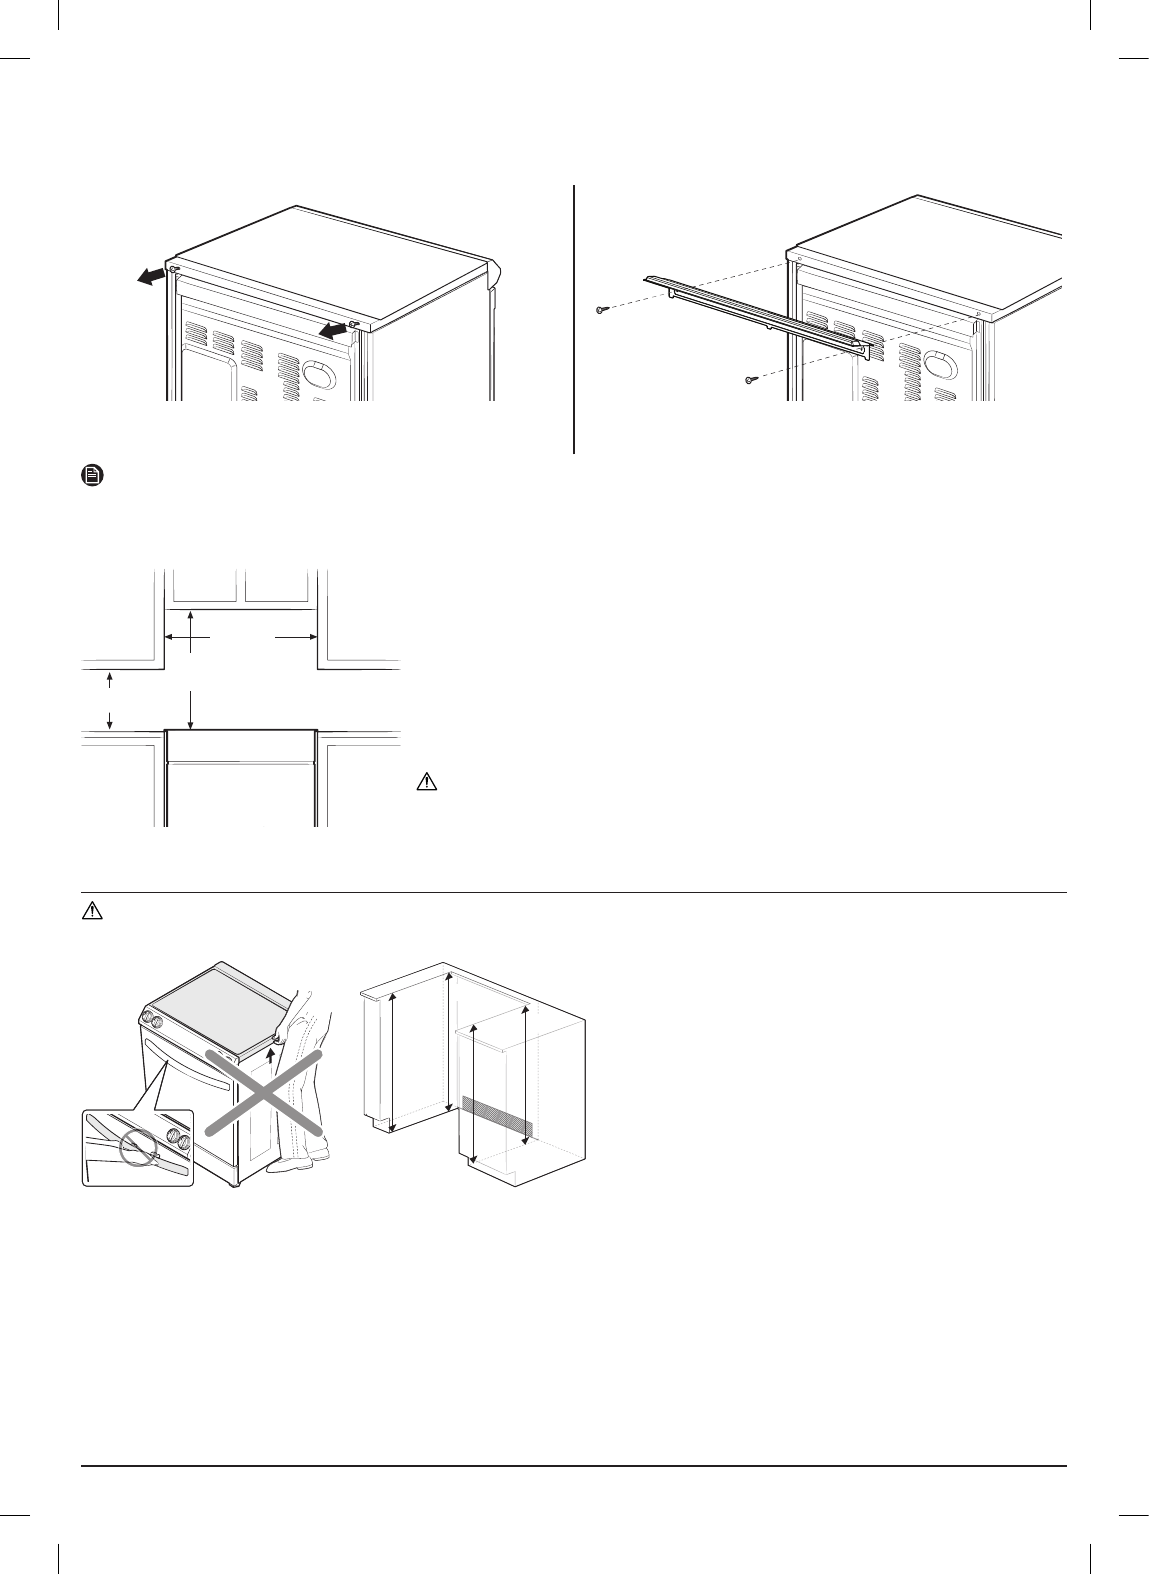
Optional rear ller kit
Used to ll gap between the range back and wall. Adds a ller strip to the rear of the range. This kit can only be used when the opening in the
countertop is 25" deep.
1. Unscrew the screws afxing the vent cover. 2. Assemble the ller strip to the back of the range using the
removed screws.
NOTE
If the countertop depth is greater than 25", there will be a gap between the ller kit and the back wall.
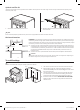
Minimum dimensions
B: 15"
30"
A: 30"
IMPORTANT: To eliminate the risk of burns or re caused by reaching over heated surface units,
avoid having cabinet storage space located above the surface units. If you have cabinet storage
space over the heating elements, you can reduce the risk by installing a range hood that projects
horizontally a minimum of 5 inches beyond the bottom of the cabinets.
A. A minimum of 30" is required between the top of the cooking surface and the bottom of an
unprotected wood or metal cabinet; a minimum of 24" is required if the bottom of the wood
or metal cabinet is protected by not less than
1
⁄4" of ame retardant millboard covered with
not less than no.28 MSG of sheet steel, 0.015" of stainless steel, 0.024" of aluminum, or
0.020" of copper.
B. A minimum of 15" is required between the countertop and the adjacent cabinet bottom.
CAUTION
Vapors may come out from the vent. It is normal, but be careful as it may be hot. Depending on
the material of your wall, hot vapors may leave stains on it.
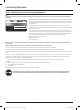
To avoid breakage
CAUTION
Do NOT lift or handle the unit by the cooktop glass or door handle.
Fig. 1
C1
C2
C3
C4
1. The counter top around the cut-out should be at and leveled.
2. Before installing the unit, measure the heights of the two
cabinet sides (C1-C4), front and back (See Fig. 1) from the oor to
the top of the counter.
3. Level the range using the four leveling legs so that the height
from the oor to the underside of the cooktop glass frame is
greater than the tallest cabinet measurement by at least
1
⁄16".
4. Slide the unit into the cabinet (DO NOT PUSH THE UNIT HARD).
Make sure the center of the unit aligns with the center of the
cabinet cut-out.
Install_NE63T8911_AA_DG68-01302A-01_EN+MES.indb 2Install_NE63T8911_AA_DG68-01302A-01_EN+MES.indb 2 2021-01-29 6:21:192021-01-29 6:21:19