AV Receiver System User Manual
Table Of Contents
- Safety information
- Features
- Contents
- Description
- Connections
- CONNECTING A CD PLAYER
- CONNECTING AN iPod
- CONNECTING THE FM ANTENNA
- Basic functions of your AV Receiver
- BEFORE USING THE AV RECEIVER
- Basic functions of your AV Receiver
- Setup
- SETUP MENU TREE
- SETTING THE SPEAKER SIZE
- CONNECTION SETTING FOR SURROUND BACK
- SETTING THE SPEAKER LISTENING DISTANCE
- SETTING THE SPEAKER LEVEL
- SETTING THE TEST TONE
- SETTING DOLBY PRO LOGIC MODE
- SETTING DOLBY PRO LOGIC IIx
- SETTING TONE CONTROL
- SETTING NEO:6 MODE
- SETTING EX/ES MODE
- AV SYNC
- MP3 ENHANCER
- SMART VOLUME
- ASC (AUTO SOUND CALIBRATION) SETUP
- DRC SETUP
- DUAL MONO SETUP
- HDMI SETUP
- VARIABLE SET (Low Power Consumption SETUP)
- VIDEO CONV. (Video Conversion)
- ZONE2 SETUP
- 12-V TRIGGER
- Operation
- USING THE SURROUND MODES
- LISTENING TO THE RADIO
- USING AN iPod
- CONVENIENT FUNCTIONS
- SOFTWARE UPGRADE
- Miscellaneous
- OPERATING YOUR TV WITH THE REMOTE CONTROL
- OPERATING YOUR DVD OR BD PLAYER WITH THE REMOTE CONTROL
- Troubleshooting
- ASC Error List
- Appendix
- SPECIFICATIONS

49
ENG
● SETUP
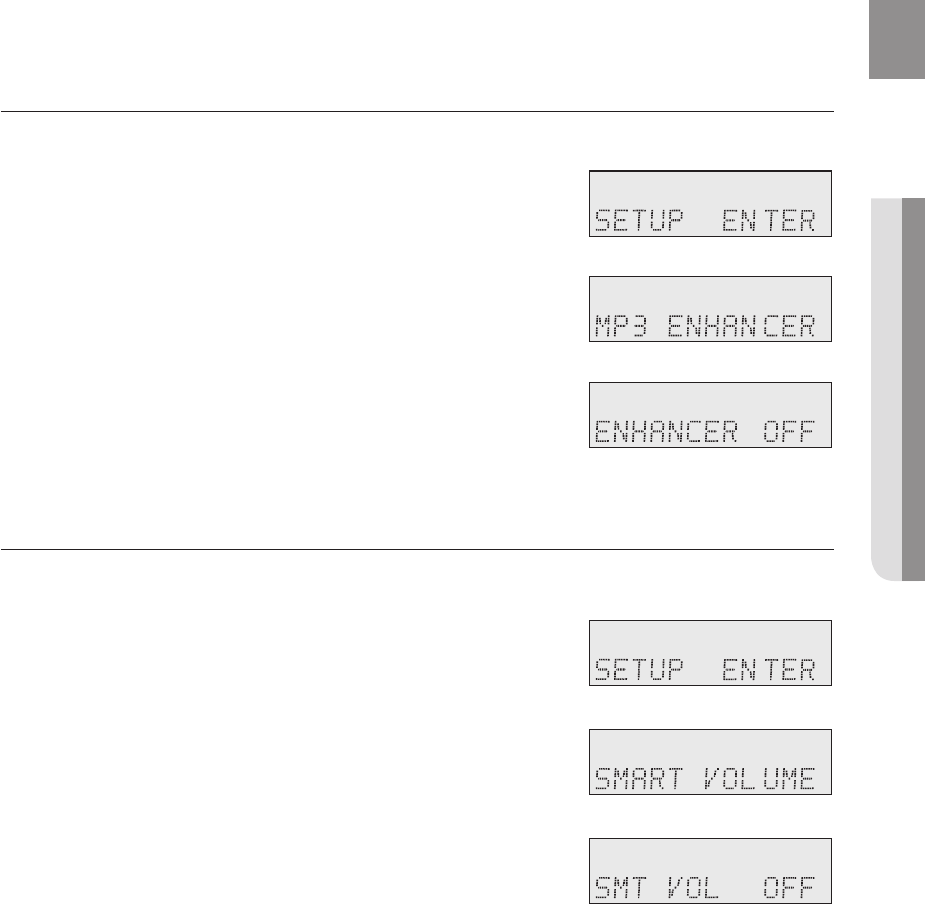
MP3 ENHANCER
This also helps enhance your sound experience (ex. mp3 music). Use this if you want to hear better sound from a
low quality mp3 source.
Press the SETUP/MENU button on the remote control.
Each time the button is pressed, the mode switches between SETUP
ENTER and SETUP OFF.
Press the ENTER button to select SETUP ENTER.
Press the ▲▼ buttons to select MP3 ENHANCER, and then press the
ENTER or ► button.
Press the ▲▼ buttons to select ON or OFF.
SMART VOLUME
This will regulate and stabilize the volume level against a drastic volume change when changing channels or during a
scene transition.
Press the SETUP/MENU button on the remote control.
Each time the button is pressed, the mode switches between SETUP
ENTER and SETUP OFF.
Press the ENTER button to select SETUP ENTER.
Press the ▲▼ buttons to select SMART VOLUME, and then press the
ENTER or ► button.
Press the ▲▼ buttons to select ON or OFF.
1.
•
2.
3.
4.
1.
•
2.
3.
4.
Æ
Æ
Æ
Æ
- HW-C900-XAA_0831.indd 49 - HW-C900-XAA_0831.indd 49 2010-08-31 6:22:272010-08-31 6:22:27


