Maestro Travel Chess Computer Instructions Bedienungsanleitung Mode d’emploi Istruzioni d’uso Instrucciones de Funcionamiento Handleiding
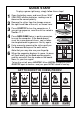
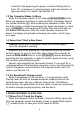
QUICK START To play a game right away, simply follow these steps! the battery cover and insert three “AAA” 1 Open (AM4/R03) alkaline batteries, making sure to observe the correct polarity. Remove the stylus from the storage area on the right-hand side of the unit, as shown here. 3 x AAA (AM4/R03) 2 Press GO/STOP to turn the computer on. If 3 you get no response, reset the unit as noted in Section 11.1. 4 Press NEW GAME twice, in quick succession, to reset the computer.
QUICK START KEYS AND FEATURES INTRODUCTION 1. GETTING STARTED: THE BASICS 1.1 Batteries In, Power On 1.2 Ready to Play? Here’s How! 1.3 The Computer Makes its Move 1.4 Game Over? Start a New Game 1.5 Too Easy/Hard? Change Levels 2. MORE FEATURES TO EXPLORE 2.1 Whose Turn? Check the Display 2.2 Special Chess Moves 2.3 Illegal/Incorrect Moves 2.4 Check, Mate, and Draw 2.5 Try the Self-Rating System 2.6 Want a Hint? Just Ask! 2.7 Interrupting the Search 2.8 Changing Sides 2.9 Built-In Openings 2.
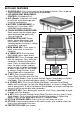
KEYS AND FEATURES 1. GO/STOP KEY: Press to turn unit on; press twice to turn off. Press to pause scrolling display; resume scrolling with ‘ (CLEAR). 2. LCD BACKLIGHT BRIGHTNESS CONTROL (Off/Medium/Full). 3. ACL (Reset): In base of unit. Used to eliminate static discharge after inserting new batteries. 4. BATTERY COMPARTMENT: In base of unit. Uses three “AAA” (AM4/R03) alkaline batteries. 5. TOUCH SCREEN CHESSBOARD: Each square registers piece movement when pressed gently with stylus or fingertip. 6.
1. GETTING STARTED: THE BASICS 1.1 Batteries In, Power On Your chess computer runs on three “AAA” (AM4/R03) batteries. Insert the batteries into the compartment in the base of the unit, making sure to observe the correct polarity. We recommend fresh alkaline batteries for longer battery life. To turn the computer on, press GO/STOP. If you get no response, reset the unit by pressing a paper clip or another sharp object down into the hole marked ACL in the base for at least one second.
instantly at the beginning of a game, instead of taking time to think. This is because it is playing moves which are stored in its openings library. For details, see Section 2.9. 1.3 The Computer Makes its Move When the computer moves, it first shows Thinking... briefly. While the computer considers its move for Black, the display flashes the symbol for Black (ı), while showing the computer’s clock. Once the actual move is made, the computer will beep and display its move (e.g.
2.3 Illegal/Incorrect Moves Your computer knows all the rules of chess—and it will never cheat! If you attempt to make an illegal move, a high-pitched double beep will alert you. This will occur, for instance, if you press an illegal from or to square, an incorrect piece or color, or an invalid game key. If you press an illegal to square, the display will simply continue to indicate the square the piece came from. To continue, move your piece to a legal square.
won or lost. A display of Checkmate! will then end the game. The computer recognizes draws by stalemate, three-fold repetition, and the 50-move rule. In each of these cases, the corresponding display will be shown after the drawing move has been made. 2.5 Try the Self-Rating System Whenever you play on any of the Tournament Levels, the computer will provide you with an approximate ELO rating after the game has ended, based on your performance.
2.8 Changing Sides To change sides with the computer, press ENTER on your turn— and the computer will make the next move for your side. You can change sides as often as you wish by pressing ENTER repeatedly. Want the computer to play the first move for White at the start of a new game? Press NEW GAME twice, and then press ENTER! Want to see the computer play chess against itself? Press ENTER after each move—and watch as it plays for both sides of the board, one move after another.
2.10 Thinking on the Opponent’s Time As you play, you’ll probably notice that the computer sometimes replies to your moves immediately, even in the middle of games played on the higher levels. This is because the computer thinks on your time, using the time you are contemplating your next move to think ahead and plan its own strategies. It tries to anticipate the move you are likely to make, and calculates its responses for that move while you’re still thinking.
4. OPTION MODE: ADD VARIETY TO YOUR GAMES! Want to explore all sorts of intriguing game options? Just take a look at Option Mode! First, learn how to select and activate these user-selectable options before or during game play, and then go on to learn about the individual options, as described in this section. Selecting Game Options Press “ (MENU) to enter the Main Menu, and the display automatically shows ¿OPTION for Option Mode.
for a new game, most of your selected options are carried over to the next game. The only exception is Two Player Mode, which automatically returns to Player vs. Computer when you start a new game. 4.1 Two Player Mode Options: player: P-C (Player vs. Computer) player: P-P (Player vs. Player) Normally, the computer automatically answers with a countermove after you enter your move. If you activate player: P-P, however, you can enter any number of moves one by one, without allowing the computer to answer.
1. Press “ (MENU) to enter the Main Menu. The display will show ¿OPTION. 2. Press ENTER to enter Option Mode. For this example, let’s pick the Ticking Clock Option. 3. Press ¯ five times, until the display shows ticks: off. 4. Press ENTER to turn this option on, and the display changes to ticks:on. 5. Press ‘ (CLEAR) to exit Option Mode, press “ (MENU) to exit Menu Mode—and the simulated ticking will start! Note: To turn this option off again, repeat the above steps. For more details, see Section 4.6.
4.5 Countdown Clock Options: clock: up / down Normally, the computer defaults to the clock: up option, displaying the elapsed time. Activating the Countdown Clock option, however, will display the remaining time instead. Here’s how to differentiate between the clocks symbols at a glance: [/] {/} Countup Clocks (White/Black) Countdown Clocks (White/Black) Note that the Countdown Clock option is only available in combination with the Tournament and Speed Chess Levels. 4.
4.8 Sound On/Off Options: sound: on / off Selecting one of these sound settings gives you the option of playing chess with or without sound effects. 4.9 LCD Contrast Options: contrast: 1 / 2 / 3 / 4 / 5 This option allows you to adjust the contrast of the LCD display, with 1 being the lightest, and 5 the darkest. If you find that the default setting of 3 is too light or too dark to read comfortably, change it by pressing ENTER repeatedly, until your desired setting is displayed. 4.
5. LEVEL MODE: CHOOSE FROM 100 LEVELS Your chess computer has 100 unique playing levels to choose from. The levels are divided into two basic groups: • FUN LEVELS (1-60): These levels offer beginners and average players a chance to build their chess skills. On many of the Fun Levels, you’ll see the computer make mistakes on purpose—just so you can learn from it! • COMPETITION LEVELS (61-100): These levels are geared towards intermediate and more advanced players.
1. Press “ (MENU) to enter the Main Menu. The display will show ¿OPTION. 2. Press ¯ one time, and the display will show ¿LEVEL. 3. Press ENTER to enter Level Mode, and the current level is displayed. Refer to Section 5, if necessary, to identify the current level. 4. Let’s find Speed Chess Level 81. Press ˘ or ¯ to increase or decrease the levels by one; press > or < to increase or decrease the levels by ten. Watch the display for < 5 min/game >. 5. When you see < 5 min/game >, press ENTER.
pawn structure, centrality, mobility, and King safety. It may overlook or walk into mates, develop its Queen too early, or make impulsive captures and checks. Chess books often advise of basic rules, yet players see their opponents breaking the rules and getting away with it. The Fun Levels provide a way to practice punishment of these typical mistakes, enabling the beginner to strengthen his game against the human opponents he’s likely to face.
5.4 Speed Chess Levels Level Total Time per Game Display 81 .............. 5 minutes per game ................... < 5 min/game> 82 .............. 7 minutes per game ................... < 7 min/game> 83 .............. 10 minutes per game ................... <10 min/game> 19 ENGLISH 74 ............ 40 moves in 1 hour 45 min. ............ < 40 in 1:45 > 75 ............ 35 moves in 1 hour 30 min. ............ < 35 in 1:30 > 76 ............ 40 moves in 2 hours ....................... < 40 in 2:00 > 77 ........
84 .............. 15 minutes per game ................... <15 min/game> 85 .............. 20 minutes per game ................... <20 min/game> 86 .............. 30 minutes per game ................... <30 min/game> 87 .............. 45 minutes per game ................... <45 min/game> 88 .............. 60 minutes per game ................... <60 min/game> 89 .............. 90 minutes per game ................... <90 min/game> 90 ............ 100 minutes per game ...................
6. TAKEBACK MODE: TAKE BACK MOVES When you’re playing chess against this computer, nothing is ever “set in stone”—you can change your mind or decide to play a different move whenever you’d like! When it’s your turn to move, simply press “ (MENU) to enter the Main Menu, and press ¯ repeatedly until the display shows ¿TAKEBACK. Press ENTER to enter Takeback Mode, and you’ll see the last move that was made. To take that move back, press ¯, and the move will be retracted on the board.
you’ll get all the answers! In fact, you can obtain an incredible amount of information about the computer’s thought process, and studying this information can help you learn so much more about the game. You may access game information at any time via Info Mode. As described below, you can call up this information manually by pressing HINT/INFO, or you can select Info Mode options to be displayed automatically, every time the computer is considering its next move.
PRINCIPAL VARIATION INFORMATION: HINT/INFO • • • • Predicted line of play: Move 1 Predicted line of play: Move 2 Predicted line of play: Move 3 Predicted line of play: Move 4 SEARCH INFORMATION: HINT/INFO • Position evaluation (score) • Search depth; and Move currently being considered (if computer is thinking) • Elapsed time for current move; and Number of nodes searched per second (if computer is thinking) CHESS CLOCK INFORMATION: HINT/INFO • Elapsed time for both sides • Remaining time for both sid
You may turn on any or all of the above Info Mode Options. If you activate more options than will fit in the display at one time, the display will scroll continuously while the computer considers its next move. If the display is scrolling too quickly, change the LCD Speed, as noted in Section 4.10. You can also press GO/STOP to pause the display, and then press ‘ (CLEAR) to resume the scrolling. When the requested information is not available, the display will show --x--.
7.3 Chess Clock Information After pressing HINT/INFO to access Info Mode, press it two more times to see chess clock information. The display will show the total elapsed time for both sides. Notice that the chess clock symbol in the middle portrays the current side to move and the type of clock in use. Pressing ˘ will cycle through two displays, as shown below: • Total elapsed time for White/Black (Countup Clock) White to move [, Black to move ].
• Current move number and last move made. • Moves of the current game. 7.5 Rating Display After pressing HINT/INFO to access Info Mode, press it four more times to see your current rating. Note that the ratings are based on Tournament Level play, as described in Section 5.3. 8.
9. STUDY MODE: TRY TESTING YOURSELF! Looking for a terrific learning tool? You’ll definitely want to try out Study Mode! Eight famous games are built right into your computer, each containing eight critical points—for a total of 64 different Study Positions. It’s up to you to play through the games and make the correct moves that were played for the winning side in the original games.
Study Mode, and you’ll see the first Study Position, < Study1-1 >. To change the Study Position, press ˘ or ¯ to increase/decrease the studies by one, or use your stylus to press > or < to increase/decrease the studies by eight. When your desired Study Position is displayed, press ENTER, and the display will confirm with Start Study?. Pressing ENTER at this point will start the Study Game, as described below, or pressing ‘ (CLEAR) will cancel and return you to the main Study Mode display.
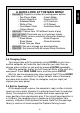
8 1-8 2-8 3-8 4-8 5-8 6-8 7-8 8-8 7 1-7 2-7 3-7 4-7 5-7 6-7 7-7 8-7 6 1-6 2-6 3-6 4-6 5-6 6-6 7-6 8-6 5 1-5 2-5 3-5 4-5 5-5 6-5 7-5 8-5 4 1-4 2-4 3-4 4-4 5-4 6-4 7-4 8-4 3 1-3 2-3 3-3 4-3 5-3 6-3 7-3 8-3 2 1-2 2-2 3-2 4-2 5-2 6-2 7-2 8-2 1 1-1 2-1 3-1 4-1 5-1 6-1 7-1 8-1 a b c d e f g h Section 7.4), or (c) take back any of the moves and resume a normal game from any position.
Mode by pressing “ (MENU) and ¯ (or ˘) until ¿STUDY is displayed, and then pressing ENTER. Next, refer to the chart and press one of the board squares to select that Study Position. Press ENTER, and the display will confirm with Start Study?. Press ENTER again, and the Study Game will start, as described previously. 10. NEED HELP? LOOK HERE! For troubleshooting purposes, we’ve compiled the following list of situations you might encounter, along with some possible solutions. a.
11. TECHNICAL DETAILS 11.1 The ACL Function Computers sometimes “lock up” due to static discharge or other electrical disturbances. If this should happen, use a pin or another sharp object to press into the hole marked ACL in the base of the unit for at least one second. This resets the computer. 11.2 Care and Maintenance Your computer is a precision electronic device, and should not be subjected to rough handling or exposed to extreme temperatures or moisture.
the use of batteries. Caution: Use only alkaline or zinc carbon batteries. Do not mix different types of batteries or new and used batteries. Do not recharge non-rechargeable batteries. Use only recommended batteries or equivalent. Be sure to observe the correct polarity when inserting the batteries. Worn out batteries should be removed from the unit promptly. Do not short circuit the supply terminals. 11.
1. Warranty period is 2 years from date of purchase with proof of purchase submitted. 2. Operating instructions must be followed. 3.
SCHNELLSTART Folgen Sie diesen Schritten, um sofort eine Partie zu starten! Sie 3 AAA Batterien in das Gerät und 1 Legen beachten Sie dabei die eingezeichnete Polarität. Nehmen Sie den Stylus zur Hand. 3 x AAA (AM4/R03) 2 Sie GO/STOP. Schaltet sich das 3 Drücken Gerät nicht an folgen Sie den Schritten in Abschnitt 11.1. Sie 2mal kurz hintereinander NEW 4 Drücken GAME.
SCHNELLSTART TASTEN UND FUNKTIONEN EINLEITUNG 1. DIE GRUNDLAGEN 1.1 Batterien einlegen, Anschalten 1.2 Spielbereit? So funktioniert es! 1.3 Computerzüge ausführen 1.4 Partie zu Ende? Starten Sie neu 1.5 Zu einfach/schwierig? Ändern Sie die Spielstufe 2. WEITERE FUNKTIONEN 2.1 Wer ist am Zug? Prüfen Sie die Anzeige 2.2 Schlagzüge und Sonderregeln 2.3 Ungültige Züge 2.4 Schach, Matt und Remis 2.5 Lassen Sie Ihre Spielstärke bewerten 2.6 Sie benötigen Hilfe? Fragen Sie einfach! 2.
TASTEN UND FUNKTIONEN 1.GO/STOP: hiermit schalten Sie das Gerät an und aus. 2.SCHALTER FÜR VARIABLE HINTERGRUNDBELEUCHTUNG (Aus/ Mittel/Hell). 3.ACL (Reset): befindet sich auf der Unterseite des Geräts. Wird gebraucht, um eventuelle statische Aufladungen vom Gerät zu nehmen. 4.BATTERIEFACH: befindet sich auf der Unterseite. Bitte legen Sie 3 alkaline AAA Batterien ein. 5.TOUCH SCREEN SCHACHBRETT: drücken Sie einfach mit einem Stylus oder manuell auf ein Feld, um Eingaben vorzunehmen. 6.
1. DIE GRUNDLAGEN 1.1 Batterien einlegen, Anschalten Ihr neuer Schachcomputer benötigt 3 AAA (AM4/R03) Batterien. Legen Sie diese gemäss der eingezeichneten Polarität ein. Wir empfehlen neue, alkaline Batterien für eine längere Lebensdauer. Schalten Sie das Gerät an, indem Sie GO/STOP drücken. Reagiert der Computer nicht, setzen Sie Ihn über die ACL-Funktion zurück. Drücken Sie mit einer Büroklammer für 3 Sekunden in die Vertiefung ACL. Dies nimmt die Aufladung vom Computer.
am Zug. Sie werden bemerken, dass der Computer manchmal sofort antwortet anstatt zu rechnen. Dies ist der Fall, wenn er aus der Eröffnungsbibliothek spielt (s. Abschnitt 2.9). 1.3 Computerzüge ausführen Ist der Computer am Zug, wird Thinking... angezeigt. Rechnet der Computer, blinkt das Symbol für Schwarz (ı) im Display und die Zeit verstreicht. Ist die Rechnung beendet, hören Sie einen Ton. Sie sehen den Zug im LCD, z.B. ıPe7-e5 und die Figur wird blinken.
2.3 Ungültige Züge Ihr Computer wird niemals einen ungültigen Zug akzeptieren! Versuchen Sie, einen auszuführen, hören Sie einen Signalton und das Display zeigt das Ausgangsfeld an. Um fortzufahren, stellen Sie die Figur zurück oder Sie führen einen regelkonformen Zug aus. Führen Sie den Computerzug nicht korrekt aus, hören Sie wieder den Signalton. Sie bewegen entweder die falsche Figur oder die richtige Figur auf ein falsches Feld.
etwas Mitgefühl entgegengebracht. Im Display wird kurz Checkmate! gezeigt. Der Computer erkennt Remis durch Patt, 3-malige Wiederholung und 50-Züge Regel. Die Anzeige gibt Ihnen den Remis-Grund an. 2.5 Lassen Sie Ihre Spielstärke bewerten Spielen Sie eine Partie in der Turnierstufe, gibt Ihnen der Computer eine Bewertung Ihrer Spielstärke, sobald das Spiel beendet ist. Was ist eine Bewertung? Es gibt eine offizielle Methode, die Leistung in Schachpartien zu messen.
2.9 Eröffnungen Am Anfang einer Partie, zieht der Computer auf vielen Stufen sofort. Dies ist möglich, weil er die Züge direkt aus einer Bibliothek holt, sie also nicht mehr berechnen muss. Diese Bibliothek enthält die wichtigsten Eröffnungen. Ist die aktuelle Stellung in seiner Eröffnungen, antwortet der Computer automatisch anstatt zu rechnen! Die Bibliothek ist auf allen Stufen aktiv - Ausnahme ist die Mattsuch-Stufe. 2.
ÜBERSICHT ZUM HAUPTMENÜ! • ¿OPTION: Entdecken Sie aufregende Spieleinstellungen. • 2-Spieler-Modus • Training • Suchalgorythmus • Sound An/Aus • Eröffnungen • LCD-Kontrast • Weiss von oben spielen • LCD-Geschwindigkeit • Countdown-Anzeige • Automatik • Uhrticken • ¿LEVEL: Wählen Sie aus 100 Spielstufen aus. • ¿TAKEBACK: Nehmen Sie beliebig viele Züge zurück! • ¿INFO: Wählen Sie verschiedene Informationen aus.
4.1 2-Spieler-Modus Optionen: player: P-C (Spieler gegen Computer) player: P-P (Spieler gegen Spieler) Normalerweise rechnet der Computer automatisch sobald Sie Ihren Zug eingegeben haben. Schalten Sie jedoch diese Option aus, spielen Sie für beide Seiten. Diese Einstellung ist dann erforderlich wenn: • Sie durch Meisterpartien gehen.
EINE OPTION EINSTELLEN 1. Drücken Sie “ (MENU) und es wird ¿OPTION angezeigt. 2. Bestätigen Sie mit ENTER. Wir nehmen nun das Beispiel „Uhrticken“. 3. Drücken Sie ¯ 5mal bis ticks: off angezeigt wird. 4. Schalten Sie die Option mit ENTER an. Es wird ticks:on gezeigt. 5. Drücken Sie ‘ (CLEAR) und dann “ (MENU), um die Partie – nun begleitet von Uhrticken – zu spielen. Um die Option wieder auszuschalten, wiederholen Sie einfach die oberen Schritte. Details finden Sie unter 4.6.
4.5 Countdown Optionen: clock: up / down Normalerweise wird Ihre Zeit addiert. Sie können jedoch einen Countdown einstellen, um nach Zeitvorgaben zu spielen. So unterscheiden Sie diese Möglichkeiten: [/] {/} Zeit wird addiert (Weiss/Schwarz) Countdown (Weiss/Schwarz) Countdown kann nur für Turnierstufen oder Schnellpartien aktiviert werden! 4.6 Uhrticken Optionen: ticks: off / on Hiermit schalten Sie ein Uhrticken zu. Eine aufregende Option, um wirkliche Turnieratmosphären zu schaffen! 4.
• coach: novice: Der Trainer macht Sie auf Kombinationen oder Opfer aufmerksam. Sinnvoll, um die Inhalte der Taktischen Lektionen umzusetzen. • coach: intermediate: Mit dieser Stufe werden die Ausensichtlichen Warnungen abgestellt. Dafür wird mehr auf Strategie eingegangen. Ein wichtiger Punkt,um das Mittelspiel besser zu beherrschen. • coach: advanced: Diese Einstellung ist ideal für Einsteiger. Hier werden Warnungen und Tipps gegeben sollten Figuren gefährdet sein.
5. SPIELSTUFEN Ihr Computer bietet 100 unterschiedliche Spielstufen! Wählen Sie eine Stufe aus, sollten Sie sich bewusst sein, dass der Computer um so stärker spielt je länger er rechnen kann - genauso wie ein menschlicher Spieler! Die Spielstufen sind wie folgt unterteilt: • 60 SPASS-STUFEN (1-60): Diese Stufen wurden speziell für Einsteiger und Gelegenheitsspieler entwickelt.
SPASS-STUFEN 5.1 Spass-Stufen Stufe Beschreibung Anzeige 1 ......................... Spass-Stufe 1 .................. 2 ......................... Spass-Stufe 2 .................. 3 ......................... Spass-Stufe 3 .................. …und so weiter bis… 58 ........................ Spass-Stufe 58 ................ 59 ........................ Spass-Stufe 59 ................ 60 ........................ Spass-Stufe 60 ................
DEUTSCH 5.3 Turnierstufen Stufe Züge/Gesamtzeit Anzeige 71 .............. 40 Züge in 1 hr. 20 Min. ............... < 40 in 1:20 > 72 .............. 40 Züge in 1 hr. 30 Min. ............... < 40 in 1:30 > 73 .............. 35 Züge in 1 hr. 45 Min. ............... < 35 in 1:45 > 74 .............. 40 Züge in 1 hr. 45 Min. ............... < 40 in 1:45 > 75 .............. 35 Züge in 1 hr. 30 Min. ............... < 35 in 1:30 > 76 .............. 40 Züge in 2 hr. ............................
SO EINFACH ÄNDERN SIE DIE SPIELSTUFE! 1. Drücken Sie “ (MENU) und es wird ¿OPTION angezeigt. 2. Drücken Sie ¯ und Sie sehen ¿LEVEL. 3. Bestätigen Sie mit ENTER und die aktuelle Stufe wird gezeigt. 4. Nehmen wir an, Sie wollen die Schnellpartie einstellen, also Stufe 81. Blättern Sie mit ˘ oder ¯ in 1er Schritten durch die Stufen oder mit dem Stylus und > oder < in 10er Schritten bis < 5 min/game > erscheint. 5. Bestätigen Sie mit ENTER. Verlassen Sie dann den Modus mit “ (MENU).
5.6 Taktische Stufe Stufe Beschreibung Anzeige 99 ..... Taktische Stufe (kein zeitliches Limit) ... < Tactical > Hier versucht der Computer, die beste taktische Zugsequenz zu finden - und zwar schneller als in normalen Spielstufen. Die Rechnung dauert an bis ein Eroberungsweg von mindestens 2 Bauern gefunden wurde, oder bis Sie mit ENTER unterbrechen. Hiermit können Sie experimentieren und ermöglichen dem Computer, sich voll auf spezielle taktische Varianten zu konzentrieren. 5.
abgeschlossen. Es wird der vorhergehende Zug angezeigt und Sie können diesen nun auf die gleiche Weise zurücknehmen. Haben Sie den Partieanfang erreicht, wird End takebacks angezeigt und das Menü automatisch verlassen. Solange Sie nicht den Partieanfang erreicht haben, können Sie vorwärtsblättern mit der Taste ˘ und somit die Rücknahmen löschen. Um weiterzuspielen, verlassen Sie den Modus mit ‘ (CLEAR) und dann “ (MENU).
Manuell abrufbare Informationen Drücken Sie HINT/INFO während der Partie, wird der vom Computer als „wahrscheinlich“ berechnete Zug angezeigt. Spielinformationen sind in verschiedene Gruppen unterteilt. Mit ˘ und ¯ können Sie durch diese blättern. Sie sehen diese Gruppen in den folgenden Abschnitten. Drücken Sie ‘ (CLEAR), um zur normalen Partie zurückzukehren. 7.1 Hauptvariante Drücken Sie HINT/INFO, um den Informations-Modus aufzurufen. Sie sehen den ersten Zug der Hauptvariante, z.B. Ply1: b1-c3.
EINE ÜBERSICHT ZUM INFO-MODUS! INFORMATIONEN ZUR HAUPTVARIANTE: HINT/INFO • • • • Hauptvariante: Zug 1 Hauptvariante: Zug 2 Hauptvariante: Zug 3 Hauptvariante: Zug 4 SUCHINFORMATIONEN: HINT/INFO • Bewertung • Suchtiefe; und derzeit berrechneter Zug • Verstrichene Zeit für aktuellen Zug und Rechenknoten pro Sekunde (falls der Computer rechnet) SCHACHUHR-INFORMATIONEN: HINT/INFO • Verstrichene Zeit für beide Seiten • Verbleibende Zeit für beide Seiten (nur bei Turnier- und Schnellschachpartien) INFORMA
7.3 Schachuhr-Informationen Drücken Sie 3mal HINT/INFO, um diese Gruppe aufzurufen. Mit ˘ blättern Sie innerhalb der Gruppe durch folgende Informationen: • Verstrichene Gesamtzeit für Weiss/Schwarz; Weiss am Zug [, Schwarz am Zug ]. • Verbleibende Gesamtzeit für Weiss/Schwarz; Weiss am Zug {, Schwarz am Zug } (nur bei Turnier- oder Blitzschach). Ist der Countdown nicht aktiviert, erscheint im zweiten Fenster einfach --:--{--:--. 7.4 Zugzähler/Spielzüge Drücken Sie 4mal HINT/INFO, um diese Gruppe aufzurufen.
8. POSITIONEN ÄNDERN ODER AUFBAUEN Diese Funktion ist ideal, um bestimmte Stellungen aufzubauen oder zu ändern! Sie können Problemaufgaben eingeben oder Mattsituationen berechnen lassen. Wichtig: Ihre aktuelle Partie wird gelöscht, falls Sie eine neue Position aufbauen. Sie können Positionen aufbauen, sobald Sie am Zug sind. Drücken Sie die Taste “ MENU und dann mehrmals ¯ bis ¿SETUP angezeigt wird. Bestätigen Sie mit ENTER. Im Display werden Farben und Figurensymbole angezeigt.
Lernen anhand von gespeicherten Stellungen Tipp: Sie können die gespeicherten Stellungen auch über Felder aufrufen, wie wir in der weiteren Anleitung erklären. Drücken Sie “ (MENU) und dann mehrmals ¯ oder ˘ bis das Display ¿STUDY anzeigt. Bestätigen Sie mit ENTER und jetzt sehen Sie < Study1-1 >. Blättern Sie mit ˘ oder ¯ durch die gespeicherten Stellungen in 1er Schritten (oder drücken Sie mit dem Stylus auf > oder < um in 8er Schritten zu blättern). Rufen Sie die Stellung Ihrer Wahl mit ENTER auf.
DIE 64 LERNSTELLUNGEN Sie können jede Lernstellung auch direkt über das Schachbrett aufrufen! Wählen Sie eine Stellung aus, indem Sie auf das zugehörige Feld drücken.
10. SIE BENÖTIGEN HILFE? SCHAUEN SIE HIER NACH! Hier finden Sie einige Antworten auf häufig gestellte Fragen. a. Der Computer reagiert nicht oder stürzt ab. • Ersetzen Sie die Batterien oder legen Sie diese erneut ein. • Eventuell ist der Computer statisch aufgeladen. Entladen Sie ihn mit Hilfe der ACL-Funktion (s. 11.1). b. Das Display ist schlecht lesbar. • Ersetzen Sie die Batterien. • Stellen Sie den Kontrast ein (s. 4.9). c. Sie haben eine Informationen aktiviert, aber der Text läuft zu schnell ab.
g. Der Computer zeigt Rate as draw? obwohl NEW GAME aktiviert wurde. • Sie haben eine Partie auf der Turnierstufe unterbrochen und müssen die Wertung eingeben. Details finden Sie unter 5.3. h. Der Computer hat seinen Zug angezeigt aber er wurde nicht ausgeführt. • Ist die Option „Automatik“ deaktiviert, müssen Sie den Zug ausführen. Details finden Sie in 4.11. i. Der Computer zeigt No Move Found! an. • Sie haben eine Mattsuch-Stufe eingestellt und der Computer findet kein Matt.
11.3 Technische Spezifikation Tasten: 8 Schachbrett: 9x8 Kontaktmembran (Touch panel) LCD Display: Punktmatrix 11-stellig, 68 x79 mm Batterien: 3 x AAA/AM4/R03 Abmessung: 128 x 87 x 22 mm Gewicht: 200 Gramm Bitte bewahren Sie diese wichtigen Information auf! Saitek behält sich das Recht vor ohne vorherige Ankündigung, technische Änderungen im Interesse eines überarbeiteten Programm durchzuführen.
GARANTIEBEDINGUNGEN 1. Die Garantiezeit beträgt 2 Jahre ab dem nachgewiesenen Kaufdatum. 2. Die Bedienungsanleitung ist zu beachten. 3.
DEMARRAGE RAPIDE Pour commencer tout de suite une partie, suivez les étapes suivantes ! 1 2 3 4 Ouvrez le compartiment des piles et insérez trois piles alcalines “AAA” (AM4/R03) en faisant attention de bien respecter la polarité. Sortez le stylet de son compartiment situé sur le côté droit de l’ordinateur, comme indiqué ci-contre. 3 x AAA (AM4/R03) Appuyez sur la touche GO/STOP pour allumer l’ordinateur. S’il ne répond pas, réinitialisez-le comme indiqué dans le chapitre 11.1.
SOMMAIRE DEMARRAGE RAPIDE TOUCHES ET CARACTÉRISTIQUES INTRODUCTION 1. COMMENCER A JOUER : LES BASES 1.1 Piles insérées, ordinateur allumé 1.2 A vos marques, prêts ? Partez ! 1.3 L’ordinateur joue son coup 1.4 Partie terminée ? Commencez une nouvelle partie 1.5 Trop facile/difficile ? Changez de niveau 2. AUTRES FONCTIONS A DECOUVRIR 2.1 A qui le tour ? Vérifiez l’affichage 2.2 Coups spéciaux 2.3 Coups non autorisés/non conformes aux règles 2.4 Echec, mat et partie nulle 2.
1. TOUCHE GO/STOP : Appuyez une fois sur cette touche pour allumer l’ordinateur, deux fois pour l’éteindre. Appuyez une fois pour suspendre le défilement de l’affichage. Continuez à faire défiler en appuyant sur ‘ (CLEAR). 2. CONTRÔLE DE LA LUMINOSITÉ DU RÉTRO-ÉCLAIRAGE DU LCD (Eteint/ Moyen/Maximum). 3. ACL (Réinitialiser) : Sur le socle de l’ordinateur. Utilisé pour décharger toute électricité statique formée après l’installation de nouvelles piles. 4.
INTRODUCTION Félicitations ! Vous venez d’acheter un ordinateur Mephisto Maestro Travel Chess Computer ! Doté d’extraordinaires capacités de jeu et d’un large éventail d’options spécifiques, ce superbe produit bénéficie d’un écran et d’une interface tactiles, ainsi que d’un rétroéclairage LCD, pour votre confort et pour une véritable facilité de jeu. Portable et toujours prêt à voyager, il vous permettra d’apprécier une partie d’échec où que vous soyez, chez vous ou en vacances.
1.3 L’ordinateur déplace une pièce Lorsque l’ordinateur déplace une pièce, il affiche tout d’abord brièvement Thinking.... S’il est en train de réfléchir pour déplacer les Noirs, l’affichage correspondant (ı) clignote et l’horloge s’affiche. Une fois le coup effectué, l’ordinateur émet un ‘bip’ et affiche son déplacement (par exemple, ıPe7-e5). La pièce clignote brièvement en alternance sur les cases de départ et d’arrivée.
coup. Vous pouvez cependant sélectionner un des 100 niveaux de jeu ! Pour une description de tous les niveaux et les instructions à suivre pour changer le niveau, veuillez vous référer au chapitre 5. 2. AUTRES FONCTIONS A DECOUVRIR 2.1 A qui le tour ? Vérifiez l’affichage Lorsque l’ordinateur joue avec les Noirs, un carré noir (ı) clignote à l’écran.
2.4 Echec, mat et partie nulle Si le Roi est mis en échec, l’ordinateur affiche brièvement Check avant de déplacer la pièce. Si l’ordinateur découvre un mat forcé, il annonce brièvement ce mat (par exemple Mate in 3). Lorsqu’une partie se termine par un échec et mat, l’ordinateur vous félicite ou vous offre ses condoléances, selon que vous avez gagné ou perdu. Checkmate! s’affiche alors, indiquant que la partie est terminée.
2.6 Vous avez besoin d’un conseil ? Il suffit de demander ! Si vous voulez qu’on vous conseille un coup, il vous suffit de le demander au Maestro Travel Chess Computer ! Appuyez sur la touche HINT/INFO lorsque votre tour est venu de jouer. L’ordinateur affiche alors aussitôt une suggestion de coup. Par exemple, si l’ordinateur vous suggère le coup e4xd5, il affichera Ply 1: e4xd5. Un demicoup (ou “ply”) est un coup joué par l’un ou l’autre des adversaires.
2.10 Utilisation du temps de l’adversaire pour réfléchir Au cours d’une partie, vous remarquerez que l’ordinateur répond parfois immédiatement à vos coups, même en milieu de partie ou pour les niveaux plus élevés. Ceci est dû au fait que l’ordinateur utilise votre temps de réflexion pour préparer son prochain coup et élaborer une stratégie. Il essaye d’anticiper le coup que vous allez effectuer et de préparer une défensive alors que vous êtes encore en train de réfléchir.
3. LE MENU PRINCIPAL : ACCES AUX MODES SPECIAUX L’ordinateur Maestro Travel Chess Computer offre plusieurs modes et options sélectionnables par l’utilisateur et accessibles à partir du menu principal intégré. Après avoir appuyé sur la touche “ (MENU), l’objet ¿OPTION s’affiche immédiatement, le premier des six objets du menu principal. Appuyez plusieurs fois sur ¯ (ou ˘) pour faire défiler les objets du menu : OBJET DU MENU PRINCIPAL .............. REFERENCE ............ AFFICHAGE Mode Option .............
OPTION ................................................. REFERENCE ..... AFFICHAGE PAR DEFAUT Mode Deux joueurs .................. Chapitre 4.1 ... player: P-C Algorithme de recherche ......... Chapitre 4.2 ... search: select Mode Autobook ........................ Chapitre 4.3 ... book: on Blancs en haut. ........................ Chapitre 4.4 ... top: black Horloge de compte à rebours .. Chapitre 4.5 ... clock: up Tic-tac de l’horloge .................. Chapitre 4.6 ... ticks: off Mode Entraînement .......
cours. Pour de plus amples informations sur chacune de ces options, veuillez consulter les chapitres de référence. NB : lorsque vous réinitialisez l’ordinateur pour une nouvelle partie, la plupart des options sélectionnées sont conservées pour la partie suivante. La seule exception concerne le mode Deux joueurs qui retourne automatiquement au mode Joueur contre Ordinateur lorsque vous commencez une nouvelle partie. 4.
ENTRAINEZ-VOUS A SELECTIONNER UNE OPTION 1. Appuyez sur “ (MENU) pour entrer dans le menu principal. ¿OPTION s’affiche. 2. Appuyez sur ENTER pour entrer dans le mode Options. Pour cet exemple, choisissons l’option du tic-tac de l’horloge (Ticking Clock). 3. Appuyez cinq fois sur ¯, jusqu’à ce que l’affichage indique ticks: off. 5. Appuyez sur ‘ (CLEAR) pour quitter le mode Options et sur “ (MENU) pour quitter le mode Menu.
4.4 Blancs en haut Options : top: black / white Vous voulez que l’ordinateur joue avec les blancs en haut de l’échiquier ? Alors sélectionnez l’option top: white au début d’une nouvelle partie. Commencez la partie en appuyant sur ENTER et l’ordinateur jouera en premier avec les Blancs en haut de l’écran.
4.8 Son activé/désactivé Options : sound: on / off Sélectionnez l’une ou l’autre de ces options pour activer ou désactiver les sons lors d’une partie d’échecs. 4.9 Contraste LCD Options : contrast: 1 / 2 / 3 / 4 / 5 Cette option vous permet d’ajuster le contraste de l’écran LCD, 1 étant le plus lumineux et 5 le plus sombre. Si vous trouvez que l’option par défaut (3) est trop lumineuse ou trop sombre, modifiez-la en appuyant plusieurs fois sur ENTER jusqu’à ce que l’option désirée soit affichée.
4.10 Vitesse LCD Options : LCD speed: 1 / 2 / 3 / 4 Vous pouvez contrôler la vitesse de déroulement de l’affichage LCD à partir de cette option, 1 correspondant à la vitesse la plus lente et 4 à la plus rapide. Si vous trouvez que l’option par défaut (2) est trop lente ou trop rapide, modifiez-la en appuyant plusieurs fois sur ENTER jusqu’à ce que l’option désirée soit affichée. 4.
CHANGER DE NIVEAU, C’EST FACILE ! 1. Appuyez sur “ (MENU) pour accéder au menu principal. ¿OPTION s’affiche. 2. Appuyez une fois sur ¯ pour afficher ¿LEVEL. 3. Appuyez sur ENTER pour accéder au mode Niveau. Le niveau en cours est alors affiché. Veuillez vous référer si nécessaire au chapitre 5 pour identifier le niveau en cours. 5. Lorsque < 5 min/game > est affiché, appuyez sur ENTER puis appuyez sur “ (MENU) pour quitter le mode Menu. Vous êtes maintenant prêts à tester votre nouveau niveau.
Veuillez noter les points suivants concernant la sélection des niveaux : • Vous pouvez changer le niveau à chaque fois que c’est votre tour de jouer. • Si vous modifiez le niveau, vous remettrez l’horloge d’échecs à zéro. • Si vous changez de niveau alors que l’ordinateur est en train de réfléchir, celui-ci abandonnera sa recherche et remettra l’horloge à zéro. NIVEAUX DE DIVERTISSEMENT 5.1 Niveaux de Divertissement Niveau Description Affichage 1 ....... Niveau de divertissement 1 ...............
NIVEAUX COMPETITION 5.2. Niveau Amateur Niveau Temps moyen par coup Affichage 61 ..................... 1 seconde par coup ................. <00:01/move> 62 ..................... 2 secondes par coup ............... <00:02/move> 63 ..................... 5 secondes par coup ............... <00:05/move> 64 ................... 10 secondes par coup ............... <00:10/move> 65 ................... 15 secondes par coup ............... <00:15/move> 66 ................... 30 secondes par coup ...............
78 ............ 50 coups en 2 heures. ................... < 50 in 2:00 > 79 ............ 40 coups en 2 heures 30 min. ....... < 40 in 2:30 > 80 ............ 40 coups en 3 heures .................... < 40 in 3:00 > Pour les niveaux ‘Tournoi’, vous devrez effectuer un certain nombre de coups en un temps donné. Si un joueur dépasse la limite de temps qui lui est impartie pour un nombre donné de coups, ceci est affiché à l’écran et le joueur perd la partie. Comme décrit ci-dessus dans le chapitre 2.
5.5 Niveau Résolution de Problèmes Niveau Problème Affichage 91 .................... Mat en 1 coup ........................ < Mate in 1 > 92 .................... Mat en 2 coups ...................... < Mate in 2 > 93 .................... Mat en 3 coups ...................... < Mate in 3 > 94 .................... Mat en 4 coups ...................... < Mate in 4 > 95 .................... Mat en 5 coups ...................... < Mate in 5 > 96 .................... Mat en 6 coups ......................
séquence tactique. Ceci est également effectué plus rapidement qu’en niveau de jeu normal. L’ordinateur cherche indéfiniment jusqu’à ce qu’il trouve une combinaison gagnante ou jusqu’à ce que vous arrêtiez la recherche en appuyant sur ENTER. Le niveau tactique est idéal pour enrichir vos connaissances, car il permet à l’ordinateur de se concentrer sur des positions tactiques. 5.7 Niveau Analyse Niveau Description Affichage 100 ...... Analyse (aucune limite de temps) .......
7. MODE INFO : REGARDEZ L’ORDINATEUR REFLECHIR Imaginez la situation suivante : Vous jouez aux échecs avec un(e) ami(e) et c’est son tour de jouer. Vous aimeriez savoir à quel coup il/elle est en train de réfléchir et ce qu’il/elle pense de la position actuelle des pièces sur l’échiquier. Mais bien sûr, vous n’osez pas lui demander, car cela ne se fait pas. Eh bien maintenant, lorsque vous jouez contre cet ordinateur, vous pouvez lui demander tout ce que vous voulez et l’ordinateur vous répondra.
Options : 0 / 1 / 2 / 3 / 4 moves • Show Nodes (afficher les nœuds) : Pour afficher le nombre de nœuds (ou positions) recherchés par seconde. Voir le chapitre 7.2. Options : nodes: off / on • Show Time per Move (afficher le temps par coup) : Pour afficher le temps utilisé jusqu’ici pour le coup. Voir le chapitre 7.3. Options : time/move: off / on • Show Progress (afficher la progression) : Pour afficher les détails de la recherche de l’ordinateur et du coup auquel l’ordinateur réfléchit. Voir le chapitre 7.
UN RESUME DU MODE INFO INFORMATIONS SUR LA VARIANTE PRINCIPALE : HINT/INFO • • • • Variante prévue : coup 1 Variante prévue : coup 2 Variante prévue : coup 3 Variante prévue : coup 4 INFORMATIONS SUR LA RECHERCHE : • Evaluation de la position (score) • Profondeur de la recherche et coup auquel l’ordinateur est en train de réfléchir • Temps écoulé pour le coup en cours et nombre de nœuds recherchés par seconde (si l’ordinateur est en train de réfléchir) INFORMATIONS SUR L’HORLOGE D’ECHECS : HINT/INFO •
chaque groupe est décrit ci-dessous plus en détails. Appuyez sur ‘ (CLEAR) pour retourner à l’affichage normal de l’horloge. 7.1 Variante principale Lorsque vous appuyez pour la première fois sur HINT/INFO, la variante principale s’affiche (la variante prévue par l’ordinateur) de la façon suivante : Ply1: b1-c3. Un ‘demi-coup’ est un coup individuel et le niveau de recherche de l’ordinateur dépend du nombre de demi-coups auxquels il réfléchit à l’avance.
7.3 Informations sur la pendule d’échecs Après avoir appuyé sur HINT/INFO pour accéder au mode Info, appuyez encore deux fois sur cette touche pour afficher des informations sur la pendule d’échecs. L’ordinateur affiche le temps total qui s’est écoulé pour les deux camps. Veuillez noter que le symbole de la pendule d’échecs au milieu de l’écran indique le camp qui doit jouer et le type d’horloge utilisé.
• Numéro du coup en cours et du dernier coup effectué. • Coups pour la partie en cours. 7.5 Affichage du classement Après avoir appuyé sur HINT/INFO pour accéder au mode informations, appuyez encore quatre fois sur cette touche pour afficher votre classement actuel. Veuillez noter que les classements sont basés sur des parties de niveau tournoi, comme décrit dans le chapitre 5.3. 8.
9. MODE ETUDE : ESSAYEZ DE TESTER VOS CAPACITES Vous recherchez un outil d’apprentissage efficace ? N’hésitez pas à tester le mode Etude ! Huit parties célèbres sont pré-enregistrées, chacune figurant huit points critiques pour un total de 64 positions à étudier. A vous de revivre ces parties en réalisant les mêmes coups qui ont conduit à la victoire. Cette fonction permet d’améliorer considérablement votre connaissance des échecs tout en vous apprenant à réaliser le meilleur coup dans une position donnée.
pour rendre cette fonction encore plus excitante, l’ordinateur évaluera vos performances tout au long de la partie. Au fait, si vous avez besoin d’aide pour résoudre une des positions du mode Etude, consultez l’annexe pour une liste complète de toutes les parties en mode Etude. N’oubliez pas, cependant, que ces parties sont un outil de référence.
Utiliser l’échiquier pour sélectionner une position Chaque position d’étude peut être activée de façon individuelle en appuyant sur la case correspondante sur l’échiquier. Comme indiqué dans le tableau du mode Etude, chacune des 64 cases représente une position d’étude. Accédez au mode Etude en appuyant sur “ (MENU) et sur ¯ (ou ˘) jusqu’à ce que ¿STUDY soit affiché, puis appuyez sur ENTER. Consultez alors le tableau et appuyez sur la case de l’échiquier pour sélectionner la position d’étude correspondante.
UTILISEZ L’ECHIQUIER POUR SELECTIONNER DES POSITIONS D’ETUDE ! Pour une méthode permettant de sélectionner facilement une position d’étude, accédez simplement au mode d’étude et appuyez sur la case correspondante sur l’échiquier, comme indiqué ci-dessous.
FRANÇAIS 10. BESOIN D’AIDE ? C’EST ICI ! Pour vous aider à résoudre les problèmes les plus courants, nous avons établi une liste des situations les plus communément rencontrées, ainsi que certains solutions possibles à ces problèmes. a. L’ordinateur ne réagit pas, fait des erreurs ou se fige en cours de partie. • Réinstallez les piles ou remplacez-les par des piles alcalines neuves. • L’électricité statique est parfois responsable d’un blocage.
f. Les notations de l’échiquier sont inversées lorsque je déplace une pièce. Pourquoi ? • L’option white: top est activée (les Blancs en haut). Accédez au mode Options et changez cette option pour black: top (voir le chapitre 4.4) g. Je viens de ré-initialiser l’ordinateur pour commencer une nouvelle partie mais l’ordinateur affiche Rate as draw? au lieu de se ré-initialiser. • Vous avez interrompu une partie de niveau tournoi et vous devez décider de l’issue de la partie pour l’ordinateur.
11.2 Entretien et maintenance Votre ordinateur est un dispositif électronique très sensible. Pour cette raison, il devra être manipulé avec précaution et il ne devra pas être exposé à des températures extrêmes ou à une atmosphère trop humide. Pour le nettoyer, n’utilisez pas d’agents ou de liquides chimiques, ceux-ci risquant d’endommager le plastique. Toujours retirer les piles avant de nettoyer l’ordinateur.
CONDITIONS DE GARANTIE 1. La période de garantie est de deux ans à compter de la date d'achat, avec soumission d'une preuve d'achat. 2. Les instructions de fonctionnement doivent être correctement suivies. 3.
ISTRUZIONI RAPIDE Per giocare immediatamente, seguire semplicemente queste istruzioni! 5 6 Aprite il coperchio della batteria e inserite tre batterie alcaline “AAA” (AM4/R03), osservando la corretta polarità. Rimuovete lo stilo dal vano sul lato destro dell’unità, come indicato nella figura. Premete il tasto GO/STOP (Avvio/Arresto) per accendere il computer. Se non ottenete una risposta, resettatelo nel modo indicato nella Sezione 11.1.
INDICE ISTRUZIONI RAPIDE TASTI E FUNZIONALITÀ INTRODUZIONE 1. ISTRUZIONI INIZIALI: DATI BASILARI 1.1 Inserimento delle batterie, accensione 1.2 Pronti per giocare? Ecco come farlo! 1.3 Il computer effettua la prima mossa 1.4 Partita terminata? Inizia una nuova partita 1.5 Troppo facile/difficile? Cambiate livello 2. ALTRE FUNZIONALITÀ DA ESPLORARE 2.1 A chi tocca? Controllate il display 2.2 Mosse speciali degli scacchi 2.3 Mosse illegali/errate 2.4 Matto, scaccomatto e patta 2.
1. TASTO GO/STOP (Avvio/Arresto): Premete per accendere l’unità; premete due volte per spegnerla. Premete per mettere in pausa il display di scorrimento; riprendete lo scorrimento con ‘ (CLEAR) (Annulla). 2. CONTROLLO DI LUMINOSITÀ RETROILLUMINATO A LCD (Spento/ Medio/Pieno). 3. ACL (Reset): Nella base dell’unità. Utilizzato per eliminare le scariche statiche dopo l’inserimento delle nuove batterie. 4. VANO BATTERIE: Nella base dell’unità. Utilizza tre batterie AAA alcaline (AM4/ R03). 5.
INTRODUZIONE Congratulazioni per aver acquistato la scacchiera computerizzata Mephisto Maestro Travel Chess Computer! Dotata di straordinarie abilità nel gioco degli scacchi e una vasta serie di opzioni speciali, questa elegante unità offre un’interfaccia touchscreen e schermo LCD retroilluminato per convenienza e facilità di gioco.
d. Premete poi lo stilo sulla casa di destinazione. Sentirete un secondo bip quando la scacchiera conferma la vostra mossa. Adesso, è il turno della scacchiera. Spesso il computer effettua la mossa istantaneamente all’inizio di una partita, invece di soffermarsi a riflettere, perché effettua delle mosse che sono memorizzate nella biblioteca di aperture. Per ulteriori particolari, cfr. Sezione 2.9. 1.
2. ALTRE FUNZIONALITÀ DA ESPLORARE 2.1 A chi tocca? Controllate il display Quando il computer pensa per i Neri, fa lampeggiare una casa Nera (ı). Dopo che ha effettuato la mossa, il display visualizza una casa Bianca fissa („), che indica che voi dovete effettuare la mossa per i Bianchi. 2.2 Mosse speciali degli scacchi Notate i seguenti punti, relativamente ad alcune mosse degli scacchi. Catture: Le catture sono indicate con una x, come in ıPa7xb6.
partenza o di destinazione illegale, un pezzo o colore errato o un tasto di gioco invalido. Se premete su una casa di destinazione illegale, il display continua semplicemente ad indicare la casa da dove proviene il pezzo. Per continuare, muovete il pezzo ad una casa legale.
2.6 Volete un suggerimento? Dovete solo chiederlo! Se avete bisogno di aiuto per effettuare una mossa, la scacchiera computerizzata è pronta a darvelo! Premete HINT/INFO (Suggerimenti/Informazioni) durante il vostro turno, e la scacchiera visualizza il suggerimento per una mossa. Se il suggerimento è ad esempio e4xd5, visualizzate Ply 1: e4xd5. Una “ply” (piega) è una mossa individuale o una mossa per ciascun lato. La visualizzazione del suggerimento richiede da uno a cinque secondi, a volte più a lungo.
biblioteca di aperture, che contiene la maggior parte delle principali aperture e molte posizioni del gioco dei Grandi Maestri. Se la posizione attuale si trova nella sua biblioteca, il computer gioca una risposta a quella posizione dalla memoria, invece di pensare alla mossa. La biblioteca di aperture viene utilizzata su tutti i livelli, eccetto i Livelli Soluzione Problemi. 2.
3. MENU PRINCIPALE: ACCESSO A MODI SPECIALI La scacchiera computerizzata Maestro Travel Chess Computer offre molti modi e opzioni selezionabili dall’utente, tutti accessibili tramite il Menu Principale integrato. Quando premete “ (MENU), passate direttamente a ¿OPTION, la prima delle sei voci del Menu Principale. Premete ¯ o ˘ ripetutamente per ciclare fra tutte le voci del Menu: VOCE MENU PRINCIPALE ... RIFERIMENTO .............. DISPLAY Modo Opzioni ...................... Sezione 4 ...............
UN RAPIDO SGUARDO AL MENU PRINCIPALE! per ciclare fra tutte le opzioni: OPZIONE .................................... RIFERIMENTO ..... DISPLAY PRECONFIGURATO Modo a due giocatori ......... Sezione 4.1 .... player: P-C Algoritmo ricerca ................ Sezione 4.2 .... search: select Modo Autobook .................. Sezione 4.3 .... book: on Bianco in cima .................... Sezione 4.4 .... top: black Cronometro per conto ........ Sezione 4.5 .... clock: up alla rovescia Ticchettio ....................
le scelte per l’opzione visualizzata. Quando la vostra scelta richiesta è visualizzata, premete ¯ o ˘ per passare ad un’opzione diversa o premete ‘ (CLEAR) (Annulla) per ritornare al Menu Principale e poi “ (MENU) per ritornare al gioco normale. Per i particolari su ciascuna di queste opzioni, vedete le relative sezioni di riferimento. NB: Quando resettate la scacchiera computerizzata per una nuova partita, la maggior parte delle vostre opzioni selezionate viene trasferita al gioco successivo.
ESERCITATEVI A CONFIGURARE DI UN’OPZIONE 1. Premete “ (MENU) per accedere al Menu Principale. Il display visualizza ¿OPTION. 2. Premete ENTER (Invio) per accedere al Modo Opzioni. Per questo esempio, prendiamo l’Opzione Cronometro Segnatempo. 3. Premete ¯ cinque volte, fino a quando il display mostra ticks: off. 4. Premete ENTER (Invio) per attivare questa opzione e il display cambia a ticks:on. 5.
In questo modo voi provate mosse e strategie diverse, nel tentativo di familiarizzarvi con quell’apertura e rafforzate in tal modo il vostro gioco. 4.
4.8 Audio acceso/spento Opzioni: sound: on / off La selezione di una di queste impostazioni audio vi fornisce l’opzione di giocare a scacchi con o senza gli effetti sonori. 4.9 Contrasto LCD Opzioni: contrast: 1 / 2 / 3 / 4 / 5 Questa opzione vi consente di regolare il contrasto del display a cristalli liquidi (LCD), dove 1 è il livello più luminoso e 5 il livello più scuro.
luminosa o troppo scura per leggere comodamente, modificatela premendo ENTER (Invio) ripetutamente, fino a quando visualizzate la configurazione richiesta. 4.10 Velocità LCD Opzioni: LCD speed: 1 / 2 / 3 / 4 Potete controllare la velocità di scorrimento del display a cristalli liquidi (LCD) configurando questa opzione, con 1 il livello più lento e 4 il livello più veloce.
CAMBIARE IL LIVELLO È FACILE! 1. Premete “ (MENU) per accedere al Menu Principale. Il display visualizza ¿OPTION. 2. Premete ¯ una volta, e il display visualizza ¿LEVEL. 3. Premete ENTER (Invio) per accedere al Modo Livelli e il livello attuale viene visualizzato. Vedete la Sezione 5, se necessario per identificare il livello attuale. 4. Troviamo il Livello Partita veloce 81. Premete ˘ o ¯ per aumentare o ridurre i livelli di uno; premete > o < per aumentare o ridurre i livelli di dieci.
Notate inoltre le seguenti istruzioni concernenti la selezione del livello: • Il livello può essere modificato ogni volta che tocca a voi effettuare la mossa. • La modifica del livello resetta sempre gli orologi da scacchi. • Se modificate i livelli mentre il computer pensa, il computer termina la sua ricerca e resetta il cronometro. LIVELLI DI DIVERTIMENTO 5.1 Livelli di divertimento Livello Descrizione Display 1 ............. Livello di divertimento 1 .............. 2 .............
LIVELLI COMPETIZIONE 5.2 Livelli casuali di gioco Livello Tempo medio per mossa Display 61 ................ 1 secondo per mossa ................... <00:01/move> 62 ................ 2 secondi per mossa .................... <00:02/move> 63 ................ 5 secondi per mossa .................... <00:05/move> 64 .............. 10 secondi per mossa .................... <00:10/move> 65 .............. 15 secondi per mossa .................... <00:15/move> 66 .............. 30 secondi per mossa ..................
Per i Livelli torneo dovete effettuare un certo numero di mosse entro un periodo specifico di tempo. Se un giocatore supera il tempo assegnato per un dato numero di mosse, il display indica questo e la partita è finita. Come descritto prima nella sezione 2.5, questa scacchiera computerizzata utilizza un sistema di autotaratura quando giocate partite del Livello Torneo.
5.5 Livelli soluzione problemi Livello Problema Display 91 .............. Scaccomatto in 1 mossa ............. < Mate in 1 > 92 .............. Scaccomatto in 2 mosse ............. < Mate in 2 > 93 .............. Scaccomatto in 3 mosse ............. < Mate in 3 > 94 .............. Scaccomatto in 4 mosse ............. < Mate in 4 > 95 .............. Scaccomatto in 5 mosse ............. < Mate in 5 > 96 .............. Scaccomatto in 6 mosse ............. < Mate in 6 > 97 .............. Scaccomatto in 7 mosse .
sperimentazione, perché permette al computer di concentrarsi pienamente sulle posizioni tattiche speciali! 5.7 Livello infinito Livello Descrizione Display 100 ........ Infinito (nessun limite di tempo) ......... < Infinite > Al Livello infinito, il computer ricerca a tempo indeterminato fino a quando trova un matto forzato, o fino a quando voi fermate la ricerca premendo ENTER (Invio). Se la ricerca viene interrotta, il computer effettua la mossa che ritiene attualmente migliore.
7. MODO INFO: GUARDATE IL COMPUTER CHE PENSA Immaginate: Giocate a scacchi con un amico e tocca a lui effettuare una mossa. Vorreste sapere che mossa sta considerando e vorreste conoscere il suo parere della posizione attuale della scacchiera.
• Mostra Progresso: Mostra la profondità della ricerca del computer e la mossa attualmente considerata. Cfr. Sezione 7.4. Opzioni: progress: off / on • Mostra Valutazione: Mostra il punteggio per la posizione attuale. Cfr. Sezione 7.2. Opzioni: evaluation: off / on Per attivare/disattivare un’opzione o per selezionare le impostazioni dell’opzione (eventuali), premete ENTER (Invio) quando l’opzione è visualizzata. Premendo ENTER (Invio) ripetutamente ciclate tra tute le scelte per l’opzione visualizzata.
UN QUADRO DEL MODO INFO INFORMAZIONI VARIAZIONE PRINCIPALI: HINT/INFO • • • • Linea di gioco prevista: Mossa 1 Linea di gioco prevista: Mossa 2 Linea di gioco prevista: Mossa 3 Linea di gioco prevista: Mossa 4 INFORMAZIONI SULLA RICERCA: HINT/INFO • Valutazione posizione (punteggio) INFORMAZIONI SUL CRONOMETRO DELLA SCACCHIERA: HINT/INFO • Tempo trascorso per entrambi i lati • Tempo rimanente per entrambi i lati* *Solo Livelli Partita rapida/Torneo INFORMAZIONI CONTEGGIO MOSSE: HINT/INFO • Numero mo
e la profondità della ricerca del computer viene descritta secondo il numero di mosse future previste dal computer. In una ricerca a due “ply”, ad esempio, il computer prevede due singole mosse (una mossa per i Neri e una per i Bianchi). Ricordate che questa prima visualizzazione di “mossa” può essere anche usata come un consiglio, perché questa è la mossa che il computer prevede voi facciate.
7.4 Conteggio mosse/Mosse partita Dopo aver premuto HINT/INFO (Suggerimenti/Informazioni) per accedere al Modo Info, premetelo altre tre volte per vedere il numero della mossa attuale e l’ultima mossa effettuata. Potete poi premere ¯ per ciclare attraverso le mosse precedenti della partita, se preferite, o premete ˘ per avanzare nuovamente a qualsiasi punto.
8. MODO IMPOSTAZIONE: CAMBIATE LA SCACCHIERA Il Modo Impostazione vi permette di configurare le posizioni speciali della scacchiera da cui giocare o problemi che volete far risolvere al computer. Attenzione: tutte le mosse nel vostro gioco attuale saranno cancellate se apportate delle modifiche alla posizione della scacchiera durante una partita! Potete modificare o configurare una posizione della scacchiera ogni volta che tocca a voi effettuare una mossa.
9. MODO STUDIO: METTETEVI ALLA PROVA Volete uno strumento didattico fenomale? Vorrete decisamente provare il Modo Studio! Otto partite famose sono incorporate nel computer, ciascuna contenente otto punti critici – per un totale di 64 Posizioni di studio. Voi dovete giocare le partite ed effettuare le mosse corrette che erano giocate per il lato vincente nelle partite originali.
Selezione delle posizioni di studio Consiglio: Potete anche selezionare le Posizioni di studio premendo alcune case della scacchiera, come descritto più tardi in questa sezione! Premete “ (MENU) per accedere al Menu Principale, e premete ¯ (o ˘) ripetutamente fino a quando il display visualizza ¿STUDY. Premete ENTER (Invio) per accedere al Modo Studio, e vedrete la prima Posizione di Studio, < Study1-1 >.
USATE LA SCACCHIERA PER SELEZIONARE LE POSIZIONI DI STUDIO! 8 1-8 2-8 3-8 4-8 5-8 6-8 7-8 8-8 7 1-7 2-7 3-7 4-7 5-7 6-7 7-7 8-7 6 1-6 2-6 3-6 4-6 5-6 6-6 7-6 8-6 5 1-5 2-5 3-5 4-5 5-5 6-5 7-5 8-5 4 1-4 2-4 3-4 4-4 5-4 6-4 7-4 8-4 3 1-3 2-3 3-3 4-3 5-3 6-3 7-3 8-3 2 1-2 2-2 3-2 4-2 5-2 6-2 7-2 8-2 1 1-1 2-1 3-1 4-1 5-1 6-1 7-1 8-1 a b c d e f g h il punteggio pieno se risolvete la Posizione di Studio al primo tentativo.
prima premuta mostrerà l’ultima mossa che è stata effettuata per l’altro lato. Premendo ‘ (CLEAR) (Annulla) cancellate la visualizzazione del punteggio. Se risolvete una conclusione del Gioco di Studio in scaccomatto, Checkmate! rimane nel display dopo una serie di messaggi di congratulazioni. A questo punto, potete (a) resettare per una nuova partita, (b) usare Modo Info per documentare le mosse ripercorrendo le mosse precedenti (come descritto nella Sezione 7.
e. f. g. h. i. 131 ITALIANO d. computer mentre pensa, ma il display effettua lo scorrimento troppo rapidamente. • Selezionate un’opzione Velocità LCD diversa (crf. Sezione 4.10). • Premete GO/STOP (Avvio/Arresto) per fermare il display di scorrimento in qualsiasi momento; premete ‘ (CLEAR) (Annulla) per riprendere lo scorrimento. Il computer non effettua una mossa. • L’unità risponde solo automaticamente se il Modo Due Giocatori è configurato a player: P-C per Giocatore contro Computer (cfr.
trovato un matto. Se non cercate di risolvere un problema di matto, passate ad un livello di gioco normale (cfr. Sezione 5). j. Sto cercando di uscire dal Menu Principale premendo ‘ (CLEAR) (Annulla), ma ricevo invece un bip di errore. • State premendo il tasto sbagliato! Per uscire dal Menu Principale premete “ (MENU). k. Il computer emette un bip intermittente anche se tocca a me effettuare la mossa. • Quando il Modo Didattico è attivato, il computer emette bip durante il vostro turno. l.
esaurite devono essere rimosse prontamente dall’unità. Non mettete i terminali di alimentazione in cortocircuito. 11.3 Caratteristiche tecniche Tasti: 8 Tastiera: 9x8, Membrana contatto (touch panel) Display a cristalli liquidi (LCD): Matrice di punti 11 caratteri, 68 x 79 mm Batterie: 3 x AAA/AM4/R03 Dimensioni: 128 x 87 x 22 mm Peso: 200 g Conservate queste informazioni per riferimento futuro.
CONDIZIONI DELLA GARANZIA 1. Il periodo di garanzia è di 2 anni dalla data d'acquisto con presentazione della prova d'acquisto. 2. Seguire le istruzioni per il funzionamento. 3.
INICIO RÁPIDO Para ponerse a jugar inmediatamente, ¡sólo tiene que seguir estos pasos! Abra el compartimento de las pilas e inserte tres pilas alcalinas tamaño “AAA” (AM4/R03), asegurando que se observa la polaridad adecuada. Retire el estilete de la zona de almacenamiento de la parte derecha de la unidad, como se muestra aquí. 3 x AAA (AM4/R03) Pulse GO/STOP [COMENZAR/PARAR] para encender el ordenador. Si no obtiene respuesta, restaure como se apunta en la Sección 11.1.
ÍNDICE DE MATERIAS INICIO RÁPIDO TECLAS Y CARACTERÍSTICAS INTRODUCCIÓN 1. PUESTA EN MARCHA: LOS ASPECTOS BÁSICOS 1.1 Instalación de pilas, encendido 1.2 ¿Listo para jugar? ¡Así se hace! 1.3 El ordenador hace una jugada 1.4 ¿Se acabó la partida? Empiece un nuevo juego 1.5 ¿Demasiado fácil/difícil? Cambie de nivel 2. MÁS CARACTERÍSTICAS QUE EXPLORAR 2.1 ¿A quién le toca? Compruebe la pantalla 2.2 Jugadas de ajedrez especiales 2.3 Jugadas ilegales/incorrectas 2.4 Jaque, mate y tablas 2.
1. TECLA DE GO/STOP [COMENZAR/PARAR]: Púlsela para encender la unidad y púlsela dos veces para apagarla. Pulse para detener el desplazamiento de pantalla y reanude el desplazamiento con ‘ (CLEAR) [DESPEJAR]. 2. MANDO DE BRILLO ILUMINADO CON LCD DE LUZ POSTERIOR (Apagado/ Medio/Competo). 3. ACL (Reponer): En la base de la unidad. Utilizado para eliminar la descarga estática después de instalar pilas nuevas. 4. COMPARTIMENTO DE LAS PILAS: En la base de la unidad. Utiliza tres pilas alcalinas “AAA” (AM4/R03).
INTRODUCCIÓN ¡Enhorabuena por la adquisición del ordenador Mephisto Maestro Travel Chess Computer! Presentando extraordinarias capacidades de juego de ajedrez y una amplia gama de opciones especiales, esta unidad estilizada ofrece una interfaz de pantalla táctil y una pantalla LCD con iluminación posterior para conveniencia y facilidad de juego.
pieza que desea mover hasta que oiga un pitido y la pieza destelle. Tenga en cuenta que puede usar la yema del dedo en vez del estilete, si así lo desea. d. A continuación, pulse con el estilete en la casilla destino. Oirá otro pitido, con el que el ordenador confirma el movimiento. Ahora le toca mover al ordenador. Notará que el ordenador a menudo mueve las piezas instantáneamente al inicio de una partida, en vez de tomarse un tiempo para pensar.
media del ordenador de cinco segundos por jugada. No obstante, ¡puede elegir entre 100 niveles de juego distintos! Para las descripciones de todos los niveles, así como para las instrucciones acerca de cómo cambiar los niveles de juego, véase la sección 5. 2. MÁS CARACTERÍSTICAS QUE EXPLORAR 2.1 ¿A quién le toca? Compruebe la pantalla Cuando el ordenador procesa la jugada para las Negras, destellará una casilla de las negras (ı).
2.3 Jugadas ilegales/incorrectas El ordenador conoce todas las reglas del ajedrez: ¡y nunca hará trampa! Si intenta hacer una jugada ilegal, un pitido doble de tono elevado le alertará del error. Esto ocurrirá si, por ejemplo, pulsa una casilla de origen o destino ilegales, una pieza o color incorrectos o una tecla de juego inválida. Si pulsa una casilla de destino ilegal, la pantalla simplemente proseguirá para indicar la casilla de origen. Para continuar, mueva la pieza a una casilla legal.
¿Desea saber su clasificación? ¡Esta es su oportunidad! Consulte la sección 5.3 para más información acerca de los niveles de torneo. 2.6 ¿Desea un consejo? ¡Sólo tiene que preguntar! Si precisa ayuda con una jugada, ¡el Maestro Travel Chess Computer se complace en ofrecérsela! Pulse HINT/INFO [CONSEJO/ INFORMACIÓN] durante su turno y el ordenador mostrará una sugerencia de jugada. Si, por ejemplo, el consejo fuese e4xd5, se mostrará Ply 1: e4xd5.
2.9 Aperturas incorporadas Al inicio de un juego, la respuesta del ordenador a menudo es instantánea en muchos niveles, debido a que hace jugadas de su biblioteca de aperturas. La biblioteca del ordenador incluye la mayoría de las aperturas principales y muchas posiciones de partidas de gran maestro. Si la posición del tablero actual se encuentra en la biblioteca, el ordenador hace una jugada en respuesta a esa posición desde la memoria, en vez de pensar acerca de la jugada.
3. EL MENÚ PRINCIPAL: ACCESO A LOS MODOS ESPECIALES El Maestro Travel Chess Computer ofrece muchos modos y opciones seleccionables por parte del usuario, todos accesibles a través del Menú principal integrado. Cuando pulse “ (MENU) se desplazará directamente a ¿OPTION, el primero de los seis elementos del Menú principal. Pulse ¯ (o ˘) repetidamente para desplazarse cíclicamente a través de todos los elementos del menú: ELEMENTO DEL MENÚ PRINCIPAL ....... REFERENCIA .......... PANTALLA Modo de opciones ....
¡UN VISTAZO RÁPIDO AL MENÚ PRINCIPAL! • ¿OPTION: Explore una serie de opciones de juego estimulantes. • Modo de dos jugadores • Algoritmo de búsqueda • Modo de registro automático • Blancas arriba • Reloj de cuenta atrás • Tictac del reloj • Modo de entrenamiento • Sonido activado/desactivado • Contraste de PCL • Velocidad de PCL • Modo de jugada automática • ¿LEVEL: Elija entre 100 niveles de juego diferentes. • ¿TAKEBACK: Retracte cualesquiera jugadas (o la totalidad) anteriores.
Para activar/desactivar una opción o seleccionar los valores de la opción (si algunos), pulse ENTER [INTRO] cuando se muestre la opción. Pulsando ENTER [INTRO] repetidamente se desplazará cíclicamente a través de todas las elecciones de la opción mostrada. Cuando aparezca la elección deseada, puede pulsar ¯ o ˘ para pasar a una opción diferente o pulse ‘ (CLEAR) [DESPEJAR] para regresar al Menú principal y luego pulse “ (MENU) para regresar al juego de partidas normal.
4.2 Algoritmo de búsqueda Opciones: search: select / brute El programa de este ordenador de ajedrez normalmente utiliza un algoritmo de búsqueda selectiva. Con este tipo particular de búsqueda, el ordenador se concentra especialmente en aquellas jugadas que vayan a tener éxito más probablemente, permitiendo ver combinaciones que de otra manera tardaría mucho más en computar.
PRACTIQUE CONFIGURANDO UNA OPCIÓN 1. Pulse “ (MENU) para entrar en el Menú principal. La pantalla mostrará ¿OPTION. 2. Pulse ENTER [INTRO] para entrar en el Modo de opciones. Para este ejemplo, elijamos la opción de tictac de reloj. 3. Pulse ¯ cinco veces hasta que la pantalla muestre ticks: off. 4. Pulse ENTER [INTRO] para activar esta opción y la pantalla cambia a mostrar ticks:on. 5.
4.8 Sonido activado/desactivado Opciones: sound: on / off Seleccionando una de estas configuraciones de sonido, le ofrece la opción a jugar al ajedrez con o sin efectos de sonido. 149 ESPAÑOL 4.7 Modo de entrenamiento Opciones: coach: off / novice / inter. / adv.
4.9 Contraste de PCL Opciones: contrast: 1 / 2 / 3 / 4 / 5 Esta opción le permite ajustar el contraste de la pantalla PCL, siendo 1 el más claro y 5 el más oscuro. Si le parece que el valor por defecto de 3 es demasiado claro u oscuro para leer cómodamente, cámbielo pulsando ENTER [INTRO] repetidamente, hasta que se muestre la configuración deseada. 4.
Configuración de un nivel de juego Pulse “ (MENU) para entrar en el menú principal y pulse ¯ hasta que la pantalla muestre ¿LEVEL. Pulse ENTER [INTRO] para entrar en el Modo de nivel y verá el nivel actualmente seleccionado, como en <00:05/move> (el nivel por defecto cuando se arranca el ordenador). Para cambiar el nivel pulse ˘ o ¯ para incrementar/ reducir los niveles de uno en uno o utilice el estilete para pulsar > o < para incrementar/reducir los niveles de diez en diez.
CÓMO CAMBIAR DE NIVEL: ¡ES FÁCIL! 1. Pulse “ (MENU) para entrar en el Menú principal. La pantalla mostrará ¿OPTION. 2. Pulse ¯ una vez y la pantalla mostrará ¿LEVEL. 3. Pulse ENTER [INTRO] para entrar en el Modo de nivel y se visualizará el nivel actual. Consulte la sección 5, si fuera necesario, para identificar el nivel actual. 4. Busquemos Ajedrez de velocidad, Nivel 81. Pulse ˘ o ¯ para aumentar o disminuir en uno los niveles; pulse > o < para aumentar o disminuir en diez los niveles.
NIVELES DE COMPETICIÓN 5.2 Niveles de juego casual Nivel Tiempo medio por jugada Pantalla 61 ................ 1 segundo por jugada .................. <00:01/move> 62 ................ 2 segundos por jugada ................ <00:02/move> 63 ................ 5 segundos por jugada ................ <00:05/move> 64 .............. 10 segundos por jugada ................ <00:10/move> 65 .............. 15 segundos por jugada ................ <00:15/move> 66 .............. 30 segundos por jugada ................
73 ............ 35 jugadas en 1 hora 45 min. ........ < 35 in 1:45 > 74 ............ 40 jugadas en 1 hora 45 min. ........ < 40 in 1:45 > 75 ............ 35 jugadas en 1 hora 30 min. ........ < 35 in 1:30 > 76 ............ 40 jugadas en 2 horas ................... < 40 in 2:00 > 77 ............ 45 jugadas en 2 horas 30 min. ...... < 45 in 2:30 > 78 ............ 50 jugadas en 2 horas ................... < 50 in 2:00 > 79 ............ 40 jugadas en 2 horas 30 min. ...... < 40 in 2:30 > 80 ............
5.5 Niveles de resolución de problemas Nivel Problema Pantalla 91 .................... Mate en 1 jugada ................... < Mate in 1 > 92 .................... Mate en 2 jugadas ................. < Mate in 2 > 93 .................... Mate en 3 jugadas ................. < Mate in 3 > 94 .................... Mate en 4 jugadas ................. < Mate in 4 > 95 .................... Mate en 5 jugadas ................. < Mate in 5 > 96 .................... Mate en 6 jugadas ................. < Mate in 6 > 97 .
5.6 Nivel táctico Nivel Descripción Pantalla 99 ..... Jugada táctica (sin límite de tiempo) .... < Tactical > En el Nivel táctico, la meta del ordenador es encontrar la mejor secuencia táctica más rápidamente que lo haría en un nivel de juego normal. El ordenador buscará indefinidamente hasta que encuentre una victoria de dos peones o más o hasta que usted pare la búsqueda pulsando ENTER [INTRO].
Como atajo al Modo de retracción, también puede pulsar simplemente en la casilla de destino de la última jugada que se realizó. La pantalla mostrará brevemente TAKEBACK y después mostrará la última jugada realizada. Para anular la jugada, pulse ¯. Al igual que anteriormente, el pulsar repetidamente ¯ le llevará a jugadas anteriores, si así lo desea. Para reanudar la partida en cualquier punto, pulse ‘ (CLEAR) [DESPEJAR].
• Mostrar jugadas: Muestra la línea de juego esperada del ordenador, hasta cuatro jugadas individuales. Véase la sección 7.1. Opciones: 0 / 1 / 2 / 3 / 4 moves • Mostrar nodos: Muestra el número de nodos (posiciones) que se buscan por segundo. Véase la sección 7.2. Opciones: nodes: off / on • Mostrar el tiempo por jugada: Muestra el tiempo utilizado hasta el momento para la jugada actual. Véase la sección 7.3.
7.1 Variante principal Cuando pulsa por primera vez HINT/INFO [CONSEJO/ INFORMACIÓN], verá la primera jugada de la variante principal (la línea de juego esperada del ordenador), que aparecerá como Ply1: b1-c3. Una “ply” es una jugada individual, o una jugada por cada bando, y la profundidad de búsqueda del ordenador se describe con relación al número de jugadas por bando que planea por adelantado.
UN ESBOZO DEL MODO DE INFORMACIÓN INFORMACIÓN DE LA VARIANTE PRINCIPAL: HINT/INFO • • • • Línea de juego esperada: Jugada 1 Línea de juego esperada: Jugada 2 Línea de juego esperada: Jugada 3 Línea de juego esperada: Jugada 4 INFORMACIÓN DE BÚSQUEDA: HINT/INFO • Evaluación de la posición (puntuación) • Profundidad de la búsqueda; y jugada que está estudiando en ese momento (si el ordenador está pensando) • Tiempo transcurrido para la jugada actual; y número de nodos buscados por segundo (si el ordenador
7.3 Información de reloj de ajedrez Después de pulsar HINT/INFO [CONSEJO/INFORMACIÓN] para acceder al Modo de información, pulse dos veces más para ver la información de reloj de ajedrez. La pantalla mostrará el tiempo total transcurrido para ambos bandos. Tenga en cuenta que el símbolo del reloj de ajedrez en el medio muestra qué bando tiene que jugar y el tipo de reloj en uso.
7.4 Conteo de jugadas/jugadas de partida Después de pulsar HINT/INFO [CONSEJO/INFORMACIÓN] para acceder el Modo de información, pulse tres veces más para ver el número de jugada actual y la última jugada realizada. Después puede pulsar ¯ para desplazarse por las jugadas de su partida, si así lo desea, o pulsar ˘ para ir hacia adelante de nuevo en cualquier momento.
ESPAÑOL otra casilla. Para añadir una pieza diferente, pulse otro símbolo de pieza y/o color y siga los mismos pasos que anteriormente. • Para despejar el tablero, pulse ‘ (CLEAR) [DESPEJAR] mientras se encuentra en el Modo de configuración. La pantalla le pedirá que confirme con el mensaje Clear board? [¿Despejar tablero?]. Pulse ENTER [INTRO] y la pantalla mostrará Cleared [Despejado]. Entonces puede añadir cualquier número de piezas, como se describe anteriormente.
9. MODO DE ESTUDIO: PRUEBE A EXAMINARSE ¿Busca una herramienta de aprendizaje estupenda? ¡Definitivamente querrá probar el Modo de estudio! El ordenador trae incorporadas ocho partidas famosas, cada una con ocho puntos críticos, proporcionando un total de 64 Posiciones de estudio diferentes.
ESPAÑOL comenzará el reloj. Es la hora de adivinar la jugada que se realizó en esa posición en la partida original. Funciona de la siguiente manera: • Sólo hay una jugada “correcta” por cada Posición de estudio. • Una vez que se ha alcanzado la Posición de estudio, el símbolo de color que aparece indica qué bando tiene que mover. • Si realiza la jugada correcta, se visualizará Well Done [Bien jugado].
¡USE EL TABLERO PARA SELECCIONAR LAS POSICIONES DE ESTUDIO! Para utilizar un método sencillo de selección de Posición de estudio, simplemente entre en el Modo de estudio y pulse una de las casillas correspondientes, como se muestra a continuación.
10. ¿NECESITA AYUDA? ¡BÚSQUELA AQUÍ! Con fines de resolución de problemas, hemos compilado la siguiente lista de situaciones con las que podría encontrarse, junto con algunas soluciones posibles. a. El ordenador no reacciona, se comporta de manera errática o se “congela” durante una partida. • Vuelva a introducir las pilas o reemplácelas con unas alcalinas nuevas. • Una descarga de electricidad estática podría haber causado un bloqueo.
• ¿Tiene el rey en jaque? ¿Pondrá su jugada a su rey en jaque? ¿Está haciendo un enroque incorrectamente? Revise la posición. • ¿Es su turno? Si el símbolo de color destella, el ordenador está pensando. Pulse ENTER [INTRO] para interrumpir, si así lo desea. f. La anotación del tablero está invertida cuando realizo jugadas. ¿Por qué? • Tiene la opción de white: top activada. Vaya a Modo de opción y cámbiela a black: top (véase la sección 4.4). g.
etc.). Cambie el tablero configurando una posición válida (véase la sección 8). 11. DETALLES TÉCNICOS 11.1 La función ACL Los ordenadores a veces se bloquean debido a descargas de electricidad estática u otros tipos de perturbaciones eléctricas. Si sucediera esto, utilice un alfiler u otro objeto afilado para pulsar en el agujero marcado ACL en la base de la unidad durante al menos un segundo. Esto reinicializa el ordenador. 11.
CONDICIONES DE LA GARANTÍA 1. El período de garantía es de 2 años desde la fecha de compra con presentación de comprobante. 2. Se deben seguir las instrucciones de funcionamiento. 3.
SNELLE START Om direct te spelen, hoeft u alleen maar de onderstaande stappen te volgen! Open het batterijvakje en breng drie “AAA” (AM4/ R03) alkalinebatterijen in; let op de juiste polariteit. 4 5 6 Verwijder het stilet uit de houder aan de rechterkant zoals aangegeven. 3 x AAA (AM4/R03) Druk op de knop GO/STOP (START/STOP) om de computer aan te zetten. Als er niets gebeurt, dient u de computer opnieuw in te stellen (zie Hoofdstuk 11.1).
INHOUDSOPGAVE SNELLE START TOETSEN EN FUNCTIES INLEIDING 1. OM TE BEGINNEN: DE BASISELEMENTEN 1.1 Batterijen inbrengen, stroom inschakelen 1.2 Klaar om te spelen? Dit zijn de regels! 1.3 De computer aan zet 1.4 Partij beëindigd? Een nieuwe partij beginnen 1.5 Te makkelijk/moeilijk? Van niveau wijzigen 2. NOG MEER FUNCTIES 2.1 Wie is aan zet? Zie beeldscherm 2.2 Speciale schaakzetten 2.3 Onjuiste zetten 2.4 Schaak, schaakmat en remise 2.5 Probeer het zelfwaarderingssysteem 2.6 Hint nodig? Gewoon vragen! 2.
1. TOETS GO/STOP (START/STOP): Druk om het apparaat aan te zetten; tweemaal indrukken om uit te zetten. Indrukken om het scrollen van het beeldscherm stop te zetten; scrollen kan worden hervat met ‘ (CLEAR) (OPHEFFEN). 2. LCD BACKLIGHT HELDERHEID INSTELLING (Uit/Medium/Maximaal). 3. ACL (Opnieuw instellen): Aan de onderkant van het apparaat. Wordt gebruikt om statische lading te verwijderen na het insteken van nieuwe batterijen. 4. BATTERIJVAK: Aan de onderkant van het apparaat.
INLEIDING Gefeliciteerd met de aanschaf van de Mephisto Maestro Travel Chess Computer! Voorzien van zeer uitgebreide schaak-spel mogelijkheden en vele speciale opties. Deze moderne schaakcomputer is voorzien van een Touch Screen interface en een backlight LCD scherm voor een aangenaam en makkelijk te bedienen schaakpartij. Het apparaat is draagbaar en kan eenvoudig mee op reis worden genomen zodat u thuis of onderweg een lekker partijtje schaak kunt spelen.
het betreffende schaakstuk te drukken totdat u een signaal hoort en het stuk gaat knipperen. U kunt dit indien gewenst ook met uw vinger doen. d. Druk vervolgens met het stilet op het bestemmingsvlak. U hoort een tweede signaal als de computer uw zet bevestigt. Daarna is de computer weer aan de beurt! U zult zien dat de computer aan het begin van een partij vaak direct opent, zonder na te denken. Dat zijn openingszetten die staan opgeslagen in de database. Zie voor meer gegevens Hoofdstuk 2.9. 1.
2. NOG MEER FUNCTIES 2.1 Wie is aan zet? Zie beeldscherm Als de computer met Zwart aan zet is, knippert er een zwart vierkantje (ı). Nadat de computer aan zet is geweest, verschijnt er een niet-knipperend wit vierkantje („), hetgeen aangeeft dat het nu uw beurt is. 2.2 Speciale schaakzetten Onthoud het volgende m.b.t. bepaalde zetten: Slaan: Een stuk dat wordt geslagen wordt aangegeven met een x, zoals in ıPa7xb6.
Als u op een verkeerde naar-veld drukt, blijft het beeldscherm het veld van aangeven. Om verder te kunnen, dient u uw stuk naar een geldig veld te verplaatsen. Als u op het veld van drukt, maar vervolgens besluit dat u een ander stuk wilt verplaatsen, dient u nogmaals op hetzelfde veld te drukken. Als u uw zet na voltooiing wilt corrigeren, dient u te werk te gaan zoals beschreven in Hoofdstuk 6. 2.4 Schaak, schaakmat en remise Als een Koning schaak staat, geeft de computer kort na de zet Check aan.
individuele zet ofwel een zet voor een van beide kleuren. De hint verschijnt meestal binnen vijf seconden, maar soms duurt het langer. Om de hint te accepteren dient u de aangegeven zet op het bord te maken. Als u een eigen zet wilt doen, kunt u de hint gewoon negeren. U kunt de hint ook wissen door op ‘ (CLEAR) (OPHEFFEN) te drukken. 2.7 Het zoeken onderbreken Om de computer tijdens het denkproces te onderbreken, drukt u op ENTER.
2.10 Denken in de tijd van de tegenstander Terwijl u speelt zult u ontdekken dat de computer soms direct op uw zetten reageert, zelfs halverwege partijen op hoger niveau. Dat komt omdat de computer ook in de tijd dat u aan het nadenken bent over de volgende zet nadenkt en een eigen strategie uitstippelt. Het apparaat probeert de meest waarschijnlijke zet van uw kant te anticiperen en berekent mogelijke tegenzetten terwijl u nog aan het nadenken bent.
EEN SNEL OVERZICHT VAN HET HOOFDMENU! • ¿OPTION: Ontdek een aantal spannende spelopties. • Twee spelers • Trainingsstand • Zoekalgoritme • Geluid Aan/Uit • Autobook-stand • LCD-contrast • Wit boven • LCD-snelheid • Aftellende klok • Automove-stand • Tikgeluid • ¿LEVEL: Kies uit 100 verschillende spelniveaus. • ¿TAKEBACK: Neem één of alle vorige zetten terug. • ¿INFO: Selecteer verscheidene automatische informatieschermen.
selecteren en activeren; leer vervolgens meer over de individuele opties die in dit hoofdstuk staan beschreven. Spelopties selecteren Druk op “ (MENU) om het Hoofdmenu te openen; op het scherm verschijnt automatisch ¿OPTION voor de Optiestand. Druk op ENTER om de Optiestand te openen en u ziet de eerste van de 11 opties (zie onder). Druk herhaaldelijk op ¯ (of ˘) om door alle opties te lopen: OPTIE ........................... REFERENTIE .......... STANDAARD SCHERM 4.
functie kan op een aantal interessante manieren worden gebruikt: • Om meesterpartijen te doorlopen. Druk op ENTER om te zien wat de computer in een bepaalde stelling zou doen! • Bewaar uw eigen schaakpartijen. Als een partij is beëindigd, kunt u naar bepaalde bordstellingen terugkeren om te zien of andere zetten tot een andere uitkomst zouden hebben geleid. • Analyseer de openingszetten door ze handmatig in te voeren. • Speel tegen een vriend waarbij de computer als scheidsrechter optreedt.
meer bekend wordt met de betreffende opening en u uw spel kunt verbeteren. 4.4 Wit boven Opties: top: black / white Wilt u wel eens wat anders en de computer bovenaan met Wit laten spelen? Probeer dan deze functie en kies top: white aan het begin van een nieuwe partij! Begin uw partij door op ENTER te drukken en de computer maakt de eerste zet voor Wit van de bovenkant van het bord.
DE OPTIE-INSTELLINGEN OEFENEN 1. Druk op “ (MENU) om het Hoofdmenu te openen. In het beeldscherm verschijnt ¿OPTION. 2. Druk op ENTER om de Optiestand te openen. Laten we voor dit voorbeeld de optie Tikkende klok selecteren. 3. Druk vijfmaal op ¯ tot het beeldscherm ticks: off aangeeft. 4. Druk op ENTER om deze optie aan te zetten; het beeldscherm zegt nu ticks:on. 5.
spel redelijk begrijpen maar hulp nodig hebben bij minder duidelijke spelsituaties. • coach: advanced: Bij deze instelling geeft de computer wanneer nodig waarschuwingen en assistentie, bijvoorbeeld als u op het punt staat een blunder te begaan of als er een stuk in gevaar is. Als de Trainingsstand is geactiveerd, hoort u van tijd tot tijd een geluidssignaal als u met Wit speelt, ter herinnering aan het feit dat het uw beurt is. 4.
5. NIVEAUSTAND: KEUS UIT 100 NIVEAUS Uw schaakcomputer heeft 100 unieke spelniveaus waaruit u kunt kiezen! De niveaus zijn onderverdeeld in twee basisgroepen: • PRETNIVEAUS (1-60): Deze niveaus geven beginners en gemiddelde spelers een kans om hun schaakvaardigheden te vergroten. Op veel pretniveaus maakt de computer met opzet fouten, zodat u daarvan kunt leren! • WEDSTRIJDNIVEAUS (61-100): Deze niveaus zijn bedoeld voor gevorderde en meer geavanceerde spelers.
WEDSTRIJDNIVEAUS 5.2 Gelegenheidsspelniveaus Niveau Gemiddelde tijd per zet Beeldscherm 61 ................ 1 seconde per zet ........................ <00:01/move> 62 ................ 2 seconden per zet ...................... <00:02/move> 63 ................ 5 seconden per zet ...................... <00:05/move> 187 NEDERLANDS PRETNIVEAUS 5.1 Pretniveaus Niveau Beschrijving Beeldscherm 1 ....................... Pretniveau 1 ....................... 2 ....................... Pretniveau 2 .....
WIJZIGING VAN HET NIVEAU: HEEL EENVOUDIG! 1. Druk op “ (MENU) om het Hoofdmenu te openen. In het beeldscherm verschijnt ¿OPTION. 2. Druk eenmaal op ¯ en in het beeldscherm verschijnt ¿LEVEL. 3. Druk op ENTER om de Niveaustand te openen en het huidige niveau wordt weergegeven. Zie indien nodig Hoofdstuk 5 om te controleren wat huidige niveau inhoudt. 4. Laten we snelschaakniveau 81 eens opzoeken.
NEDERLANDS 74 ............ 40 zetten in 1 uur 45 min. .............. < 40 in 1:45 > 75 ............ 35 zetten in 1 uur 30 min. .............. < 35 in 1:30 > 76 ............ 40 zetten in 2 uur ........................... < 40 in 2:00 > 77 ............ 45 zetten in 2 uur 30 min. .............. < 45 in 2:30 > 78 ............ 50 zetten in 2 uur ........................... < 50 in 2:00 > 79 ............ 40 zetten in 2 uur 30 min. .............. < 40 in 2:30 > 80 ............ 40 zetten in 3 uur ............
5.4 Snelschaakniveaus Niveau Totale tijd per partij Beeldscherm 81 .............. 5 minuten per partij ................... < 5 min/game> 82 .............. 7 minuten per partij ................... < 7 min/game> 83 .............. 10 minuten per partij ................... <10 min/game> 84 .............. 15 minuten per partij ................... <15 min/game> 85 .............. 20 minuten per partij ................... <20 min/game> 86 .............. 30 minuten per partij ................... <30 min/game> 87 ...
5.6 Tactisch niveau Niveau Beschrijving Beeldscherm 99 ............ Tactische partij (geen tijdslimiet) ... < Tactical > In het niveau Tactisch gaat de computer op zoek naar de beste tactische strategie, sneller dan op een normaal spelniveau. De computer zoekt oneindig naar een manier waarop twee of meer pionnen kunnen worden geslagen, net zolang tot u het zoeken onderbreekt door op ENTER te drukken.
Een snellere manier om een zet terug te nemen, is door op het veld naar te drukken van de laatste zet die was uitgevoerd. In het beeld verschijnt kort TAKEBACK, waarna de laatste zet wordt getoond. Druk op ¯ om de zet terug te nemen. Indien u herhaald op ¯ drukt, kunnen er meer zetten worden teruggenomen. Druk op ‘ (CLEAR) (OPHEFFEN) om de partij op elk gewenst moment te hervatten. 7. INFOSTAND: ZIE DE COMPUTER DENKEN Stelt u zich eens voor: U schaakt tegen een vriend en hij is aan zet.
Handmatige informatieschermen Druk op elk gewenst moment op HINT/INFO en de eerste verwachte zet van de computer verschijnt (zie Hoofdstuk 7.1). De spelinformatie wordt in verscheidene groepen ingedeeld en als u herhaaldelijk op HINT/INFO drukt, loopt u door de verschillende groepen heen. De toetsen ˘ en ¯ kunnen worden gebruikt om door de opties binnen elke groep te lopen. Onderstaand treft u een gedetailleerde beschrijving van alle groepen aan.
EEN OVERZICHT VAN DE INFOSTAND INFORMATIE OVER DE HOOFDVARIANT: HINT/INFO • • • • Verwachte speelwijze: Zet 1 Verwachte speelwijze: Zet 2 Verwachte speelwijze: Zet 3 Verwachte speelwijze: Zet 4 ZOEKINFORMATIE: HINT/INFO • Waardering van de stelling (score) • Zoekniveau; zet die momenteel wordt overwogen (als de computer nadenkt) • Verstreken tijd voor huidige zet; aantal nodes waarnaar per seconde wordt gezocht (als de computer nadenkt) SCHAAKKLOKINFORMATIE: HINT/INFO • Verstreken tijd voor beide part
7.2 Zoekinformatie Druk nadat u op HINT/INFO hebt gedrukt om de Infostand te openen nogmaals op HINT/INFO om informatie over het zoekproces van de computer op te vragen. Het beeldscherm geeft de huidige score weer; als u herhaaldelijk op ˘ drukt, loopt u door de rest van de informatie: • De huidige score: Een numerieke evaluatie van de huidige stelling, gebaseerd op een pionwaarde van 1.0 punt; een positieve waarde geeft aan dat Wit voor staat.
waarnaar per seconde wordt gezocht (als de computer aan het nadenken is). 7.3 Schaakklokinformatie Druk nadat u op HINT/INFO hebt gedrukt om de Infostand te openen nog tweemaal op HINT/INFO om de schaakklokinformatie op te vragen. Het beeldscherm geeft de totaal verstreken tijd voor beide kleuren weer. Onthoud dat het schaakkloksymbool in het midden aangeeft welke kleur aan zet is en welk type klok er wordt gebruikt.
8. SETUP-STAND: HET BORD WIJZIGEN In de Setup-stand kunt u speciale bordstellingen creëren van waaruit u verder wilt spelen, of probleemsituaties instellen die u door de computer wilt laten oplossen! U kunt een bordstelling wijzigen of creëren als u aan zet bent. Druk op “ (MENU) en druk op ¯ totdat in het beeldscherm ¿SETUP verschijnt. Druk op ENTER om de Setup-stand te openen en u ziet een scherm waarin de kleur en de schaaksymbolen staan weergegeven („ıKQRBNP).
• Druk op ENTER om de Setup-stand af te sluiten. Als de computer om bevestiging vraagt met New position?, drukt u op ENTER om naar het spel terug te keren in de nieuwe bordopstelling. E.e.a. wordt bevestigd door het bericht New position!. Als u op ‘ (CLEAR) (OPHEFFEN) drukt, verschijnt er in het beeldscherm Resume, en blijft u in de Setup-stand. Onthoud dat met de bovenstaande procedure elke willekeurige bordstelling kan worden gecreëerd.
Het selecteren van analyseposities Druk op “ (MENU) om het Hoofdmenu te openen en druk herhaaldelijk op ¯ totdat in het beeldscherm ¿STUDY verschijnt. Druk op ENTER om de Analysestand te openen en u ziet de eerste Analysestelling, < Study1-1 >. Om de Analysestelling te wijzigen, dient u op ˘ of ¯ te drukken om één analyse naar boven/beneden te gaan, of met het stilet op > of < te drukken om acht analyses naar boven/beneden te gaan.
HET BORD GEBRUIKEN OM ANALYSESTELLINGEN TE SELECTEREN! Voor eenvoudige selectie van een analysestelling, opent u de Analysestand en drukt u op een van de corresponderende velden, zoals hieronder aangegeven.
Als u een Analysestelling oplost die is geëindigd in schaakmat, verschijnt na een aantal felicitaties het bericht Checkmate!. U kunt nu (a) een nieuwe partij starten, (b) de Infostand gebruiken om uw zetten op te slaan door ze in omgekeerde volgorde nogmaals te doorlopen (zie Hoofdstuk 7.4), of (c) een aantal zetten teruggaan en de partij op een andere wijze proberen af te maken.
d. e. f. g. h. i. j. druk indien nodig op ‘ (CLEAR) (OPHEFFEN) om het scrollen te hervatten. De computer voert geen zet uit. • Het apparaat reageert alleen automatisch als de instelling Twee spelers is ingesteld op player: P-C voor Speler vs. Computer (zie Hoofdstuk 4.1). • U bent misschien op een niveau waar de computer lang nadenkt. U kunt indien gewenst een zet forceren door op ENTER te drukken. De computer accepteert mijn zet niet. • U probeert een ongeldige zet uit te voeren.
Hoofdmenu te verlaten is door op de toets “ (MENU) te drukken. k. De computer produceert van tijd tot tijd een geluidssignaal, zelfs als ik aan zet ben. • Als de Trainingsstand is geactiveerd, laat de computer tijdens uw beurt herinneringssignalen horen. l. De computer geeft geen geluidssignaal als er een zet wordt uitgevoerd. • Ga naar de Optiestand en zet het geluid aan (zie Hoofdstuk 4.8). m.Ik kan de Setup-stand niet afsluiten.
11.3 Technische specificaties Toetsen: 8 Schaakbord: 9x8 contactmembraan (touch panel) LCD-beeldscherm: Dot matrix van 11 tekens, 68 x 79 mm Batterijen: 3 x AAA/AM4/R03 Afmetingen: 128 x 87 x 22 mm Gewicht: 200 gram Bewaar deze informatie voor naslagdoeleinden. Saitek behoudt zich het recht voor om zonder voorafgaande kennisgeving wijzigingen door te voeren in het belang van vooruitgang.
APPENDIX: STUDY MODE GAMES (Section 9) ANHANG: GESPEICHERTE PARTIEN (Abschnitt 9) ANNEXE: PARTIES DU MODE ETUDE (Chapitre 9) APPENDICE: GIOCO IN MODO STUDIO (Sezione 9) APÉNDICE: JUEGOS DEL MODO DE ESTUDIO (Sección 9) APPENDIX: GEANALYSEERDE PARTIJEN (Hoofdstuk 9) #1 #2 1. 2. 3. e2-e4 g1-f3 d2-d4 e7-e5 d7-d6 c8-g4 4. d4xe5! ......... d1xf3 f1-c4 ......... g4xf3 d6xe5 g8-f6 (1-1) f3-b3! ......... b1-c3 ......... d8-e7 c7-c6 (1-2) c1-g5! ......... ......... b7-b5 (1-3) .........
......... g8-h8 25. g7xh7+! ......... ......... h8-g8 26. h7-g7+ g8-h8 (2-6) ......... 18. e3-e4 19. e4-e5 20. g1-h1 27. g4-h4+! ......... 28. h4-h7 29. h7-h8+ 30. h8-g7+ 31. g7-g8+ 32. g8-f7+ 33. f7-f8+ ......... h8xg7 g7-f8 f8-e7 e7-e8 e8-e7 e7-d8 d7-e8 (2-7) ......... 21. d3-e4 f6-g4! ......... (3-4) ......... 22. g2-g3 e7-h4 ......... (3-5) ......... 23. g3xh4 c8xc3!! ......... (3-6) (2-8) ......... 24. e2xd2 25. d2-g2 d8-d2!! b7xe4+ ......... (3-7) 34. g5-f7+! ......... .........
15. c1-f4 16. a1-d1 d8-c7 a8-d8 17. d1xd6! ......... 18. f4xe5 19. e1xd1 ......... d8xd6 d6-d1 f6xe5 (4-5) 20. f5-h6+! ......... ......... g8-h8 (4-6) 21. g3xe5! ......... ......... c7xe5 (4-7) 22. h6xf7+ ......... (4-8) ......... ......... d7-b5 (5-5) 21. a2-a4! ......... ......... b5xa4 (5-6) 22. e2-e4! ......... ......... a4-b5 (5-7) .........
19. g1xg2 ......... 20. e2xd4 21. g2-f1 ......... ......... 20. c2-d1 d5-d4 a6-b7+ ......... (6-7) d8-d7!! (6-8) e1xd1++ #8 1. 2. 3. 4. 5. 6. 7. 8. 9. 10. 11. 12. 13. #7 d2-d4 c2-c4 b1-c3 g1-f3 c4xd5 e2-e3 f1-d3 0-0 c3xd5 e3-e4 d4xc5 e4-e5 d1-e2 d7-d5 e7-e6 g8-f6 c7-c5 f6xd5 b8-c6 f8-e7 0-0 d8xd5 d5-d8 e7xc5 c5-e7 c6-b4 14. d3-b1 ......... ......... c8-d7 (8-1) 15. a2-a3! ......... 16. e2-e4 17. c1-h6 ......... b4-d5 g7-g6 f8-e8 (8-2) 1. 2. 3. 4.
www.saitek.com ©2004 Saitek Ltd. Made and printed in China All trademarks are the property of their respective owners.